A practical print guide
Print at actual size.
Then measure.
A precisely sized file can still come out too small, too large or unevenly scaled. Use the matching paper, print at 100%, and check a known distance on the sheet before relying on it.
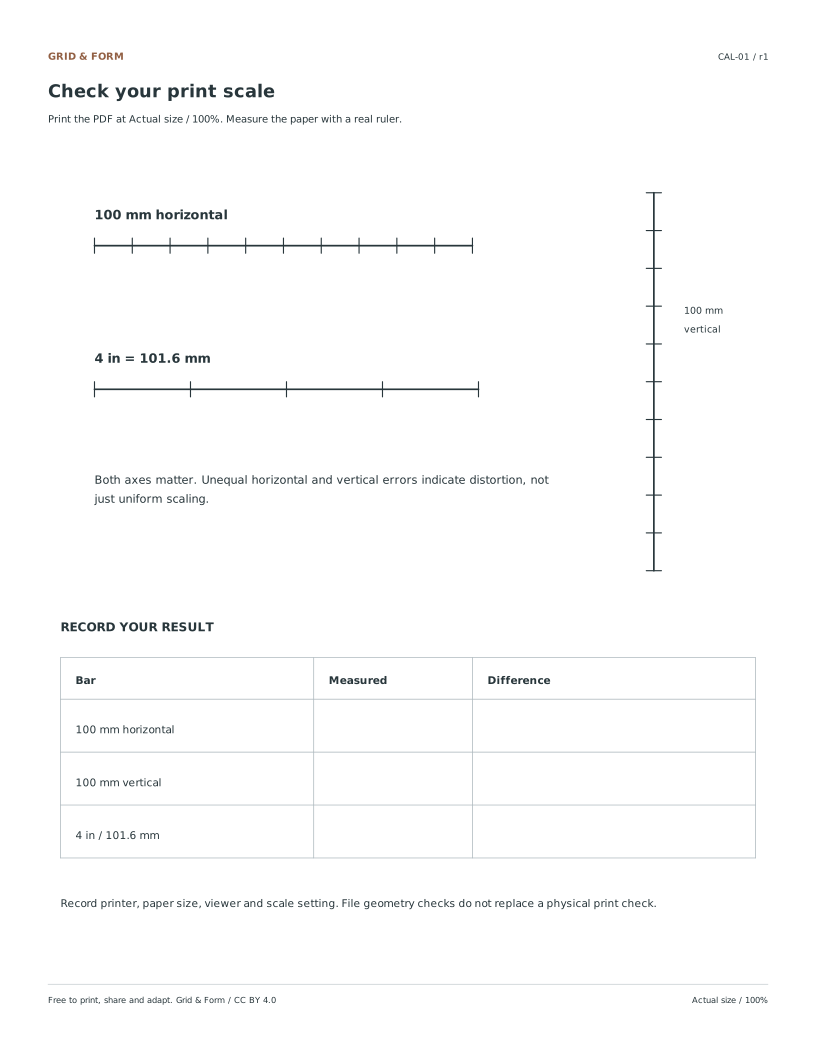
100 mm in both axes + 4 inch bar.
Physical print verification is pending.
Check both directions.
A ruler beats a screen preview.
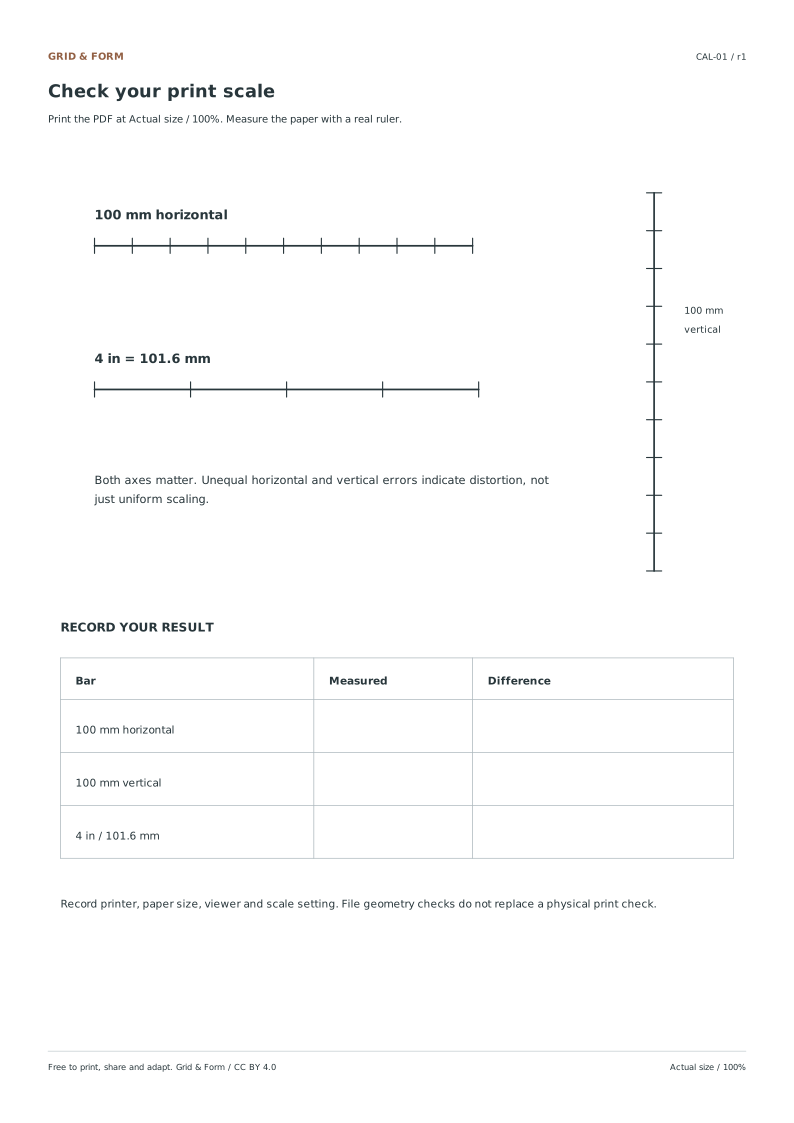
The sheet includes horizontal and vertical 100 mm bars, a horizontal 4 inch / 101.6 mm bar, and a table for your measurements. Measure between the centerlines of the end marks.
All paper sizes & editable formats
- Calibration PDF: US Letter PDF · editable SVG

- Calibration PDF: A4 PDF · editable SVG
Five settings to check before printing.
- Open the downloaded PDF.
Print the resource file rather than this web page. SVGs are editable source files; a browser can fit them to the page differently.
- Match the paper.
Use a Letter PDF with Letter paper, or an A4 PDF with A4 paper. Set portrait orientation and use one PDF page per sheet.
- Choose Actual size or 100%.
Disable Fit, Shrink, booklet, poster and multiple-page layouts. If the viewer uses a custom scale field, enter 100%.
- Avoid borderless expansion.
Some printer drivers enlarge borderless prints beyond the paper edge. Use a normal paper mode for this check and inspect any additional driver scaling setting.
- Print one test sheet first.
Measure the horizontal and vertical bars with a physical ruler. Record the paper, printer, viewer and settings before printing a class set.
What “Fit” changes
Fit-to-page can reduce a large PDF or enlarge a small one to match the selected printable area. A preview that looks neatly centered can therefore still be the wrong scale. A 100% setting is the starting point; a ruler provides the result.
Menu labels vary by viewer and printer driver. Look for the numeric scale as well as a named option, and check that another driver setting is not also resizing the job.
Read the measurement, not just the setting.
Use a practical tolerance.
For these drawing exercises, a suggested check is a 100 mm bar within 0.5 mm of its stated length in both axes. This is this project’s practical target, not an industry standard or a guarantee for every printer.
A 99 mm bar is 1% short. If both axes are similarly short, recheck scaling settings first. If the axes differ, a single percentage adjustment will not correct both directions.
A diagnostic calculation
If 100 mm
prints as 98 mm.
This estimates the inverse of uniform scaling. First remove unintended Fit or driver expansion. If you use a manual compensation, print a new calibration sheet and measure both axes again. Do not assume one correction works for every paper or printer.
If the print still looks wrong.
| What you see | What to check | Next step |
|---|---|---|
| Both bars are uniformly short | Fit, Shrink, wrong paper size or a second driver scale | Set 100%, match the paper and repeat one calibration page. |
| Horizontal and vertical errors differ | Driver distortion, feed behavior or print pipeline | Try another viewer or normal paper mode; measure again. Do not repair only one axis. |
| Outer lines are clipped | Paper mismatch, borderless expansion or printer non-printable area | Use the matching file. If the device needs larger margins, create a deliberately smaller drawing area while preserving spacing. |
| Grid looks too faint | Draft, toner-saving or low-quality print settings | Try normal grayscale quality. Do not enlarge the page to darken it. |
| On-screen ruler disagrees | Browser zoom and image fitting | Measure the printed sheet with a real ruler; do not calibrate from a web screenshot. |
A few useful answers
Before you begin
Is Actual size always enough to guarantee a correct print?
No. It avoids intentional viewer scaling, but paper selection, printer-driver behavior and the physical device can still affect the result. Measure the calibration sheet.
Should I print the SVG or PDF?
Use the PDF for the normal print workflow. The SVG is an editable vector source. If you print an edited SVG, preserve its dimensions and run a new physical scale check.
Can I use a phone to measure the bars?
A camera image can introduce perspective and lens distortion. Use a physical ruler for this check. A screen or camera preview does not establish the printed dimensions.
Have these files been physically print-tested?
Not yet. Zumola records digital geometry checks separately from the uncompleted physical test. Print one calibration sheet and record the result before using the paper for a measured task.