Reference diagram
LETTER · Download PDF (2 pages)
Free original resources
Learn to draw a baby weighing scale by constructing the dial, tray, and body in clear steps, with a convention-based rubric and four practice tasks.
Original reference diagrams, four practice exercises and separate worked answers. All files are free. No signup required.
LETTER · Download PDF (2 pages)
LETTER · Download PDF (4 pages)
LETTER · Download PDF (6 pages)
Choose A4 or US Letter for your printer. The reference and answer illustrations are not physical rulers; follow the scale instruction printed on the practice worksheet.
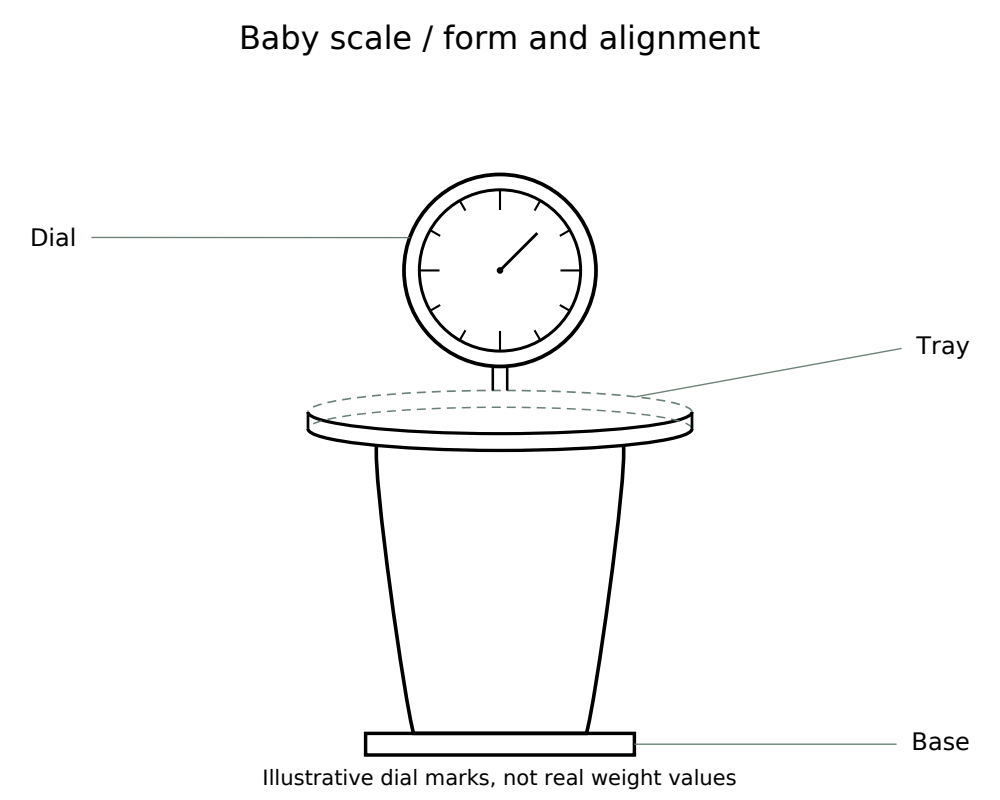
This lesson teaches a reliable way to draw a baby weighing scale: a round dial, a shallow tray, and a supporting body. You will use simple shapes and a defined drawing convention so your result is clear and checkable. The convention is: draw all construction lines lightly first, then darken final outlines; place the dial circle above the tray ellipse; keep the tray ellipse wider than the dial; and show the body as a tapered form connecting tray to base. Label styles and exact proportions may vary, so the rubric rewards correct relationships rather than one universal answer. All measurements below are hypothetical examples for practice; measure your own paper and tools when drawing.
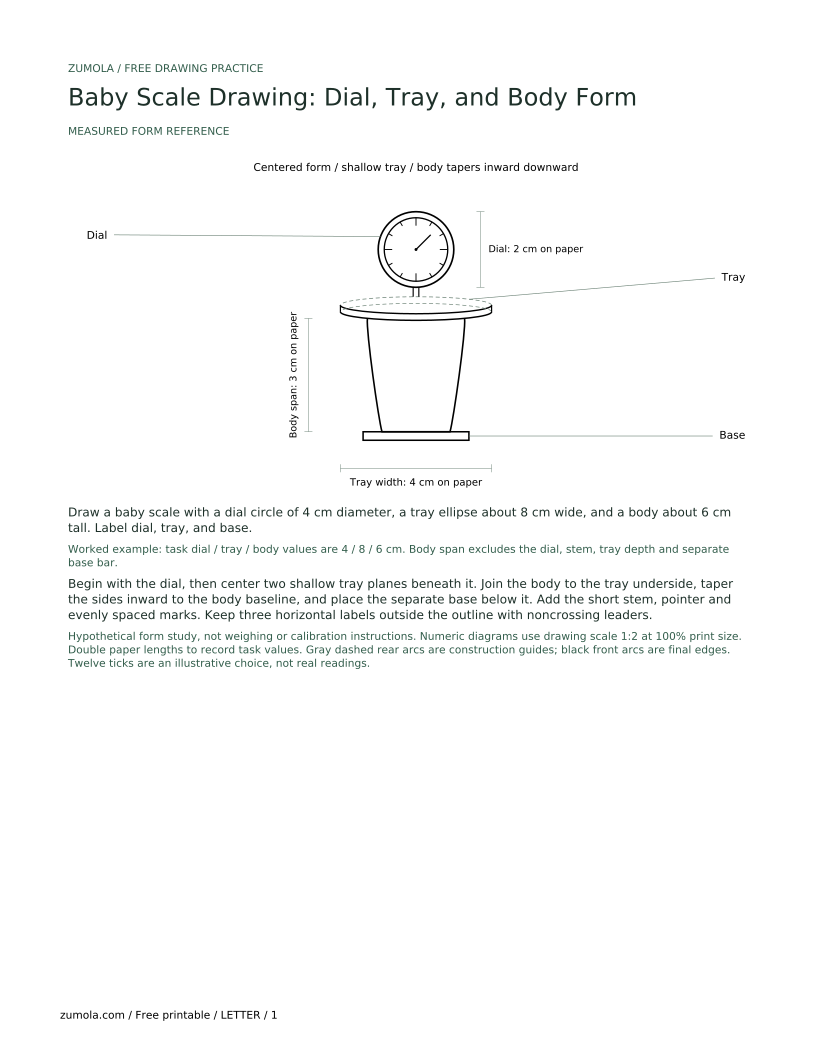
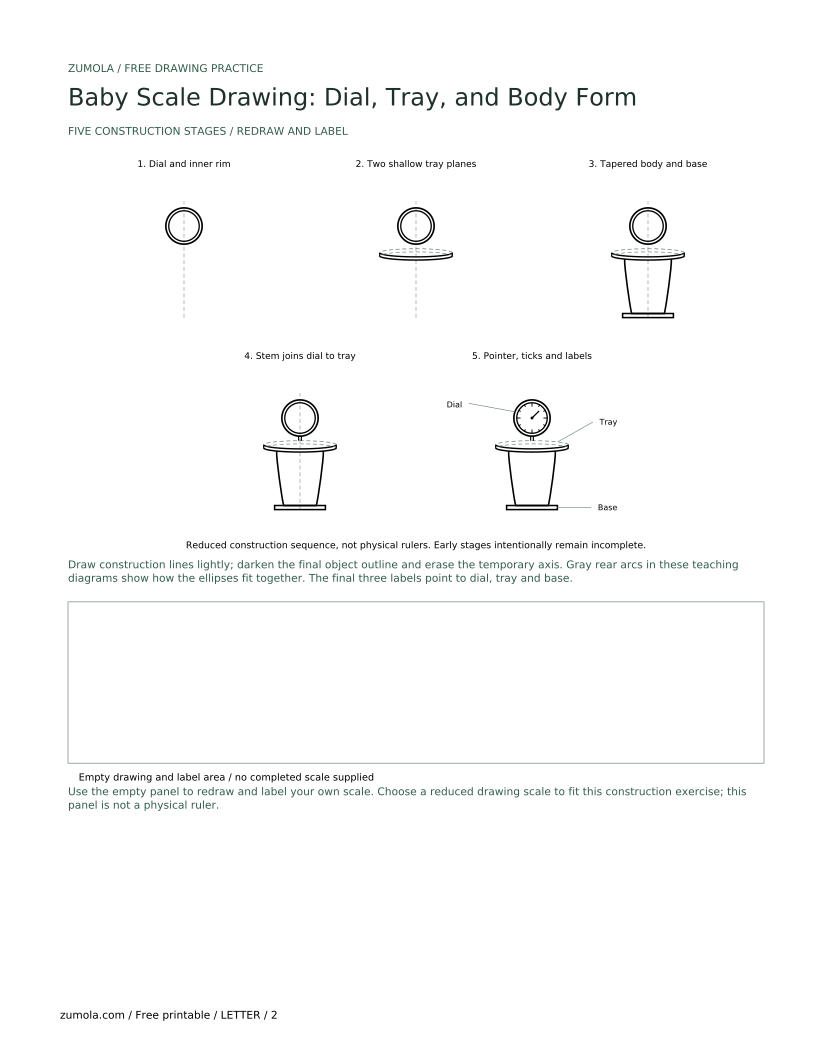
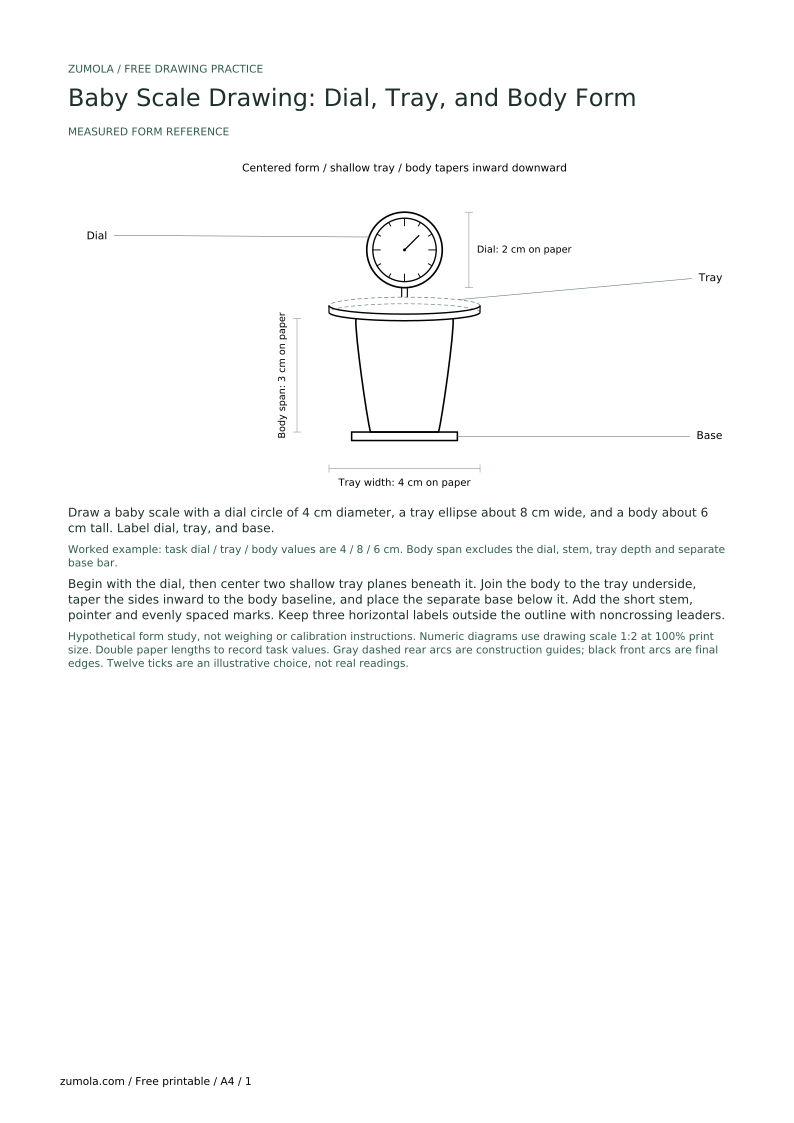
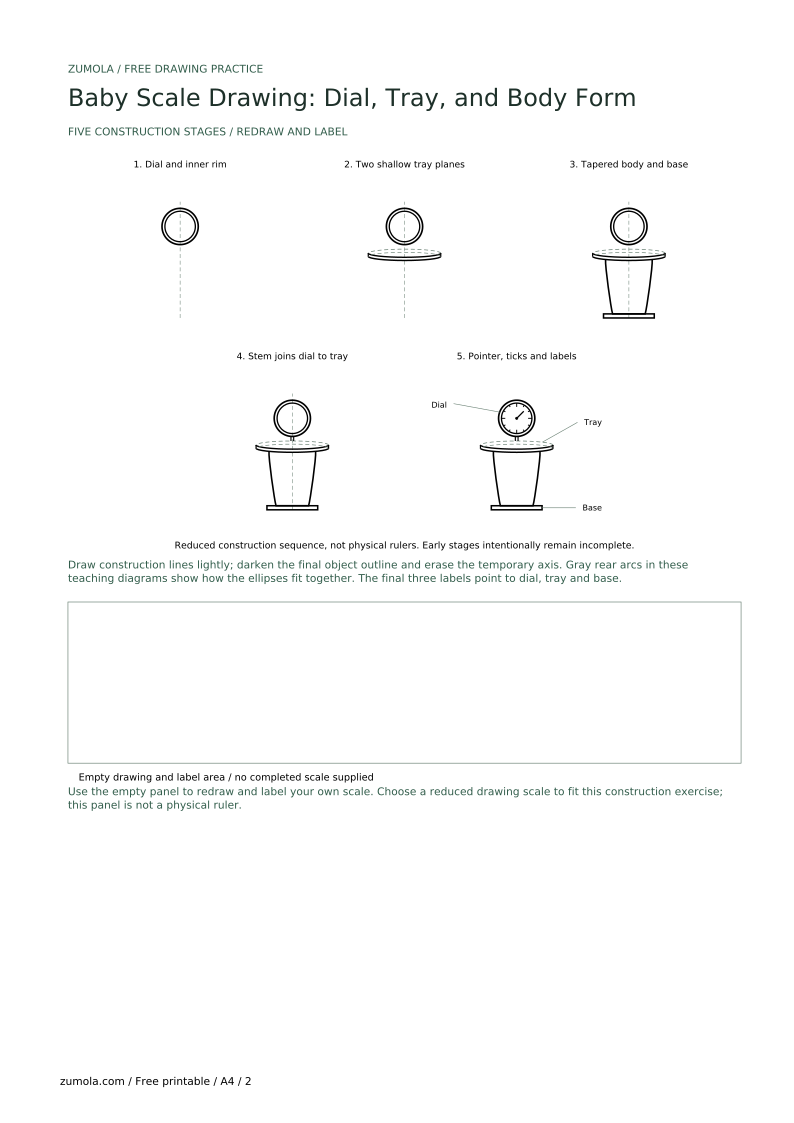
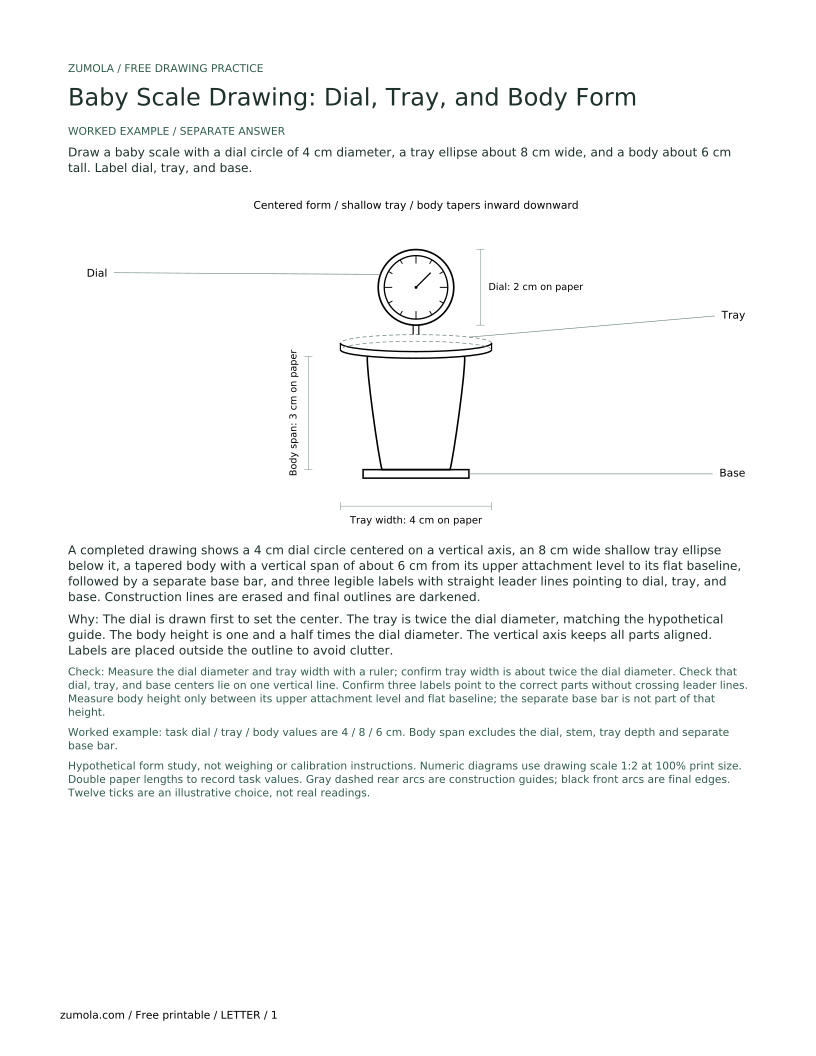
Start with the dial because it sets the drawing's visual center. Draw its outer circle, then a smaller concentric circle marking the inner boundary of the rim band. Next, draw a wide, shallow tray ellipse centered below the dial. For the introductory and worked example, choose a tray width twice the dial diameter. This is a chosen drawing ratio, not a device standard; explicit task values take priority. Sketch two body sides tapering inward from attachment points on the underside of the tray toward a flat body baseline. Add the short stem between dial and tray, then a base bar below the body. This is a stylized form study, not an equipment or calibration diagram.
Keep the vertical axis consistent: the dial center, tray center, and base center should align on one imaginary vertical line. This single alignment check prevents the scale from looking tilted. Use light construction lines for all shapes, then darken only the final outlines. If you change a proportion, adjust the construction lines before darkening so the drawing stays coherent. For a numerical body height, measure the vertical span from the shared level of the two upper body attachment points beneath the tray to the flat body baseline. Do not include the dial, tray depth, stem or base-bar thickness in that body-height measurement.
The dial needs only a few marks to read as a dial: a center point, a short pointer line, and several evenly spaced tick marks around the rim. Do not attempt to show real measurement values; this lesson is about form, not reading measurements. For the tray, show depth with a second ellipse slightly below the first and connect the two with short side curves. This creates a shallow basin. Keep the tray depth small relative to its width so it reads as a baby tray rather than a bowl.
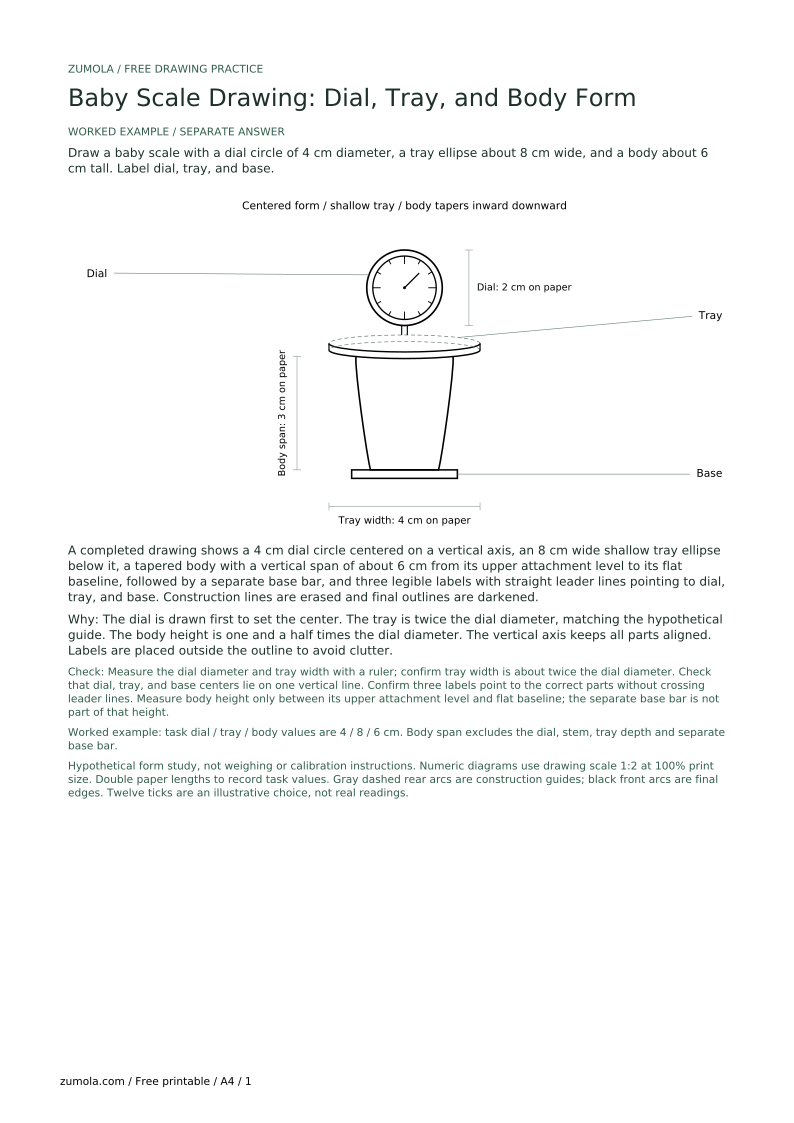
For the introductory and worked example, choose tray width equal to twice the dial diameter and body height equal to one and a half times that diameter. These are this lesson's hypothetical drawing ratios, not common equipment standards. An exercise may choose different values: task 2 explicitly uses a 5 cm body with a 4 cm dial, so its body-to-dial ratio is 1.25 rather than 1.5. When a task leaves a dimension unstated, label any value you choose as illustrative instead of treating it as required.
The body should look stable. Use two side lines that curve outward slightly near the tray and inward near the base, then finish with a flat base line. Add a base bar or rounded rectangle beneath the body to suggest a stand. Label the drawing with three terms: dial, tray, and base. Place labels outside the outline with straight leader lines that touch the part they name. Keep labels horizontal and avoid crossing leader lines.
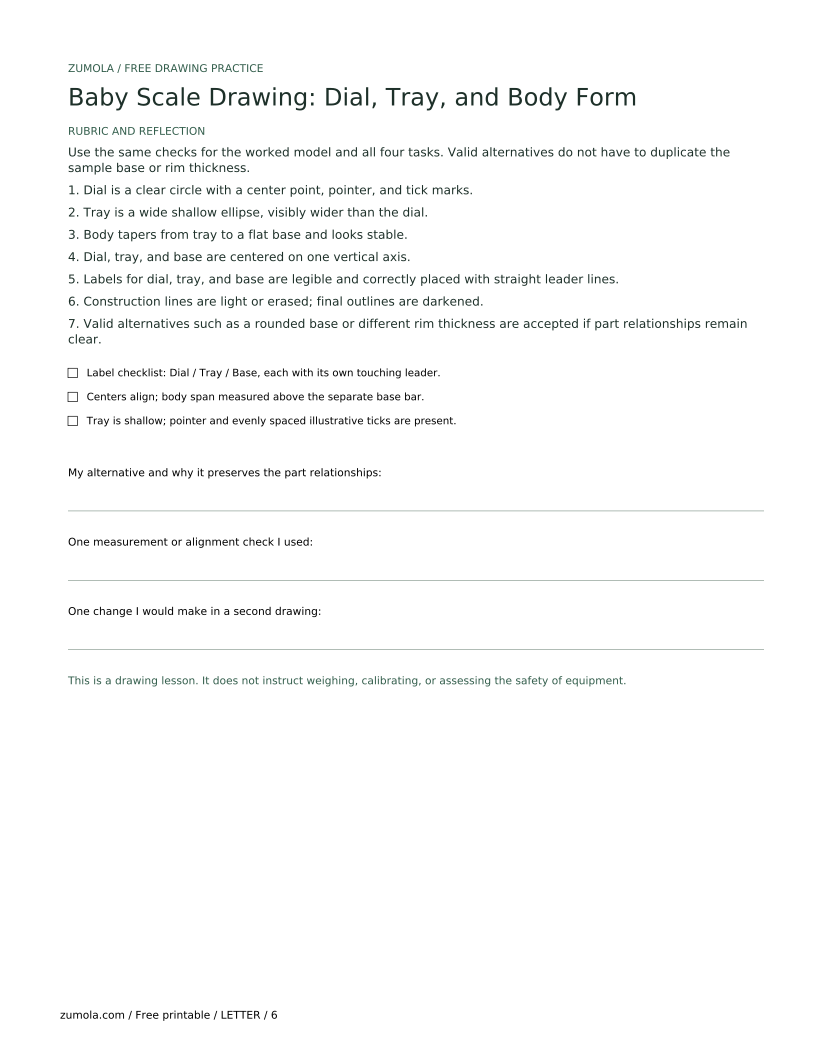
Because letter styles vary, labels may be printed, cursive, or mixed case as long as they are legible. The rubric checks that each label points to the correct part and that the three parts are visually distinct. Valid alternatives include a round base instead of a bar, or a slightly different dial rim thickness, provided the dial-tray-base relationships remain clear.
Draw a baby scale with a dial circle of 4 cm diameter, a tray ellipse about 8 cm wide, and a body about 6 cm tall. Label dial, tray, and base.
A completed drawing shows a 4 cm dial circle centered on a vertical axis, an 8 cm wide shallow tray ellipse below it, a tapered body with a vertical span of about 6 cm from its upper attachment level to its flat baseline, followed by a separate base bar, and three legible labels with straight leader lines pointing to dial, tray, and base. Construction lines are erased and final outlines are darkened.
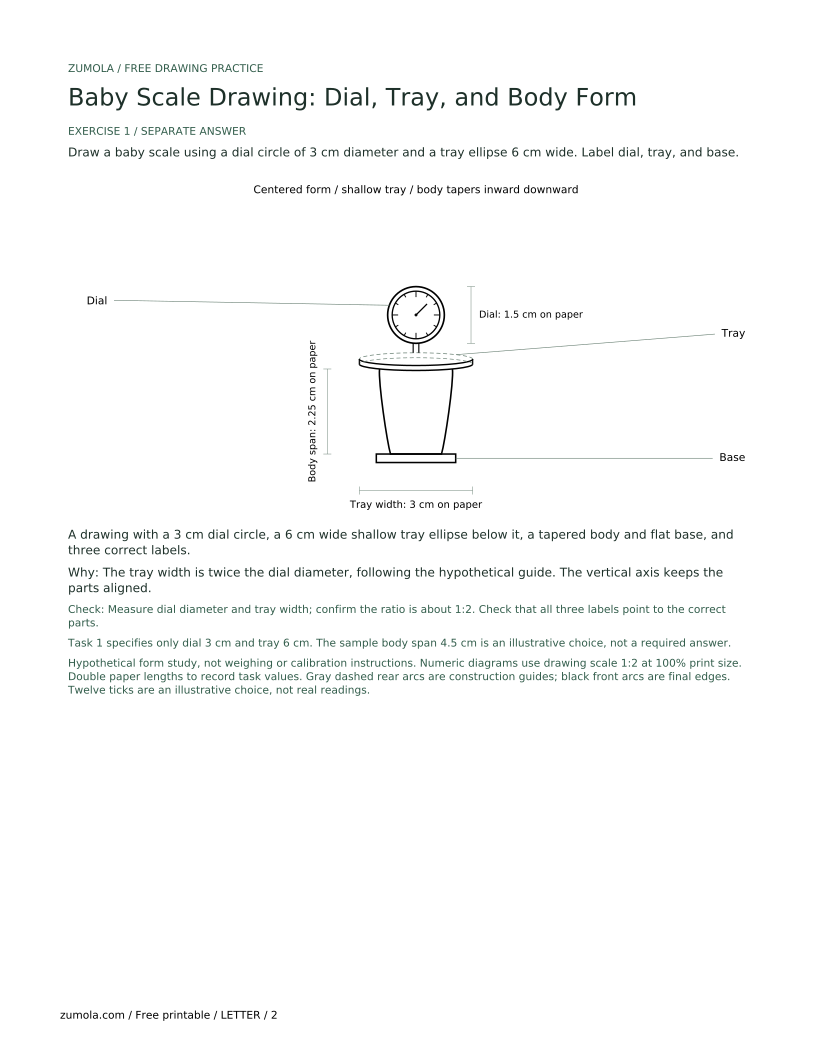
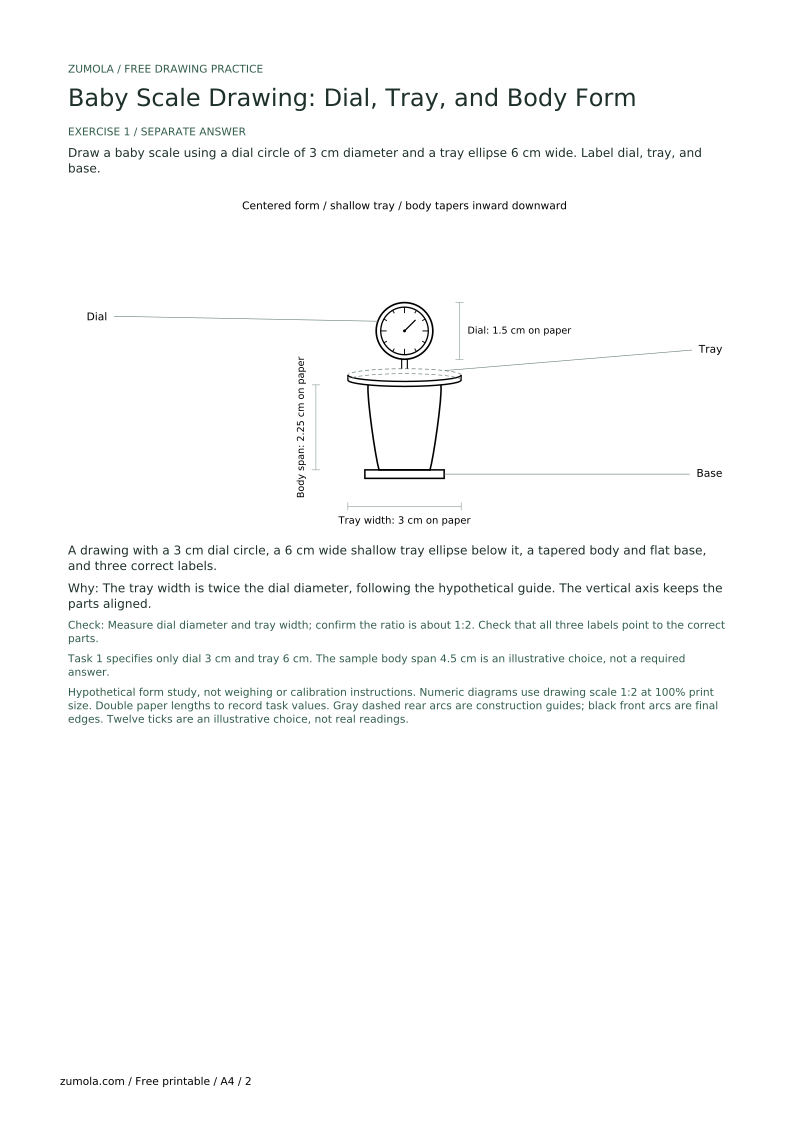
Draw a baby scale using a dial circle of 3 cm diameter and a tray ellipse 6 cm wide. Label dial, tray, and base.
A drawing with a 3 cm dial circle, a 6 cm wide shallow tray ellipse below it, a tapered body and flat base, and three correct labels.
The tray width is twice the dial diameter, following the hypothetical guide. The vertical axis keeps the parts aligned.
Check: Measure dial diameter and tray width; confirm the ratio is about 1:2. Check that all three labels point to the correct parts.
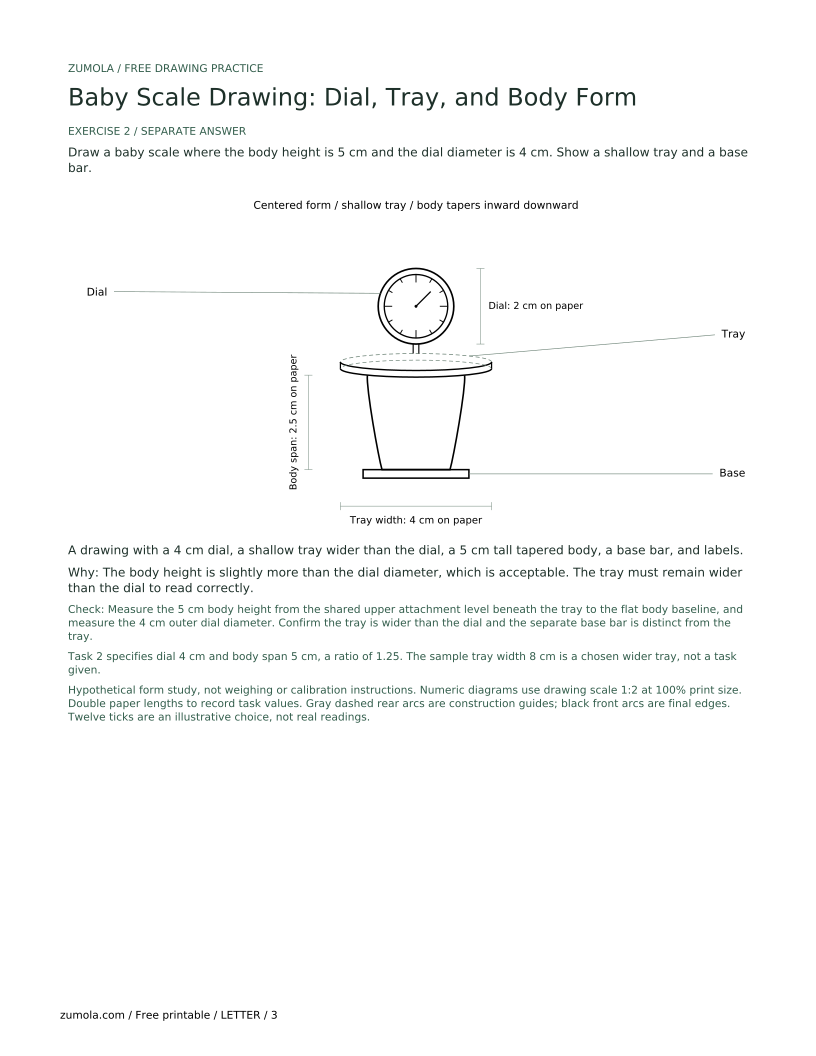
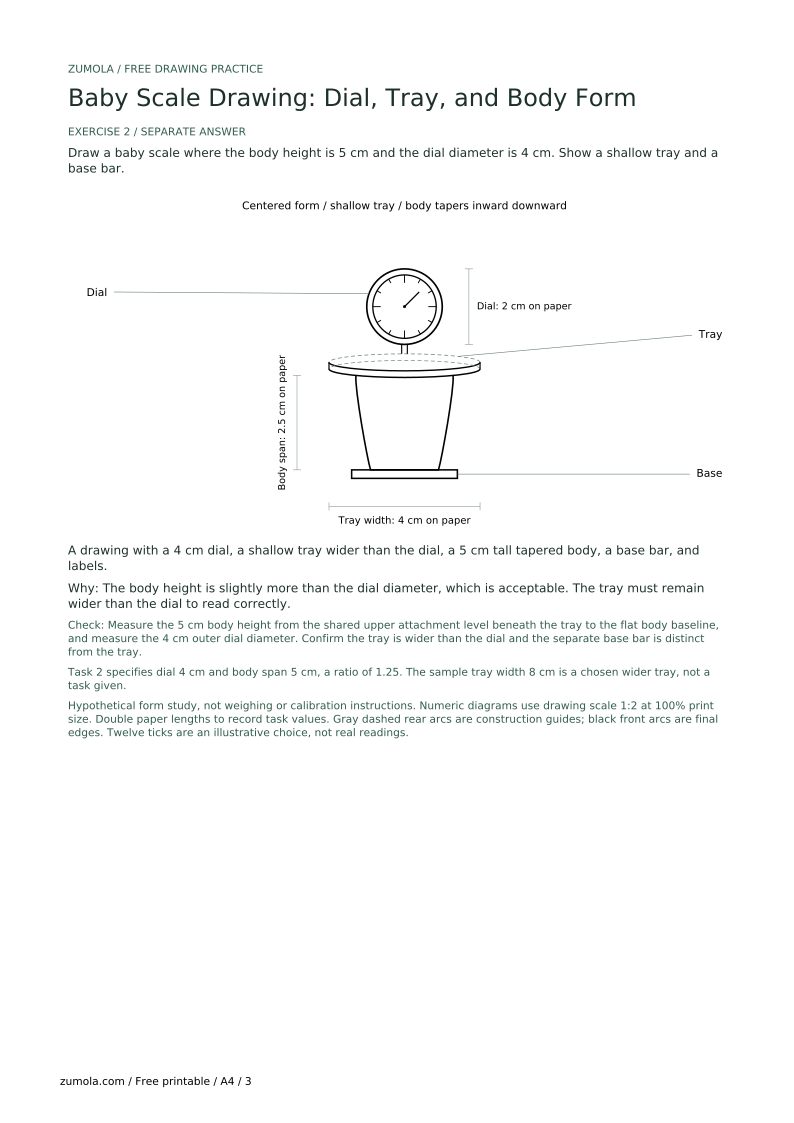
Draw a baby scale where the body height is 5 cm and the dial diameter is 4 cm. Show a shallow tray and a base bar.
A drawing with a 4 cm dial, a shallow tray wider than the dial, a 5 cm tall tapered body, a base bar, and labels.
The body height is slightly more than the dial diameter, which is acceptable. The tray must remain wider than the dial to read correctly.
Check: Measure the 5 cm body height from the shared upper attachment level beneath the tray to the flat body baseline, and measure the 4 cm outer dial diameter. Confirm the tray is wider than the dial and the separate base bar is distinct from the tray.
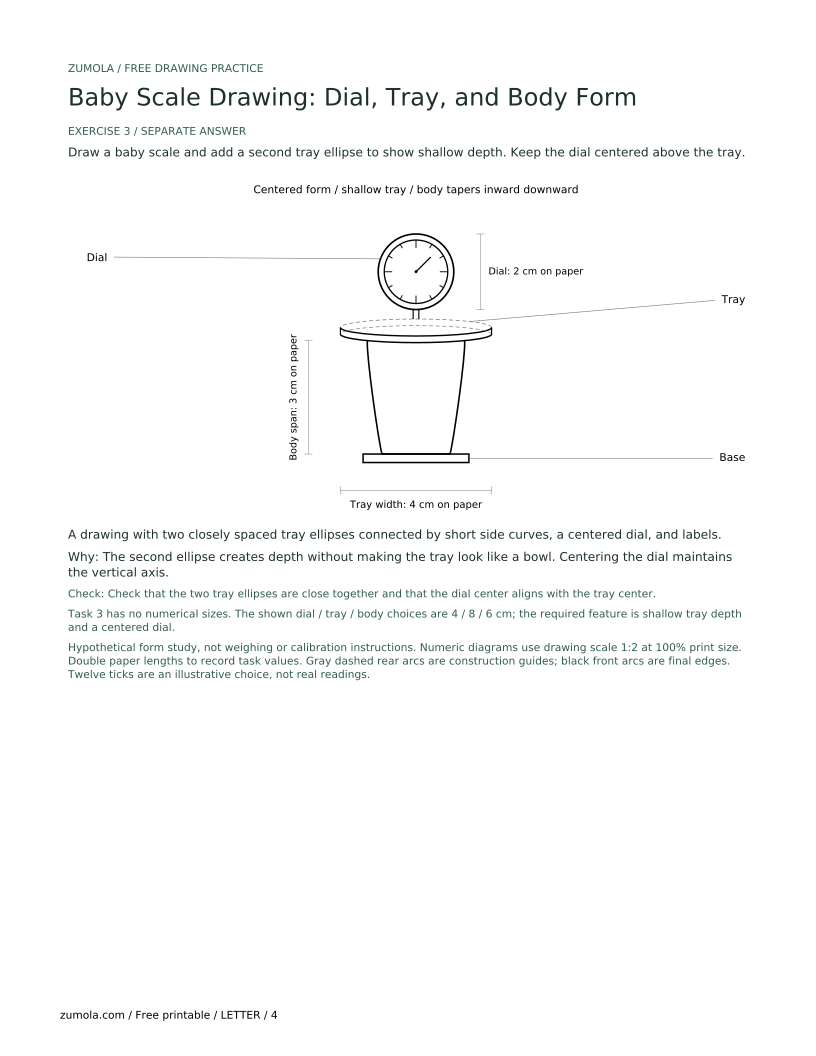
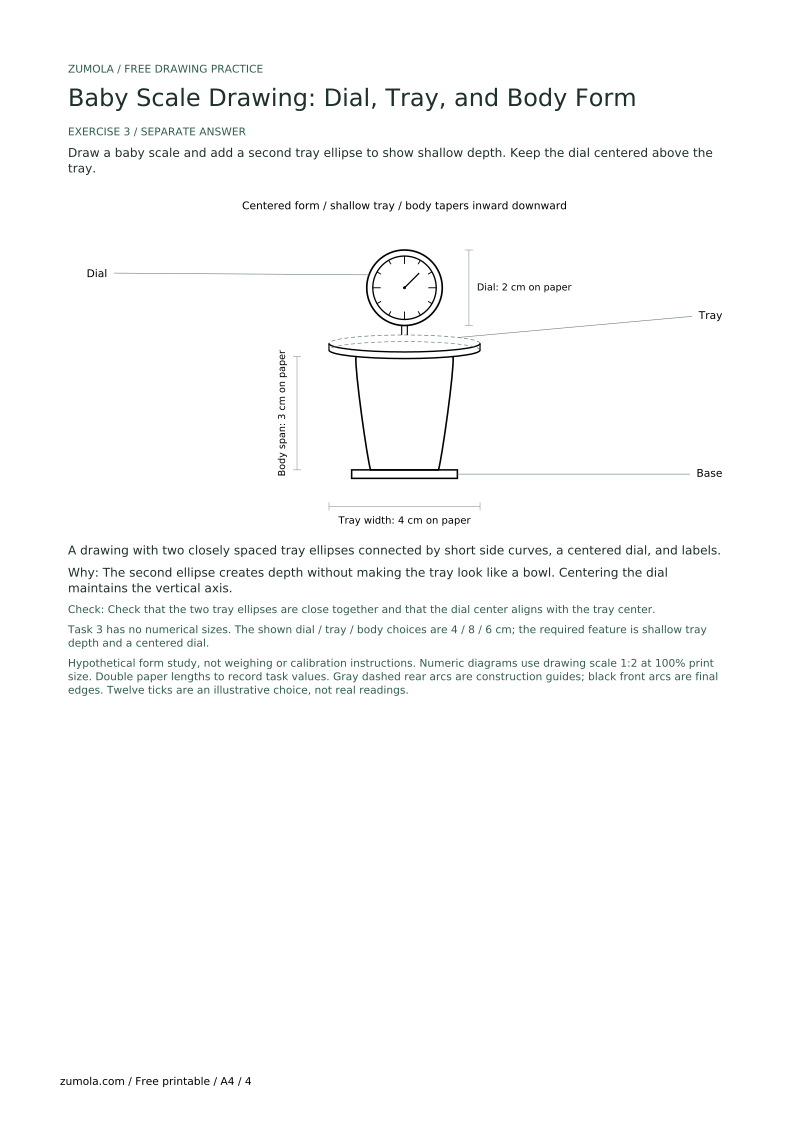
Draw a baby scale and add a second tray ellipse to show shallow depth. Keep the dial centered above the tray.
A drawing with two closely spaced tray ellipses connected by short side curves, a centered dial, and labels.
The second ellipse creates depth without making the tray look like a bowl. Centering the dial maintains the vertical axis.
Check: Check that the two tray ellipses are close together and that the dial center aligns with the tray center.
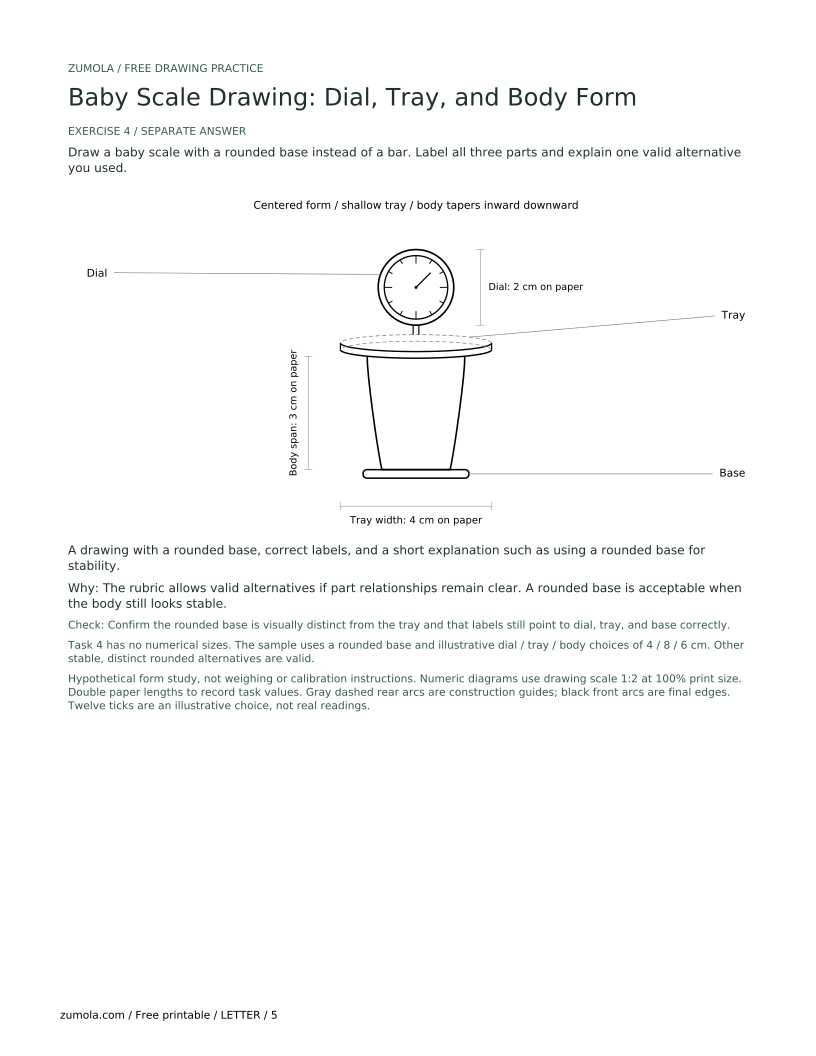
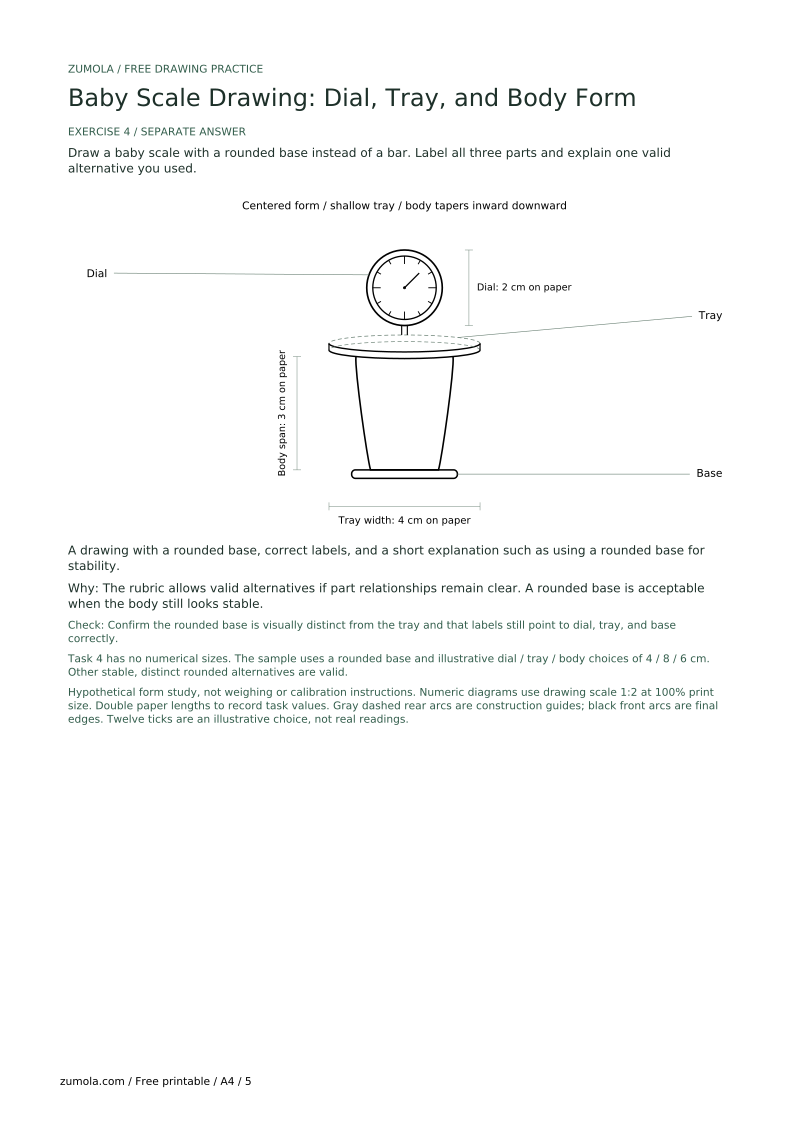
Draw a baby scale with a rounded base instead of a bar. Label all three parts and explain one valid alternative you used.
A drawing with a rounded base, correct labels, and a short explanation such as using a rounded base for stability.
The rubric allows valid alternatives if part relationships remain clear. A rounded base is acceptable when the body still looks stable.
Check: Confirm the rounded base is visually distinct from the tray and that labels still point to dial, tray, and base correctly.
Widen the tray ellipse so it is clearly wider than the dial circle; in the hypothetical guide, about twice the dial diameter.
Redraw a light vertical axis first and center each major shape on it before darkening outlines.
Keep the second tray ellipse close to the first and use short side curves to show only shallow depth.
Place labels outside the drawing and draw one straight leader line per label to the correct part.
No. This lesson focuses on form. A center point, pointer, and tick marks are enough to read as a dial.
Yes. A rounded base or a bar is acceptable if the body still looks stable and the base is visually distinct from the tray.
Use the hypothetical guide of about twice the dial diameter, then check by eye or ruler and adjust so the tray reads as wider than the dial.
Legibility matters more than style. Printed, cursive, or mixed-case labels are all acceptable if each label clearly names its part.