Free original lessons
Drawing Sunglasses: Frame, Lens, and Reflection Construction
Learn to draw sunglasses with clear frame geometry, tinted lens shapes, and believable reflections using a simple convention and checkable steps.
Free lesson
Four exercises
Worked answers
Object Drawing Lessons
This lesson teaches a repeatable method for drawing sunglasses as a standalone object. You will build the frame from measured landmarks, shape the lenses with consistent symmetry, and add reflections that read as glass rather than paint. The convention is simple: treat the lens as a tinted surface with one broad highlight and one soft secondary reflection, and treat the frame as a continuous band with a visible bridge and temple arms. Lettering and handwriting are not part of this task, so no style rule applies beyond keeping labels legible if you annotate your practice sheet. All measurements below are hypothetical examples chosen for clarity; measure your own paper and tools before committing to any number. The goal is a clean, checkable drawing you can self-assess without needing a printed file.
Practice materials: Printable downloads are not available for this lesson yet. Use the instructions and four exercises below.
Reference illustration
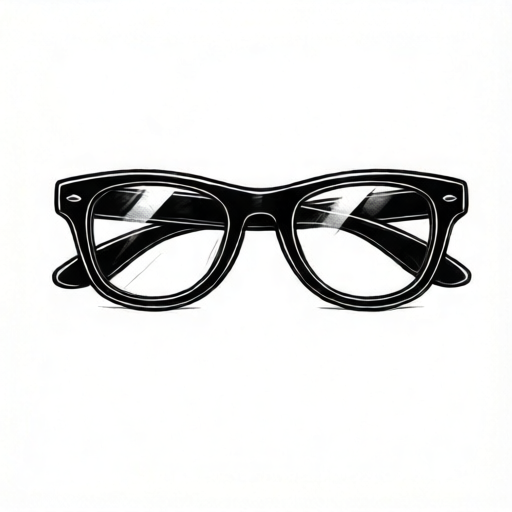
Use the stated measurements and conventions for each exercise.
Set landmarks and frame geometry
Begin by deciding the overall width of the sunglasses on your page. For this lesson, assume a hypothetical frame width of 120 mm and a lens height of 40 mm; these are example values, not standards. Mark the center of the page and draw a faint horizontal midline. Place two lens centers equidistant from the center line, then mark the bridge gap between them. The bridge should be narrower than either lens and sit on the midline.
Next, sketch the frame as a continuous band around each lens. Keep the top and bottom rims roughly parallel, and let the outer corners curve slightly outward. Draw the temple arms as two short lines extending back from the outer corners at a shallow angle. Check that the left and right sides mirror each other by folding the paper gently or by measuring distances from the center line with a ruler.
- Mark the page center and a horizontal midline.
- Place two lens centers at equal distances from the center line.
- Mark the bridge gap on the midline between the lens centers.
- Draw the top rim, bottom rim, and outer corner curves for each lens.
- Add temple arms from the outer corners at a shallow angle.
- Measure left and right distances to confirm symmetry.
Shape the lenses and tint
Lens shape should follow the frame you just built. Draw each lens as a rounded rectangle or soft oval that fits inside its rim with a small even margin. Keep the two lenses the same height and width; if one looks larger, re-measure from the center line rather than erasing blindly. The tint is indicated by even shading, not by filling the lens solid black. Use light pencil strokes in one direction, then cross them gently to suggest depth.
Leave a clear margin between the lens edge and the frame so the frame reads as a separate object. If you annotate your practice sheet, write labels in plain legible letters; handwriting style is not graded here. The tint should be darkest near the top rim and lighter toward the bottom, which suggests light passing through the lens.
- Draw each lens inside its rim with an even margin.
- Compare lens heights and widths using a ruler.
- Shade the lens evenly with light strokes.
- Darken the upper part of the tint slightly.
- Keep the frame edge clear and unshaded.
Add reflections that read as glass
Reflections make tinted lenses look like glass. Use one broad highlight and one soft secondary reflection per lens. The broad highlight is a curved band near the upper outer corner; the secondary reflection is a thinner curve near the lower inner corner. Keep both shapes simple and avoid scribbling. The highlight should be the lightest area, so leave the paper white or erase back to it.
Place reflections consistently on both lenses so the pair reads as one object. If the left lens highlight sits near the top outer corner, the right lens highlight should sit near its top outer corner as well. A small gap between the highlight and the frame edge helps the reflection look like it sits on the lens surface rather than on the rim.
- Draw a broad curved highlight near the upper outer corner of each lens.
- Add a thinner secondary reflection near the lower inner corner.
- Leave the highlight area light or erase it back to white.
- Check that both lenses use the same reflection placement.
- Soften edges with light strokes so reflections do not look painted on.
Check proportions and finish
Before finishing, measure the frame width, lens height, and bridge gap. Compare left and right measurements from the center line. A difference of a few millimeters is acceptable in a sketch, but large differences should be corrected. Check that the temple arms are the same length and angle. Finally, confirm that the tint is even and that the reflections are the lightest areas on the lens.
Finish by cleaning up stray lines and strengthening the frame outline. Do not add a full face or eyeglasses without tint; this task is limited to sunglasses as a standalone object. If you annotate, keep labels short and legible. The drawing is complete when the frame, lens, and reflection each read clearly at a glance.
- Measure frame width, lens height, and bridge gap.
- Compare left and right distances from the center line.
- Check temple arm length and angle.
- Confirm tint is even and reflections are lightest.
- Erase stray lines and strengthen the frame outline.
Worked example
Draw a pair of sunglasses on a page where the frame width is 100 mm and each lens is 35 mm wide with a 10 mm bridge gap. Add a broad highlight near the upper outer corner of each lens and a thin secondary reflection near the lower inner corner.
Worked answer
Mark the center line. Half the frame width is 50 mm. The two lenses plus the bridge total 35 + 35 + 10 = 80 mm, leaving 20 mm of outer margin, or 10 mm per side. The lens center sits 10 mm (outer margin) plus 17.5 mm (half a lens) = 27.5 mm from the outer edge, which is 50 minus 27.5 = 22.5 mm from the center line. Draw each lens 35 mm wide and 30 mm tall inside its rim with a 2 mm margin. Shade the lenses evenly, leave the upper outer highlight white, and add a thin lower inner reflection. Check that left and right distances match and that the highlight is the lightest area.
Four practice exercises
Exercise 1
A sketch has a frame width of 90 mm and a bridge gap of 8 mm. Each lens is 32 mm wide. Check whether the lens widths plus the bridge gap equal the frame width.
Show answer and check
No. Two lenses at 32 mm each plus an 8 mm bridge give 72 mm, which is 18 mm less than the 90 mm frame width.
Why: Add the two lens widths and the bridge gap, then compare the total to the frame width. The difference shows the frame has extra width that must be accounted for, such as outer rim margins.
Check: Re-add 32 plus 32 plus 8 and compare with 90. If the total is less, measure the outer margins on both sides to confirm they are equal.
Exercise 2
On a drawing, the left lens highlight is near the upper outer corner and the right lens highlight is near the lower inner corner. State the correction needed under the lesson convention.
Show answer and check
Move the right lens highlight to its upper outer corner so both lenses use the same relative placement.
Why: The convention requires consistent reflection placement on both lenses so the pair reads as one object. Matching the relative position corrects the mismatch.
Check: Compare the highlight position on each lens by measuring from the top rim and outer edge. Both should be near the upper outer corner.
Exercise 3
A lens is 40 mm tall and the frame rim adds a 3 mm margin above and below. What is the total height of the frame at that lens?
Show answer and check
46 mm.
Why: Add the lens height and both margins: 40 plus 3 plus 3 equals 46 mm.
Check: Measure the lens height and both margins separately, then add them. The sum should match the measured frame height at that point.
Exercise 4
A student shades a lens solid black and then cannot see the broad highlight. Describe the fix and the check.
Show answer and check
Lighten the tint by erasing or shading more lightly, then restore the broad highlight by leaving that area white or erasing it back. Check that the highlight is the lightest area on the lens.
Why: The convention requires the broad highlight to remain visible as the lightest area. Solid black removes the contrast needed for a glass-like reflection.
Check: Compare the highlight area with the rest of the lens. The highlight should be noticeably lighter, and the tint should still read as even.
Common mistakes
- Making one lens larger than the other. Re-measure both lens widths and heights from the center line and adjust the smaller or larger lens before adding tint.
- Filling the lens solid black so reflections disappear. Shade lightly and leave the highlight area white or erase it back after shading.
- Placing reflections randomly on each lens. Use the same relative position on both lenses, such as upper outer corner for the broad highlight.
- Letting the frame and lens merge into one shape. Keep a small even margin between the lens edge and the frame rim.
- Drawing temple arms at different angles. Measure the angle from the outer corner on each side and match them before finishing.
Self-check rubric
- Frame is continuous and symmetrical within a few millimeters.
- Lenses are equal in size and sit inside the rims with an even margin.
- Tint is even and does not obscure the highlight.
- Each lens has one broad highlight and one soft secondary reflection placed consistently.
- Temple arms match in length and angle.
- Labels, if used, are legible; handwriting style is not graded.
Questions and answers
Do I need a printed template to do this lesson?
No. The steps use simple landmarks and measurements you can mark on any paper. A printable practice outline is planned but not yet built.
Are the millimeter values required?
No. The 120 mm width and 40 mm lens height are hypothetical examples. Measure your own paper and choose values that fit.
How dark should the lens tint be?
Dark enough to read as tinted, but light enough that the broad highlight remains the lightest area. Even shading matters more than darkness.
Can I use a different reflection shape?
Yes. The convention allows valid alternatives as long as each lens has one broad highlight and one soft secondary reflection placed consistently.
Does handwriting style affect the grade?
No. Labels only need to be legible. The rubric focuses on frame geometry, lens shape, tint, and reflection placement.