Free original lessons
Vegetable Contour Drawing: Compare Edges and Shapes
Learn to draw vegetable contours by comparing edges and shapes. Practice with four self-contained exercises and a clear rubric.
Free lesson
Four exercises
Worked answers
Object Drawing Lessons
Contour drawing trains your eye to follow the outer edge of a subject and record its shape without guessing. This lesson focuses on vegetables because their forms are simple yet varied: a carrot tapers, a pepper bulges, an onion layers. You will compare shapes side by side, measure proportions with a simple convention, and build accuracy through repeated studies. All exercises are solvable from the text alone; no images are required. Use a pencil and paper. The convention for height is baseline to midline: the baseline is the lowest point of the vegetable, and the midline is the horizontal line through the widest part of the vegetable. Letter styles vary, so your handwriting or labels may differ from the examples as long as they are legible and consistent.
Practice materials: Printable downloads are not available for this lesson yet. Use the instructions and four exercises below.
Reference illustration
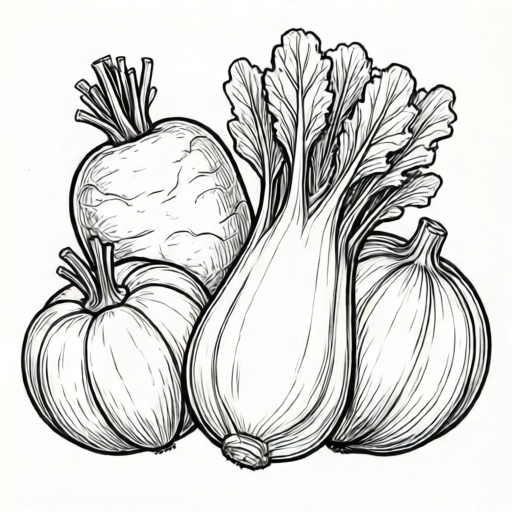
Use the stated measurements and conventions for each exercise.
Seeing Edges Before Drawing
Contour drawing begins with careful looking. Trace the outline of a vegetable with your eyes, noting where the edge turns sharply and where it curves gently. Avoid naming the vegetable in your mind; instead, describe the edge as a series of directions and lengths.
A useful habit is to compare two vegetables of similar size. Place them side by side and ask which is wider at the midline, which tapers more quickly, and where the widest point sits relative to the baseline. These comparisons build shape vocabulary.
- Place one vegetable on a plain surface and identify its baseline and midline.
- Trace the outer edge slowly with your eyes, pausing at each change of direction.
- Draw the edge in short segments, checking the angle of each segment against the previous one.
- Compare your drawn contour to the vegetable by holding the paper at arm's length.
Shape Comparison Plate
A shape comparison plate is a simple grid where you draw the same vegetable twice: once as a quick contour and once as a measured contour. The quick contour captures gesture; the measured contour uses the baseline-to-midline convention to check height and width.
For measurement, define the baseline as the lowest point and the midline as the horizontal line through the widest part. Measure the distance from baseline to midline in centimeters. This is the lower height. Measure from midline to the top in centimeters. This is the upper height. The total height is the sum. Width is measured across the midline.
- Draw a rectangle around your vegetable on paper to set a bounding box.
- Mark the baseline at the bottom of the box and the midline where the vegetable is widest.
- Measure lower height, upper height, and width in centimeters; label them on the box.
- Draw the contour inside the box, checking that the widest point touches the midline.
Using the Convention Consistently
The baseline-to-midline convention is a tool, not a rule about beauty. Different vegetables will have different proportions, and your drawing should reflect those proportions. If a pepper is wider than it is tall, the width measurement will exceed the total height.
Keep units consistent. Use centimeters for all measurements in this lesson. If you choose different numerical values for practice, label them as hypothetical examples. The goal is to compare shapes accurately, not to match a standard.
- Measure each vegetable three times and average the results to reduce error.
- Record measurements in a small table beside each drawing.
- Check that the sum of lower and upper height equals total height.
- Compare two vegetables by listing their width-to-height ratios.
From Contour to Comparison
Once you can draw a single contour accurately, compare two vegetables in the same drawing. Draw them side by side at the same scale. Use the midline to align their widest points horizontally. This makes differences in taper and bulge easy to see.
A comparison drawing should show at least two vegetables and label the baseline, midline, and total height for each. Keep labels small and consistent. The rubric rewards accurate proportion and clear comparison, not decorative shading.
- Choose two vegetables with different shapes, such as a carrot and a bell pepper.
- Draw both bounding boxes at the same scale on one sheet.
- Mark baseline and midline for each vegetable.
- Draw both contours and label the measurements.
- Write one sentence comparing their width-to-height ratios.
Worked example
A zucchini is described as follows: baseline to midline is 6 cm, midline to top is 4 cm, and width at midline is 5 cm. Draw a measured contour in a bounding box and label the measurements.
Worked answer
Total height is 6 + 4 = 10 cm. Width is 5 cm. The bounding box is 5 cm wide and 10 cm tall. The midline sits 6 cm above the baseline. The widest point of the contour touches the midline at 5 cm width. The contour tapers from the midline to the top over 4 cm and to the baseline over 6 cm. Labels: lower height 6 cm, upper height 4 cm, total height 10 cm, width 5 cm.
Four practice exercises
Exercise 1
A carrot has lower height 8 cm, upper height 2 cm, and width at midline 3 cm. Draw a measured contour in a bounding box and label all measurements.
Show answer and check
Total height is 10 cm. Bounding box is 3 cm wide and 10 cm tall. Midline is 8 cm above baseline. Widest point is 3 cm at midline. Contour tapers to a point at the top over 2 cm and to the baseline over 8 cm.
Why: The baseline-to-midline convention sets the widest point at the midline. Adding lower and upper height gives total height. The width is measured across the midline.
Check: Verify that 8 + 2 = 10 and that the widest point touches the midline at 3 cm width.
Exercise 2
A bell pepper has lower height 5 cm, upper height 5 cm, and width at midline 7 cm. Draw a measured contour and write one sentence comparing its width-to-height ratio to the carrot in Exercise 1.
Show answer and check
Total height is 10 cm. Bounding box is 7 cm wide and 10 cm tall. Midline is 5 cm above baseline. Widest point is 7 cm at midline. Width-to-height ratio is 7:10. The carrot ratio is 3:10, so the pepper is much wider relative to its height.
Why: Equal lower and upper heights place the midline at the middle. The ratio compares width to total height using the same units.
Check: Confirm 5 + 5 = 10 and that the ratio 7:10 is greater than 3:10.
Exercise 3
An onion has lower height 4 cm, upper height 6 cm, and width at midline 6 cm. Draw a measured contour. Then draw a second onion with lower height 6 cm, upper height 4 cm, and width 6 cm. Label both and state one difference.
Show answer and check
First onion: total height 10 cm, midline 4 cm above baseline, width 6 cm. Second onion: total height 10 cm, midline 6 cm above baseline, width 6 cm. Difference: the widest point sits lower on the first onion and higher on the second.
Why: Changing lower and upper heights while keeping total height constant moves the midline. The width stays the same, so the difference is vertical placement of the widest point.
Check: Check that both totals are 10 cm and that the midline positions match the lower heights.
Exercise 4
A cucumber has lower height 7 cm, upper height 3 cm, and width at midline 4 cm. A second cucumber has lower height 3 cm, upper height 7 cm, and width 4 cm. Draw both at the same scale in one comparison drawing. Label baselines, midlines, and total heights. Write one sentence about their shapes.
Show answer and check
Both have total height 10 cm and width 4 cm. First cucumber midline is 7 cm above baseline; second is 3 cm above baseline. The first is widest near the bottom; the second is widest near the top. Their width-to-height ratios are equal at 4:10.
Why: Same scale means same total height and same width units. The comparison shows that equal ratios can still produce different shapes when the midline position changes.
Check: Verify both totals are 10 cm, both widths are 4 cm, and the midline labels match the lower heights.
Common mistakes
- Drawing from memory instead of looking at the edge. Look at the vegetable for five seconds, then draw one segment. Repeat. Keep your eyes on the subject more than the paper.
- Ignoring the midline and placing the widest point too high or too low. Mark the midline first and check that the widest part of the contour touches it.
- Using inconsistent units for height and width. Measure everything in centimeters and write the unit beside each number.
- Comparing vegetables drawn at different scales. Set both bounding boxes to the same total height before drawing contours.
Self-check rubric
- Contour follows the described edge with no large invented bulges or dents.
- Baseline and midline are marked and consistent with the measurements.
- Lower height plus upper height equals total height.
- Width is measured at the midline and labeled with units.
- Comparison drawing uses the same scale for both vegetables.
- Labels are legible; letter style may vary.
- No shading or decoration replaces contour accuracy.
Questions and answers
Do I need a real vegetable to do these exercises?
The exercises are self-contained and describe the shapes in text. A real vegetable helps, but you can complete every task from the written description alone.
What if my handwriting or labels look different from the example?
Letter styles vary. The rubric checks legibility and consistency, not a single style. Any clear labeling is acceptable.
How do I know if my contour is accurate?
Compare your drawing to the described measurements. Check that the widest point sits at the midline and that lower plus upper height equals total height.
Can I use inches instead of centimeters?
Yes, as long as you use one unit consistently throughout a single drawing. This lesson uses centimeters for all examples.