Free original lessons
Yogurt Cup Drawing: Rim, Spoon, and Label
Learn to draw a yogurt cup with a clear rim, a spoon, and a label using simple shapes, proportion checks, and a flexible style rubric.
Free lesson
Four exercises
Worked answers
Object Drawing Lessons
This lesson teaches a reliable way to draw a single yogurt cup with three required features: a visible tub rim, a spoon, and a label. You will build the cup from a cylinder, add an elliptical rim, place the spoon so it reads clearly, and position a label that follows the curve of the tub. The method uses simple arithmetic and a defined drawing convention so you can check your work without needing a specific brand or photo. All measurements are hypothetical examples; measure your own paper and tools if you adapt the scale. The rubric allows valid style differences, including handwriting and lettering choices, because x-height is defined as baseline to midline and letter styles vary.
Practice materials: Printable downloads are not available for this lesson yet. Use the instructions and four exercises below.
Reference illustration
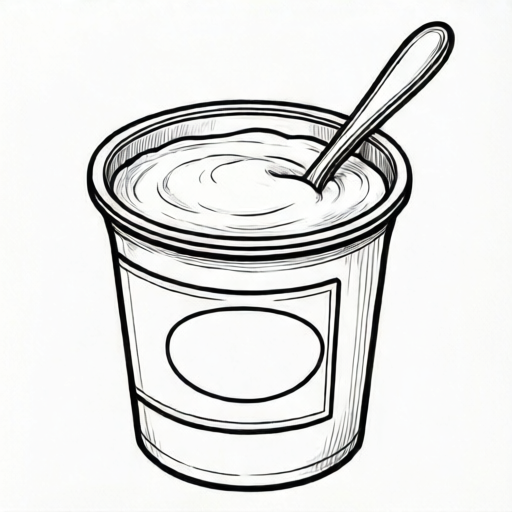
Use the stated measurements and conventions for each exercise.
Build the Tub and Rim
Start with a light vertical center line. Draw a cylinder body: two vertical sides and a curved bottom. The top opening is an ellipse, not a circle, because the cup is seen at a slight angle. Keep the ellipse width equal to the body width and make the ellipse height about one third of its width as a starting proportion. This is a hypothetical example; adjust after measuring your own drawing.
Add the rim as a second, slightly larger ellipse above the opening, then connect the two ellipses with short vertical or slanted lines to show thickness. The rim should read as a band, not a single line. Check that the left and right edges of the rim align with the body sides within a small margin you choose, such as 2 mm on a 10 cm wide drawing.
- Draw a vertical center line about 8 cm long on plain paper.
- Mark the body width, for example 6 cm, centered on the line.
- Draw two vertical sides and a curved bottom.
- Draw the top opening as an ellipse with width 6 cm and height 2 cm.
- Draw a second ellipse 4 mm above the first for the rim top.
- Connect the ellipses at left and right to show rim thickness.
Place the Spoon
The spoon must be clearly separate from the cup outline. Place the handle entering the cup from one side, angled toward the center. Draw the bowl of the spoon inside the rim ellipse, but keep part of the bowl visible above the rim line so the spoon is identifiable. A simple convention is to draw the spoon bowl as a small oval about 1.5 cm long and 1 cm wide on a 6 cm wide cup; this is a hypothetical example.
Check the spoon by tracing its outline with your finger: the handle should not merge with the rim, and the bowl should not be hidden behind the label. If the spoon looks like a second rim, shorten the bowl or move the handle angle.
- Choose a side for the handle, for example the right side.
- Draw the handle as two nearly parallel lines entering the cup.
- Draw the spoon bowl as a small oval inside the rim.
- Keep at least 3 mm of the bowl visible above the rim line.
- Erase any line that makes the spoon merge with the rim.
Add the Label and Finish
The label is a band on the front of the tub. Draw two horizontal curves that follow the bottom curve of the cup, then connect them at the sides. The label should sit below the rim and above the bottom, leaving a margin you choose, such as 1 cm from the rim and 1 cm from the bottom on a 10 cm tall cup. Write a short word or draw a simple symbol inside the label. Lettering is not judged for a single correct style; x-height is baseline to midline, and your letters may be rounded, angular, or mixed.
Finish by darkening the final outline and erasing construction lines. Add a small shadow under the cup if desired, but do not let it touch the label. Check that the rim, spoon, and label are all visible and that the label curves with the tub rather than sitting flat.
- Draw the label top curve 1 cm below the rim.
- Draw the label bottom curve 1 cm above the cup bottom.
- Connect the curves at the left and right sides.
- Write a short label word or symbol inside the band.
- Darken final lines and erase construction marks.
- Check that rim, spoon, and label are each clearly visible.
Worked example
Draw a yogurt cup 6 cm wide and 10 cm tall with a rim band 4 mm wide, a spoon entering from the right, and a label band 1 cm below the rim and 1 cm above the bottom. Use a 2 cm high top ellipse.
Worked answer
A completed line drawing shows a cylinder 6 cm wide and 10 cm tall, a top ellipse 6 cm wide and 2 cm high, a second ellipse 4 mm above it connected at the sides, a spoon handle entering from the right with a 1.5 cm oval bowl partly visible above the rim, and a label band between 1 cm below the rim and 1 cm above the bottom with a short word written inside. Construction lines are erased and the final outline is darkened.
Four practice exercises
Exercise 1
Draw a yogurt cup 5 cm wide and 9 cm tall. Use a top ellipse 5 cm wide and 1.5 cm high. Add a rim band 3 mm wide and a label band 1 cm below the rim and 1 cm above the bottom. Place a spoon entering from the left.
Show answer and check
A line drawing with a 5 cm by 9 cm cylinder, a 5 cm by 1.5 cm top ellipse, a second ellipse 3 mm above connected at the sides, a left-entering spoon with a small oval bowl partly above the rim, and a curved label band with margins of 1 cm.
Why: The width and height set the body. The ellipse height is one third of the width, which is a simple proportion. The rim band and label margins are measured from the rim and bottom so the features do not overlap.
Check: Measure the body width and height with a ruler. Confirm the top ellipse height is about 1.5 cm. Check that the rim band is about 3 mm and the label margins are about 1 cm. Trace the spoon to confirm it does not merge with the rim.
Exercise 2
A drawing has a top ellipse 6 cm wide and 3 cm high. The rim is a single line. The spoon bowl is completely hidden behind the label. List two fixes and redraw the rim and spoon.
Show answer and check
Fix one: reduce the ellipse height to about 2 cm so it reads as a shallower opening. Fix two: move the spoon bowl upward so at least 3 mm is visible above the rim, and add a second ellipse above the opening to show rim thickness.
Why: An ellipse height equal to half its width can look like a circle at some angles. A single rim line does not show thickness. A hidden spoon bowl removes the required spoon feature.
Check: After redrawing, measure the ellipse height and compare it to one third of the width. Confirm two rim ellipses are connected at the sides. Trace the spoon bowl to see that part of it is above the rim line.
Exercise 3
Draw a yogurt cup with a label band that curves with the tub. Write the word MILK inside the label using block letters. Define x-height as baseline to midline and keep all letters inside the band.
Show answer and check
A drawing with a curved label band between the rim and bottom margins, and the word MILK written so the top of each letter reaches the midline and the bottom sits on the baseline, all within the band.
Why: The label must follow the tub curve, not sit flat. X-height is baseline to midline, so letter height is checked against that convention. Block letters are one valid style among many.
Check: Trace the label top and bottom curves to confirm they follow the tub. Measure the letter height from baseline to midline and confirm it fits inside the band. Check that no letter crosses the label edge.
Exercise 4
Draw a yogurt cup 7 cm wide and 11 cm tall with a rim band 5 mm wide. Place a spoon entering from the right at a 30 degree angle from vertical. Add a label band 1.5 cm below the rim and 1.5 cm above the bottom. Check that the spoon handle does not touch the label.
Show answer and check
A line drawing with a 7 cm by 11 cm body, a rim band 5 mm wide, a right-entering spoon angled about 30 degrees from vertical, and a curved label band with 1.5 cm margins. The handle passes above the label without touching it.
Why: The angle and margins are chosen to keep the spoon and label separate. The rim band width is a visible proportion of the body width. The label margins are measured from fixed reference lines.
Check: Use a ruler to confirm the body width and height. Estimate the spoon angle against the vertical center line. Measure the rim band and label margins. Check that there is a visible gap between the spoon handle and the label top curve.
Common mistakes
- Drawing the top opening as a perfect circle. Use an ellipse with height about one third of its width, then adjust after checking the angle.
- Making the rim a single line with no thickness. Add a second ellipse above the opening and connect the edges to show a band.
- Letting the spoon handle merge with the rim outline. Leave a small gap or change the handle angle so the spoon reads as separate.
- Drawing the label as a flat rectangle. Curve the top and bottom label lines to follow the tub surface.
Self-check rubric
- The cup body is a closed shape with two sides and a curved bottom.
- The top opening is an ellipse, not a circle, and the rim shows thickness.
- The spoon is separate from the rim and its bowl is partly visible.
- The label follows the tub curve and sits between the rim and bottom margins.
- Lettering is intentional and fits inside the label; style may vary.
- Construction lines are erased or clearly lighter than final lines.
- All three required features, rim, spoon, and label, are visible.
Questions and answers
Do I need a real yogurt cup to draw this?
No. The lesson uses a cylinder and ellipse method that works from the text alone. If you use a real cup, measure it and label your numbers as your own measurements.
How wide should the rim be?
Choose a visible band, for example 4 mm on a 6 cm wide drawing. This is a hypothetical example; any consistent width that reads clearly is acceptable.
Can I use cursive or block letters on the label?
Yes. Letter styles vary. The rubric checks that lettering is intentional and fits inside the label band, not that it matches one style.
What if my spoon looks too large?
Compare the spoon bowl to the rim ellipse. If the bowl covers more than half the rim width, shorten it or move it toward the center.