Free original lessons
Drawing Fingers: Knuckle Landmarks and Proportion Guides
Learn to place knuckle landmarks and set finger segment proportions using simple ratios, bend guides, and a checkable drawing convention.
Free lesson
Four exercises
Worked answers
Object Drawing Lessons
Fingers are often drawn as tubes with random bumps. A more reliable approach is to treat each finger as three segments joined at knuckle landmarks, then use proportion guides to keep lengths and bends consistent. This lesson defines a simple drawing convention: the x-height is the distance from the baseline to the midline of a letter x in your normal handwriting. You will use that personal unit to set finger proportions, mark knuckles, and check your drawing. Letter styles vary, so the convention is a measuring tool, not a style rule. All measurements are checkable with a ruler or by counting grid squares.
Practice materials: Printable downloads are not available for this lesson yet. Use the instructions and four exercises below.
Reference illustration
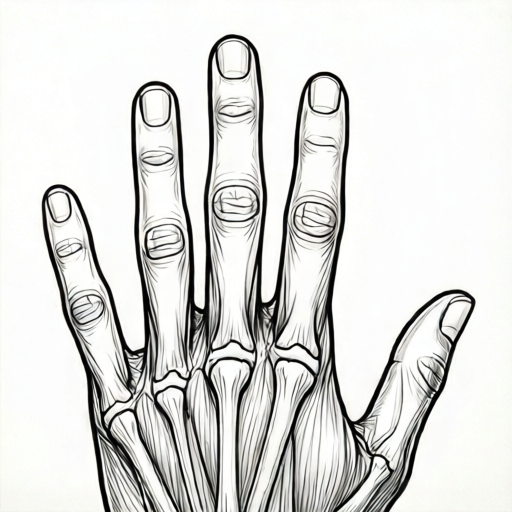
Use the stated measurements and conventions for each exercise.
Define your x-height unit
Write a lowercase x on scrap paper in your normal handwriting. Measure from the baseline to the midline of the letter, not the top of any flourish. Record that length in millimeters as your x-height unit. If your x-height is 4 mm, then one unit equals 4 mm. Use the same unit throughout the drawing.
The x-height is a personal scale, not a universal standard. Two artists with different handwriting will have different units, and both are valid. The goal is internal consistency: every finger proportion in one drawing should use the same unit.
- Write x three times and measure each baseline-to-midline distance.
- Average the three measurements and round to the nearest millimeter.
- Label this value as one unit on your practice sheet.
- Use only this unit for all finger measurements in the exercise.
Mark knuckle landmarks in order
Each finger has three knuckle landmarks: the base knuckle where the finger meets the hand, the middle knuckle, and the tip knuckle near the nail. Draw them as small crosses, not circles, so they do not compete with the finger outline. Place the base knuckle first, then the middle knuckle, then the tip knuckle.
A useful proportion guide is that the middle segment is often slightly shorter than the base segment, and the tip segment is shortest. As a hypothetical example, use base 1.2 units, middle 1.0 unit, and tip 0.8 unit. These numbers are examples, not standards. Measure your own hand or reference to choose values, then keep them consistent.
- Draw a light baseline for the finger direction.
- Mark the base knuckle cross on the baseline.
- Measure the base segment length and mark the middle knuckle cross.
- Measure the middle segment length and mark the tip knuckle cross.
- Check that the three crosses lie on one smooth curve, not a zigzag.
Set segment ratios and joint bends
Segment ratios keep fingers from looking like equal links. Choose a ratio such as 1.2 : 1.0 : 0.8 for base, middle, and tip. Multiply each ratio by your x-height unit to get actual lengths. For example, with a 5 mm unit, the segments become 6 mm, 5 mm, and 4 mm. These are hypothetical example values; measure your own equipment and label your chosen numbers as examples.
Joint bends should be drawn as gentle changes in direction at each knuckle cross. A common guide is that the middle knuckle bends more than the base knuckle when the finger curls. Draw the bend as a short arc through the knuckle cross, then continue the segment. Avoid sharp angles unless the reference clearly shows them.
- Write your ratio as three numbers, for example 1.2, 1.0, 0.8.
- Multiply each by your x-height unit and record the three lengths.
- Draw the base segment from base knuckle to middle knuckle.
- Draw the middle segment with a slight bend at the middle knuckle.
- Draw the tip segment with a smaller bend at the tip knuckle.
- Check total finger length by adding the three segment lengths.
Check with a tracing outline
A blank practice outline is a planned resource: a simple finger shape with three knuckle crosses already marked. To use it, trace the outline, then place your own crosses using your unit. Compare the traced crosses with the printed ones. If they differ by more than half a unit, adjust your measurements.
For independent drawing, draw three fingers side by side using the same unit but different bend amounts. Check that each finger has exactly three knuckle crosses and that the segment lengths match your recorded values. Valid alternatives include different bend angles and slightly different tip shapes, as long as the knuckle count and segment ratios remain consistent.
- Trace the planned outline lightly.
- Mark your own knuckle crosses using your unit.
- Measure each segment and compare with your recorded lengths.
- Redraw any segment that differs by more than half a unit.
- Repeat without tracing, using only the crosses as guides.
Worked example
An artist measures an x-height of 5 mm. They choose the hypothetical ratio 1.2 : 1.0 : 0.8. Calculate the three segment lengths and the total finger length, then state where each knuckle cross goes.
Worked answer
Base segment: 1.2 × 5 mm = 6 mm. Middle segment: 1.0 × 5 mm = 5 mm. Tip segment: 0.8 × 5 mm = 4 mm. Total finger length: 6 + 5 + 4 = 15 mm. Place the base knuckle cross at the start, the middle knuckle cross 6 mm along the finger direction, and the tip knuckle cross 6 + 5 = 11 mm along. The fingertip is at 15 mm. Check by measuring each segment with a ruler and confirming the sum equals 15 mm.
Four practice exercises
Exercise 1
An artist measures an x-height of 4 mm and uses the hypothetical ratio 1.2 : 1.0 : 0.8. Calculate the three segment lengths and the total finger length.
Show answer and check
Base 4.8 mm, middle 4.0 mm, tip 3.2 mm, total 12.0 mm.
Why: Multiply each ratio by 4 mm: 1.2 × 4 = 4.8, 1.0 × 4 = 4.0, 0.8 × 4 = 3.2. Add the three lengths: 4.8 + 4.0 + 3.2 = 12.0 mm.
Check: Measure each segment with a ruler and confirm the sum equals 12.0 mm.
Exercise 2
A finger drawing has knuckle crosses at 0 mm, 7 mm, and 12 mm along a straight line. The artist claims segments of 7 mm, 5 mm, and 5 mm. Identify the error and give the correct tip segment length.
Show answer and check
The crosses at 0 mm, 7 mm, and 12 mm give a base segment of 7 − 0 = 7 mm and a middle segment of 12 − 7 = 5 mm. The claimed tip segment of 5 mm is not supported because no tip cross is marked at 17 mm. The error is that the artist claims three segments but only two are defined by the given crosses; the correct tip segment length would be 5 mm only if the tip cross were at 17 mm.
Why: Subtract consecutive cross positions: 7 − 0 = 7 mm for the base segment, 12 − 7 = 5 mm for the middle segment. The tip cross must be placed after the middle cross, so the claimed third segment cannot be measured from the given crosses.
Check: Re-measure the distance between each pair of crosses and confirm each subtraction.
Exercise 3
An artist wants three fingers with the same ratio 1.2 : 1.0 : 0.8 and an x-height unit of 6 mm. Finger A bends 10 degrees at the middle knuckle, finger B bends 20 degrees, and finger C bends 30 degrees. State the segment lengths and explain whether the different bends are valid.
Show answer and check
Each segment is base 7.2 mm, middle 6.0 mm, tip 4.8 mm, total 18.0 mm. The different bends are valid alternatives because knuckle count and segment ratios remain consistent.
Why: Multiply the ratio by 6 mm: 1.2 × 6 = 7.2, 1.0 × 6 = 6.0, 0.8 × 6 = 4.8. Sum: 7.2 + 6.0 + 4.8 = 18.0 mm. Bend angle is a style choice, not a proportion rule.
Check: Measure each segment on all three fingers and confirm they match 7.2 mm, 6.0 mm, and 4.8 mm within half a unit.
Exercise 4
A planned blank outline shows knuckle crosses at 0 mm, 5 mm, and 9 mm. An artist traces it but places their own crosses at 0 mm, 6 mm, and 10 mm using a 5 mm x-height unit and ratio 1.2 : 1.0 : 0.8. Compare the two sets of crosses and state whether the artist should adjust.
Show answer and check
The artist's crosses give segments of 6 mm and 4 mm, while the outline gives 5 mm and 4 mm. The base segment differs by 1 mm, which is less than half a unit (2.5 mm), so no adjustment is required, but the artist should note the difference.
Why: Subtract consecutive positions: artist 6 − 0 = 6 mm and 10 − 6 = 4 mm; outline 5 − 0 = 5 mm and 9 − 5 = 4 mm. The difference is 1 mm, below the half-unit threshold of 2.5 mm.
Check: Measure both sets of crosses with a ruler and compare each segment difference to half the x-height unit.
Common mistakes
- Drawing fingers as equal-length segments. Use a ratio such as 1.2 : 1.0 : 0.8 and multiply by your x-height unit so the tip segment is shortest.
- Placing knuckle crosses in a zigzag. Draw a light curve through all three crosses before adding the finger outline.
- Changing the x-height unit midway through the drawing. Record the unit once at the top of the page and use only that value for every finger.
- Treating the x-height as a universal standard. Measure your own handwriting and label your unit as personal; compare only within one drawing.
Self-check rubric
- Exactly three knuckle crosses per finger, placed in base-to-tip order.
- Segment lengths match the recorded ratio multiplied by the x-height unit.
- The three knuckle crosses lie on one smooth curve, not a zigzag.
- The x-height unit is recorded once and used consistently.
- Valid alternatives are accepted: different bend angles and tip shapes are allowed if knuckle count and segment ratios remain consistent.
Questions and answers
What exactly is the x-height in this lesson?
It is the distance from the baseline to the midline of a lowercase x in your normal handwriting. Measure it in millimeters and use it as your personal unit.
Are the ratio numbers 1.2, 1.0, 0.8 required?
No. They are hypothetical examples. Choose your own ratio from a reference or your hand, then keep it consistent within the drawing.
How many knuckle landmarks does each finger have?
Three: base, middle, and tip. Mark them as small crosses in order from base to tip.
Can I use different bend angles for each finger?
Yes. Bend angles may vary as a valid alternative, provided each finger still has three knuckle crosses and the segment ratios stay consistent.