Free original lessons
Drawing Fur: Direction, Clumps, and Shading Practice
Learn to draw fur with clear direction and clump construction using arrows, shape breakdowns, stroke drills, and a shading panel for short and long fur.
Free lesson
Four exercises
Worked answers
Object Drawing Lessons
Fur looks convincing when strokes follow a clear direction and group into clumps rather than scatter randomly. This lesson breaks fur into two controllable parts: the flow path across a form and the clump shapes that sit along that path. You will practice short and long fur strokes, build clumps from simple shapes, and shade a panel to show depth. The convention used here is that fur direction is drawn as arrows along the surface, and clumps are drawn as tapered groups of strokes that share a root and fan slightly toward the tip. Letter styles and stroke shapes vary by hand, so the rubric rewards consistent direction and readable clumping rather than one exact line pattern.
Practice materials: Printable downloads are not available for this lesson yet. Use the instructions and four exercises below.
Reference illustration
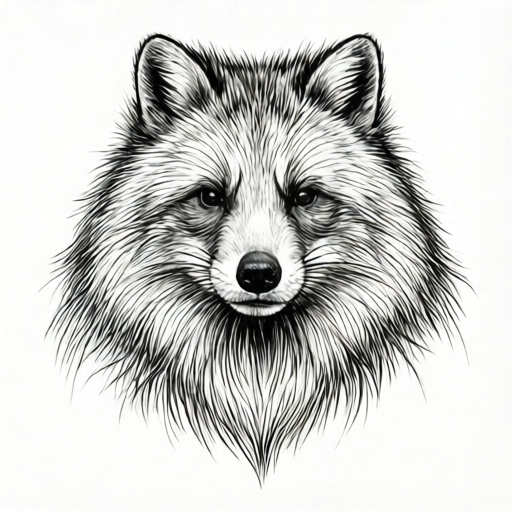
Use the stated measurements and conventions for each exercise.
Reading Direction on a Form
Fur direction is the path hair travels across a surface. On a rounded form, that path usually follows the form's curvature and changes gradually rather than switching abruptly. Before drawing individual hairs, sketch two or three light arrows that show the main flow. These arrows are a planning tool, not part of the final fur.
A useful convention is to draw arrows from the root area toward the tip area. Where two flow paths meet, such as along a limb or around a cheek, let the arrows curve into each other instead of crossing at sharp angles. This keeps the fur readable and prevents a tangled look.
- Draw a simple rounded shape to represent a fur-covered form.
- Add two or three light arrows that follow the curve of the shape from root to tip.
- Check that no arrows cross at a sharp angle; adjust them to curve smoothly.
- Keep the arrows visible during the stroke drill, then erase or lighten them for the final pass.
Building Clumps from Simple Shapes
A clump is a group of strokes that share a root and taper toward a tip. Think of each clump as a narrow triangle or teardrop: wide at the root, narrowing toward the end. Clumps overlap and nest, but each one should have a clear direction that agrees with the flow arrows.
Start with three or four clumps along one flow path. Draw the outer edges first, then fill the middle with shorter strokes that follow the same taper. Leave small gaps between clumps so the fur does not become a solid mass. For long fur, make the clumps longer and let the tips separate; for short fur, keep clumps compact and close to the surface.
- Choose one flow arrow and mark a root point along it.
- Draw a tapered clump shape from the root toward the tip, wide at the root and narrow at the end.
- Add two or three shorter strokes inside the clump that follow the same taper.
- Repeat with overlapping clumps, leaving small gaps between groups.
- Compare the clump direction with the flow arrow and adjust any stroke that points away from the path.
Short and Long Fur Stroke Drills
Short fur uses quick, close strokes that stay near the surface. Long fur uses longer strokes with more visible separation at the tips. In both cases, the stroke should start at the root and move toward the tip, with pressure lightening as the stroke ends. This creates a natural taper.
Practice each type on a small panel. For short fur, draw rows of short tapered strokes that follow one direction. For long fur, draw fewer, longer clumps with clear gaps. Keep the stroke length consistent within each row so the fur reads as a single coat rather than a mix of lengths.
- Divide a practice panel into two areas: short fur and long fur.
- In the short fur area, draw rows of short strokes that start at a root line and taper toward the tip.
- In the long fur area, draw longer clumps with wider gaps between them.
- Check that every stroke tapers and that the direction stays consistent within each row.
- Lighten the pressure at the end of each stroke to avoid blunt tips.
Shading a Fur Panel for Depth
Shading helps fur read as layered. Use darker values at the roots and in the gaps between clumps, and lighter values toward the tips. This does not mean every clump must be shaded individually; instead, shade the spaces where clumps overlap and the areas where the form turns away from the light.
Keep the shading direction consistent with the fur flow. If the light comes from the upper left, place darker values on the lower right of each clump and in the gaps. A simple check is to squint at the panel: the clump shapes should still be visible, and the darker areas should sit between clumps rather than across their tips.
- Choose a light direction and mark it lightly outside the panel.
- Shade the gaps between clumps with a darker value.
- Add a slightly darker line at the root of each clump.
- Leave the tips lighter and avoid shading across the tip taper.
- Squint at the panel to confirm that clumps remain readable and the shading supports depth.
Worked example
A rounded form has a flow arrow curving from upper left to lower right. Draw three overlapping clumps along this arrow, then shade the gaps between them. Describe the clump shapes and where the darker values go.
Worked answer
Draw three tapered clumps that start near the upper left root and narrow toward the lower right tip. Each clump is wide at the root and narrow at the end, with two or three shorter strokes inside following the same taper. Leave small gaps between clumps. Shade the gaps and the root areas with a darker value, and keep the tips lighter. The clumps should overlap slightly but remain distinct, and the shading should sit between clumps rather than across their tips.
Four practice exercises
Exercise 1
On a rounded form, draw two flow arrows that curve from the top toward the bottom right. Then draw four short-fur clumps along the lower arrow. Each clump should be wide at the root and narrow at the tip.
Show answer and check
Two arrows curve smoothly from top to bottom right without sharp crossings. Four short clumps sit along the lower arrow, each tapered from root to tip and following the arrow direction.
Why: The arrows establish a clear path, and the clumps are built as tapered groups that agree with that path. Short fur keeps the clumps compact and close to the surface.
Check: Trace each clump with a finger: it should start wide at the root and narrow toward the tip. Confirm that no clump points away from the lower arrow.
Exercise 2
Draw a long-fur panel with three overlapping clumps along one flow path. Leave a small gap between each clump. Then shade the gaps with a darker value and keep the tips lighter.
Show answer and check
Three long clumps overlap slightly along the flow path, with visible gaps between groups. Darker shading fills the gaps, and the tips remain lighter.
Why: Long fur needs more separation at the tips, and shading the gaps helps the clumps read as layered rather than flat.
Check: Squint at the panel: the three clumps should still be distinguishable, and the darkest areas should sit between clumps, not across the tips.
Exercise 3
Create a short-fur drill row of six strokes that all taper from root to tip and follow one direction. Then create a second row of four longer strokes for long fur, keeping the same direction.
Show answer and check
The first row has six short tapered strokes in one direction. The second row has four longer tapered strokes in the same direction, with more space between them.
Why: Consistent direction within each row makes the fur read as one coat. The longer strokes in the second row show the difference between short and long fur.
Check: Compare stroke lengths within each row: they should be similar. Check that every stroke tapers and that both rows follow the same direction.
Exercise 4
Draw a small fur panel with one flow arrow, three clumps, and shading. Then write one sentence explaining where you placed the darker values and why.
Show answer and check
The panel shows one flow arrow, three tapered clumps following it, and darker values in the gaps and at the roots. The sentence explains that darker values sit between clumps to show depth while tips stay lighter.
Why: This combines direction, clump construction, and shading in one small panel. The sentence checks that the shading choice is intentional.
Check: Verify that the arrow matches the clump direction, that clumps taper, and that the written sentence matches the actual shading placement.
Common mistakes
- Drawing fur strokes in random directions across the form. Plan two or three flow arrows first and make every stroke follow one of those paths.
- Making every clump the same size and spacing. Vary clump width and leave small gaps between groups so the fur reads as layered.
- Using blunt strokes that do not taper. Start with firmer pressure at the root and lighten pressure toward the tip to create a taper.
- Shading across the tips of clumps instead of between them. Place darker values in the gaps and at the roots, and keep the tips lighter.
Self-check rubric
- Direction: strokes follow the planned flow arrows and curve smoothly around the form.
- Clump construction: clumps are tapered, grouped, and overlap without becoming a solid mass.
- Stroke consistency: short and long fur drills use consistent stroke length within each row.
- Shading: darker values sit in gaps and at roots, with lighter tips supporting depth.
- Readability: squinting at the panel still shows distinct clump shapes and a clear flow path.
- Valid alternatives: slightly wavy or broken strokes are acceptable if direction and clumping remain readable.
Questions and answers
Do I need to draw every hair individually?
No. Fur is built from clumps and strokes that suggest many hairs. A few well-directed clumps read better than scattered individual lines.
How do I know if my fur direction is correct?
Check that strokes follow the flow arrows and curve smoothly around the form. If strokes cross at sharp angles or point away from the path, adjust them.
What is the difference between short and long fur in this lesson?
Short fur uses compact clumps and close strokes near the surface. Long fur uses longer clumps with more separation at the tips.
Can I use a different stroke shape?
Yes. The convention here is tapered clumps, but valid alternatives include slightly wavy or broken strokes as long as direction and clump grouping remain readable.