Free original lessons
Charcoal Landscape Drawing: Tonal Blending Practice
Learn to draw a charcoal landscape with tonal blending. Plan sky, midground, and foreground zones, blend strokes, and check values with a simple rubric.
Free lesson
Four exercises
Worked answers
Object Drawing Lessons
This lesson teaches a charcoal landscape plate focused on tonal blending. You will plan three tonal zones (sky, midground, foreground), apply charcoal strokes, blend them with a tortillon or cloth, and evaluate the result using a defined convention. The convention treats value as a relative scale from lightest (paper white) to darkest (compressed charcoal), measured in five steps. Letter styles and stroke directions vary; the rubric accepts valid alternatives. All numerical examples are hypothetical and must be replaced by measurements of your actual equipment.
Practice materials: Printable downloads are not available for this lesson yet. Use the instructions and four exercises below.
Reference illustration
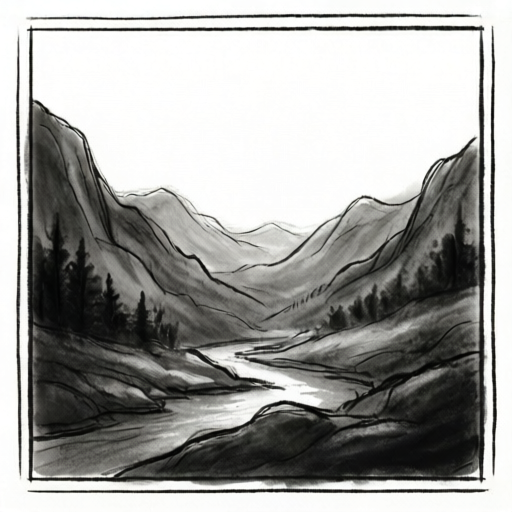
Use the stated measurements and conventions for each exercise.
Planning the Three Tonal Zones
Begin by dividing your paper into three horizontal bands: sky (top third), midground (middle third), and foreground (bottom third). Assign a target value to each zone using a five-step scale: 1 = paper white, 2 = light gray, 3 = mid gray, 4 = dark gray, 5 = near-black. For a typical daylight scene, sky might be 2, midground 3, and foreground 4. These are hypothetical examples; adjust to your scene.
Sketch the horizon line and two or three simple shapes in the midground (e.g., a hill and a tree mass). Keep shapes broad; detail comes later. Mark the foreground with a few directional lines indicating slope or path.
- Draw a light outline of the horizon and major shapes with a hard charcoal pencil.
- Label each band with its target value (1–5) in the margin.
- Check that adjacent zones differ by at least one value step to ensure separation.
Applying and Blending Charcoal Strokes
Apply charcoal in the sky using light, horizontal strokes with the side of a soft charcoal stick. Blend with a tortillon or soft cloth using gentle circular motions. Work from light to dark: start with value 2, then add a second layer only where you need value 3. For the midground, use shorter, angled strokes and blend less to retain some texture. The foreground receives the darkest strokes (value 4–5) applied with moderate pressure; blend selectively to keep edges crisp.
Blending convention: a blended area should show no distinct stroke edges when viewed at arm's length, while an unblended area may retain visible strokes. The rubric accepts either approach if the tonal zone reads clearly.
- Apply sky strokes, then blend until stroke edges disappear at arm's length.
- Add midground strokes at a different angle; blend only 50 percent of the area.
- Apply foreground strokes with firmer pressure; blend edges but leave some stroke texture.
- Step back and compare each zone to its target value label.
Checking Values and Adjusting
Use a simple value check: squint at the drawing. If two adjacent zones merge visually, increase the contrast by darkening the darker zone or lightening the lighter zone with a kneaded eraser. Measure your actual paper size and charcoal stick diameter before calculating coverage; for example, if your paper is 20 cm by 30 cm (hypothetical), the sky band is about 20 cm by 10 cm. A single blended layer may cover roughly 100 square cm per minute with a 1 cm stick; these numbers are hypothetical and must be verified with your equipment.
Record adjustments in the margin: note which zone changed and by how many value steps. This creates a checkable record.
- Squint test: confirm three distinct values.
- If zones merge, adjust one zone by one value step.
- Re-blend only the adjusted area and re-check.
Worked example
A student plans a 20 cm by 30 cm charcoal landscape (hypothetical dimensions). Sky target value 2, midground 3, foreground 4. After blending, the sky and midground merge visually. What is one valid adjustment and how do you check it?
Worked answer
Darken the midground from value 3 to value 4, or lighten the sky from value 2 to value 1. Then re-blend only the adjusted zone and perform the squint test. Record the change in the margin: 'midground 3 to 4, re-blended, squint test passed.'
Four practice exercises
Exercise 1
On a 15 cm by 20 cm paper (hypothetical), plan sky value 2, midground 3, foreground 5. Describe the stroke direction and blending extent for each zone.
Show answer and check
Sky: horizontal strokes, fully blended. Midground: angled strokes, 50 percent blended. Foreground: vertical strokes, edges blended but stroke texture retained.
Why: Varying direction and blending extent creates depth cues and keeps zones distinct.
Check: Squint test: confirm three distinct values; margin note lists direction and blend percentage for each zone.
Exercise 2
After drawing, the foreground and midground merge. You may change one zone by one value step. State the change and the check.
Show answer and check
Darken foreground from 4 to 5 (or lighten midground from 3 to 2). Re-blend the changed zone, then squint test.
Why: A one-step change increases contrast without altering the whole plate.
Check: Record the change in the margin; squint test shows separation.
Exercise 3
A student blends the sky with circular motions and the foreground with horizontal strokes, leaving visible stroke edges in the foreground. Is this valid under the rubric? Explain.
Show answer and check
Yes, if the tonal zones read clearly at arm's length and the method is described in a margin note. The rubric accepts unblended areas when intentional.
Why: The convention allows valid alternatives; the key is documented method and clear tonal separation.
Check: Check margin note for method description; squint test for zone separation.
Exercise 4
Calculate the area of the sky band on a 20 cm by 30 cm paper divided into three equal horizontal bands (hypothetical). If one blended layer covers 100 square cm per minute, how many minutes for one layer?
Show answer and check
Sky band area = 20 cm × 10 cm = 200 square cm. Time = 200 ÷ 100 = 2 minutes for one layer.
Why: Area = width × height; time = area ÷ coverage rate. Units are consistent (cm and square cm).
Check: Recompute: 20 × 10 = 200; 200 ÷ 100 = 2. Verify paper dimensions with a ruler.
Common mistakes
- Blending the entire drawing until all texture is lost. Blend sky fully, midground partially, and foreground selectively to preserve depth cues.
- Using the same stroke direction in all three zones. Vary stroke angle: horizontal in sky, angled in midground, vertical or diagonal in foreground.
- Skipping the value labels before drawing. Write target values in the margin first; compare each zone to its label after blending.
- Applying dark charcoal directly without a light base layer. Build from light to dark: start at value 2, then add value 3 or 4 only where needed.
Self-check rubric
- Three tonal zones are present and labeled with target values before drawing.
- Adjacent zones differ by at least one value step after blending, confirmed by squint test.
- Blending method is described in a margin note (tool, motion, extent).
- Stroke direction varies across zones or a valid alternative is explained.
- Adjustments are recorded with zone name and value change.
Questions and answers
What is the five-step value scale?
A relative scale from 1 (paper white) to 5 (near-black compressed charcoal). It is a convention, not a standard; adjust steps to your materials.
Do I have to blend every zone?
No. The rubric accepts fully blended, partially blended, or unblended zones if the tonal separation reads clearly at arm's length.
How do I know if my zones are distinct?
Use the squint test. If adjacent zones merge, adjust one zone by one value step and re-check.
Can I use a cloth instead of a tortillon?
Yes. Any blending tool is valid if it produces the intended effect and you can describe your method in the margin note.