Free original lessons
Draw Front-View Lips: Outline, Cupid's Bow, and Simple Shading
Learn to draw front-view lips with a clear outline, cupid's bow, and three-step color shading. Includes practice tasks, a worked example, and a rubric.
Free lesson
Four exercises
Worked answers
Object Drawing Lessons
This lesson teaches a reliable method for drawing front-view lips using an outline, a labeled cupid's bow, and simple color and shading steps. You will work on paper with a pencil and colored pencils or markers. The goal is a clear, readable lip shape rather than realistic texture or full-face proportions. All measurements are hypothetical examples; measure your own paper and tools if you adapt them. Use the convention below consistently: the lip midline is the horizontal line where the upper and lower lips meet; the cupid's bow is the two-peak curve at the top center of the upper lip; the lower-lip curve is the rounded bottom edge of the lower lip. X-height here means the vertical distance from the baseline to the midline of a letter, used only for handwriting notes; letter styles vary, so accept valid alternatives.
Practice materials: Printable downloads are not available for this lesson yet. Use the instructions and four exercises below.
Reference illustration
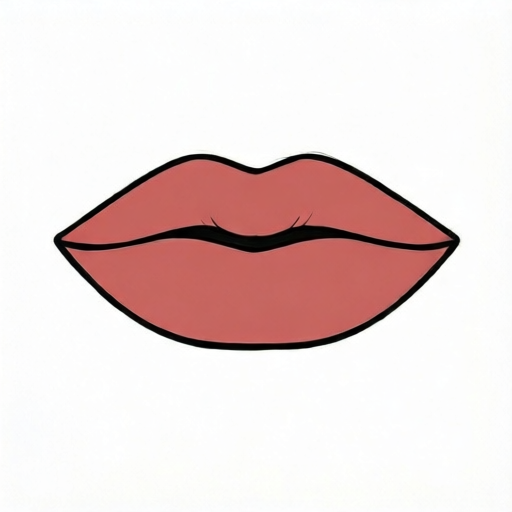
Use the stated measurements and conventions for each exercise.
Set up the outline and label the cupid's bow
Begin with a light horizontal midline about 6 cm long on plain paper. Mark the center. Above the center, draw two small peaks that meet in a shallow V; this is the cupid's bow. From each peak, curve outward and slightly down to form the upper lip's outer corners. Below the midline, draw a rounded lower-lip curve that connects the corners. Keep the outline light so you can adjust it.
Label the cupid's bow and the lower-lip curve on your drawing. Check symmetry by folding the paper gently along the midline or by measuring equal distances from the center to each corner. The outline should read as lips from the front, not as a profile.
- Draw a 6 cm horizontal midline and mark its center.
- Add two small peaks above the center to form the cupid's bow.
- Curve outward from each peak to the upper corners.
- Draw a rounded lower-lip curve below the midline.
- Label the cupid's bow and lower-lip curve, then check symmetry.
Apply three simple color and shading steps
Choose one base color for the lips. Step one: fill the entire lip area with a light, even layer of the base color, leaving the outline visible. Step two: add a slightly darker layer along the outer edges and just under the cupid's bow to suggest shadow. Step three: add a small lighter area near the center of the lower lip to suggest a highlight. Keep the shading simple and smooth; avoid realistic lip texture.
Use a consistent light direction, such as from the upper left. If you choose different colors, keep the same three-step order: base, edge shadow, center highlight. The result should be readable at a glance and match your outline.
- Fill the lip area with a light base color.
- Darken the outer edges and the area under the cupid's bow.
- Add a small highlight near the center of the lower lip.
- Check that the outline remains visible and the shading is smooth.
Check proportions and readability
Measure the width from corner to corner and the height from the top of the cupid's bow to the bottom of the lower-lip curve. As a hypothetical example, a 6 cm width with a 2 cm height gives a width-to-height ratio of 3:1. Record your own measurements and compare them to your intended ratio. Check that the cupid's bow sits near the center and that both peaks are similar in size.
Readability matters more than exact realism. Step back and ask whether the drawing reads as front-view lips. If the outline is unclear, darken it slightly or simplify the curves. Keep the shading steps distinct so the shape is easy to see.
- Measure corner-to-corner width and top-to-bottom height.
- Calculate the width-to-height ratio and compare it to your plan.
- Check that the cupid's bow is centered and the peaks are similar.
- Step back to confirm the drawing reads as front-view lips.
Worked example
Draw front-view lips on a 6 cm midline with a centered cupid's bow, then apply three shading steps. Use a hypothetical width of 6 cm and height of 2 cm.
Worked answer
The outline shows a 6 cm midline, two small peaks above the center forming the cupid's bow, outer corners at equal distances from the center, and a rounded lower-lip curve below. The width-to-height ratio is 6:2, or 3:1. Shading step one fills the lips with a light base color. Step two darkens the outer edges and the area under the cupid's bow. Step three adds a small highlight near the center of the lower lip. The outline remains visible and the drawing reads as front-view lips.
Four practice exercises
Exercise 1
Draw a front-view lip outline on a 6 cm midline. Place the cupid's bow at the center and make both peaks equal. Label the cupid's bow and lower-lip curve.
Show answer and check
A light 6 cm midline with a centered cupid's bow, equal peaks, outer corners at equal distances from the center, and a rounded lower-lip curve. Labels are present.
Why: The centered bow and equal corners create a readable front-view shape. Labeling confirms the key features.
Check: Measure from the center to each corner; they should be equal. Check that both peaks are similar in size and that the lower-lip curve is rounded.
Exercise 2
Using your outline from the first exercise, apply three shading steps with one base color. Keep the outline visible and avoid realistic texture.
Show answer and check
Step one: light base color over the lip area. Step two: darker layer along the outer edges and under the cupid's bow. Step three: small highlight near the center of the lower lip. The outline remains visible.
Why: The three-step order creates simple depth without texture. Keeping the outline visible preserves the shape.
Check: Confirm three distinct layers: base, edge shadow, and center highlight. Check that the outline is still visible and the shading is smooth.
Exercise 3
Measure a drawn lip outline with a hypothetical width of 6 cm and height of 2 cm. Calculate the width-to-height ratio and state whether it matches a 3:1 plan.
Show answer and check
The ratio is 6:2, which simplifies to 3:1. It matches the 3:1 plan.
Why: Dividing both numbers by 2 gives 3:1. Consistent units make the comparison straightforward.
Check: Re-measure width and height, divide both by the same factor, and compare the simplified ratio to 3:1.
Exercise 4
Draw a second front-view lip outline using a different base color. Keep the cupid's bow centered and apply the same three shading steps. Record one measurement you used to check symmetry.
Show answer and check
A second outline with a centered cupid's bow, equal corner distances, and three shading steps in the new color. A recorded measurement, such as 2 cm from center to each corner, confirms symmetry.
Why: Changing color tests the method's flexibility. Recording a measurement makes the symmetry check explicit.
Check: Verify equal center-to-corner distances and confirm the three shading steps are present. Accept any valid color if the order is kept.
Common mistakes
- Making the cupid's bow too wide or too deep. Keep the two peaks small and close to the center; redraw the curve lightly until it reads as a shallow bow.
- Shading the entire lip area darkly in one step. Use the three-step order: light base, edge shadow, center highlight. Keep each layer light and even.
- Ignoring symmetry between the left and right corners. Measure equal distances from the center to each corner, or fold the paper gently along the midline to compare.
- Adding realistic lip texture instead of simple shading. Stick to smooth color layers and a single highlight; the brief excludes realistic texture.
Self-check rubric
- Outline is clear and reads as front-view lips.
- Cupid's bow is centered and labeled.
- Lower-lip curve is rounded and connects the corners.
- Symmetry is checked by measurement or folding.
- Three shading steps are distinct: base, edge shadow, center highlight.
- Shading is smooth and avoids realistic texture.
- Measurements and ratio are recorded and consistent.
- Valid alternative color choices are accepted if the three-step order is kept.
Questions and answers
Do I need special paper or tools?
No. Plain paper, a pencil, and colored pencils or markers are enough. Measure your own tools if you adapt the hypothetical sizes.
Can I use different colors?
Yes. Keep the same three-step order: base color, edge shadow, center highlight. The method matters more than the specific color.
How do I know if my lips are symmetrical?
Measure from the center to each corner and compare. You can also fold the paper gently along the midline to check.
Why avoid realistic lip texture?
This lesson focuses on outline, cupid's bow, and simple color steps. Texture is outside the brief and can make the shape harder to read.