Free original lessons
Boulder Drawing: Faceted Planes and Cast Shadow
Learn to draw a boulder by dividing it into flat facets, shading each plane by light direction, and adding a believable cast shadow.
Free lesson
Four exercises
Worked answers
Object Drawing Lessons
A boulder reads as solid when its surface is broken into a few clear facets rather than smoothed into a blob. This lesson shows how to outline a boulder, divide it into planes, assign each plane a value based on a single light direction, and place a cast shadow that agrees with that light. Work on ordinary paper with a graphite pencil and a blending stub or tissue. Keep one light source for the whole drawing; changing direction midway is the most common reason a boulder looks flat. The convention used here is simple: facet edges are drawn as thin lines, and each facet receives one flat value before any blending. Valid alternatives exist, such as leaving facet edges soft or using cross-hatching instead of blending, provided the light direction stays consistent and the shadow shape matches the form.
Practice materials: Printable downloads are not available for this lesson yet. Use the instructions and four exercises below.
Reference illustration
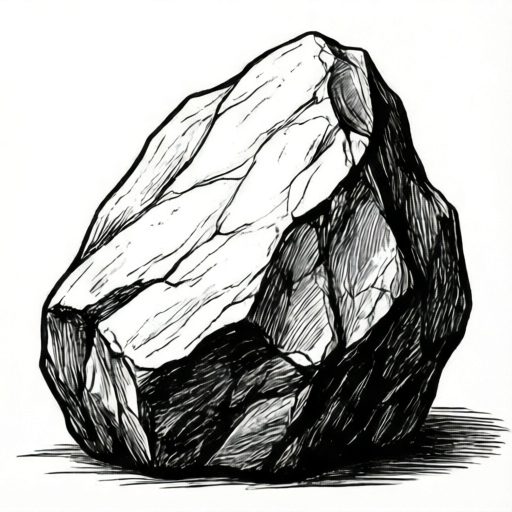
Use the stated measurements and conventions for each exercise.
Outline the boulder and mark the light
Begin with a closed outline that is wider than it is tall, with two or three gentle bumps rather than a perfect oval. Draw a small arrow at the top corner of the page pointing toward the boulder to record the light direction; for this lesson assume light comes from the upper left at roughly forty-five degrees.
Keep the outline light so it can be adjusted. A boulder outline that is too circular gives no facet edges to shade, so flatten one side slightly and add a small notch where two planes meet.
- Draw a light outline about twelve centimeters wide and eight centimeters tall.
- Mark a light-direction arrow at the upper left of the page.
- Add two or three short internal lines that cross the form, dividing it into four to six facets.
- Check that every internal line ends on the outline, not in empty space.
Assign one value to each facet
Decide which facets face the light and which turn away. Facets facing upper left receive the lightest value; facets facing lower right receive the darkest; side-facing facets sit between. Write a small letter L, M, or D inside each facet before shading so the plan is visible.
Shade each facet with even pressure in one direction, then optionally blend lightly. Do not blend across facet edges if you want crisp planes; blend only within a facet. If you prefer cross-hatching, use parallel strokes that change direction at each facet edge.
- Label each facet L, M, or D according to its facing direction.
- Shade all L facets first with light pressure.
- Shade M facets with medium pressure, then D facets with firm pressure.
- Leave the outline and facet edges visible; erase any smudges outside the boulder.
Place the cast shadow
A cast shadow falls on the ground opposite the light. With light from upper left, the shadow extends to the lower right. Its near edge touches the boulder base; its far edge is soft. The shadow shape should echo the boulder outline but stretched along the ground direction.
Keep the shadow value darker than the darkest facet near the contact point and lighter at the far end. This contact darkening anchors the boulder to the ground.
- Draw a shadow outline starting at the boulder base and extending lower right.
- Darken the shadow where it meets the boulder.
- Lighten the shadow toward its far edge with gentle strokes.
- Check that no shadow appears on the light side of the boulder.
Refine edges and check consistency
Compare the lightest facet with the lightest part of the shadow; the facet should be lighter. Compare the darkest facet with the contact shadow; the contact shadow should be darker. Soften only the outer silhouette where the boulder turns away from the viewer, and keep internal facet edges sharper.
Step back from the page and squint. If the boulder still reads as a flat shape, the facet values are too similar; increase the difference between L and D facets by one pressure step.
- Squint at the drawing to test whether facets separate.
- Adjust one facet value if two adjacent facets look identical.
- Soften the outer edge on the shadow side only.
- Confirm the light arrow, facet labels, and shadow direction all agree.
Worked example
A boulder outline is twelve centimeters wide and eight centimeters tall, divided into five facets. Light comes from upper left. Facets A and B face upper left, C faces left, D faces lower right, E faces down. Describe the value plan and cast shadow direction.
Worked answer
Label A and B as L (lightest), C as M (medium), D and E as D (darkest). Shade A and B with light pressure, C with medium, D and E with firm pressure. The cast shadow extends to the lower right, darkest where it meets the boulder base and lighter at the far edge. The light arrow at upper left must agree with both the facet labels and the shadow direction.
Four practice exercises
Exercise 1
A boulder outline is ten centimeters wide and seven centimeters tall with four facets. Light comes from upper left. Facet 1 faces upper left, facet 2 faces up, facet 3 faces right, facet 4 faces down. Assign L, M, or D to each facet and state the shadow direction.
Show answer and check
Facet 1: L. Facet 2: L or M (choose one and keep it). Facet 3: M. Facet 4: D. Shadow extends lower right.
Why: Facets facing the light source receive the lightest value; downward and right-facing facets turn away. The shadow falls opposite the upper-left light.
Check: Confirm each label matches the facet's facing direction and that the shadow points lower right, opposite the light arrow.
Exercise 2
A drawing shows a boulder with light from upper left, but the cast shadow extends to the upper left. The darkest facet is on the upper-left side. Identify two errors and state the corrections.
Show answer and check
Error one: shadow direction is wrong; it should extend lower right. Error two: darkest facet is on the light side; the darkest facet should face lower right or down.
Why: Cast shadows fall opposite the light, and the darkest planes face away from the light. Both errors contradict the recorded light direction.
Check: Trace the light arrow to the shadow and to the darkest facet; both should be on opposite sides of the boulder.
Exercise 3
A boulder has five facets labeled L, L, M, D, D. The artist shades all five with the same medium pressure. Describe the correction and the expected visual result.
Show answer and check
Re-shade the two L facets with light pressure and the two D facets with firm pressure, keeping M at medium. The facets will then separate into three clear value groups.
Why: Identical pressure removes plane information. Three pressure levels restore the light-to-dark progression that makes facets read.
Check: Squint at the drawing; adjacent facets should no longer look identical, and the L-to-D order should match the labels.
Exercise 4
A cast shadow is drawn uniformly dark from contact point to far edge. The boulder base is eight centimeters wide and the shadow extends six centimeters to the lower right. Describe how to adjust the shadow values and why.
Show answer and check
Darken the shadow at the contact edge and gradually lighten it toward the far edge six centimeters away. The contact darkening anchors the boulder; the lighter far edge shows the shadow spreading.
Why: A cast shadow is darkest where the object meets the ground and softens as it extends. Uniform darkness flattens the relationship between boulder and ground.
Check: Compare the contact shadow with the darkest facet; contact should be darker. Compare the far edge with the lightest facet; far edge should still be darker than the lightest facet but lighter than the contact.
Common mistakes
- Shading every facet with the same pressure. Label facets L, M, D first, then use three distinct pressure levels so planes separate.
- Letting the cast shadow point toward the light. Re-check the light arrow; the shadow must extend opposite the light direction.
- Blending across facet edges until the boulder looks smooth. Blend only inside each facet, or switch to cross-hatching that changes direction at edges.
- Making the cast shadow uniformly dark. Darken the contact edge and lighten the far edge to show the shadow spreading.
Self-check rubric
- Outline is closed and wider than tall with at least two gentle bumps.
- Four to six facets are marked with internal lines ending on the outline.
- Each facet has one consistent value and a visible L, M, or D label.
- Light direction is recorded once and agrees with facet values and shadow direction.
- Cast shadow extends opposite the light, is darkest at contact, and lightens outward.
- Facet edges remain distinguishable; blending does not erase planes.
- Alternative conventions such as cross-hatching are acceptable if light direction stays consistent.
Questions and answers
How many facets should a boulder have?
Four to six is enough for a clear reading. Fewer than four gives little plane information; more than six becomes busy at small scale.
Can I use cross-hatching instead of blending?
Yes. Keep stroke direction consistent within each facet and change direction at facet edges so planes remain distinct.
What if my light comes from the right?
Mirror the plan: lightest facets face upper right, darkest face lower left, and the cast shadow extends lower left.
How dark should the cast shadow be?
Darker than the darkest facet at the contact point, then lighter toward the far edge. Use pressure steps rather than a single tone.