Free original lessons
Heart Pencil Drawing: Step-by-Step Construction Guide
Learn to draw a heart with two arcs and a point, vary its size, add outline and shading, and check your work with clear steps and practice tasks.
Free lesson
Four exercises
Worked answers
Object Drawing Lessons
This guide teaches a reliable way to draw a heart shape using pencil construction. You will build the heart from two matching arcs and a lower point, then adjust size, outline, and shading. The method works at small, medium, and large scales because it relies on simple proportions and checkable landmarks rather than a single template. A convention is stated for judging shape: the heart's width is measured across the widest part of the two arcs, and its height is measured from the top midline of the arcs to the bottom point. Letter styles and handwriting vary, so the rubric accepts any heart that meets the stated proportions and symmetry checks, not one universal outline. All practice tasks are self-contained and use simple arithmetic with consistent units.
Practice materials: Printable downloads are not available for this lesson yet. Use the instructions and four exercises below.
Reference illustration
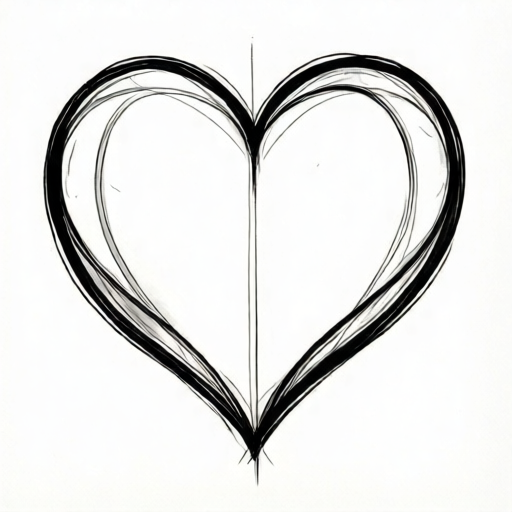
Use the stated measurements and conventions for each exercise.
Set the convention and mark the frame
Define the heart's bounding box before drawing curves. Choose a width W and a height H. A practical starting proportion is H equal to W multiplied by 0.9, but treat any numerical value here as a hypothetical example you can change. Mark the top midline, the bottom point, and the widest left and right limits. These four landmarks control the whole construction.
Use a light pencil for construction lines so they can be erased or left faint. Keep the pencil sharp enough to make clean marks, and measure the actual paper and tools you have rather than assuming a standard size.
- Draw a light vertical center line and mark the top midline point.
- Mark the bottom point on the center line at distance H below the top midline.
- Mark the left and right widest limits at distance W apart, centered on the vertical line.
- Label the four landmarks so you can check them before adding curves.
Build the two arcs and the lower point
The heart's upper lobes are two arcs that meet at the top midline and sweep outward to the widest limits. Each arc should be smooth and should not dip below the widest limit before turning toward the bottom point. The lower sides are straight or gently curved lines from the widest limits down to the bottom point.
Check symmetry by comparing left and right distances from the center line at several heights. Small differences are acceptable if the overall shape reads as a heart and the landmarks match the chosen proportions.
- From the top midline, draw the left arc outward and downward to the left widest limit.
- Mirror the right arc from the top midline to the right widest limit.
- Draw the left lower side from the left widest limit to the bottom point.
- Draw the right lower side from the right widest limit to the bottom point.
- Lightly erase construction lines only after the outline is confirmed.
Vary size and add outline and shading
To make a smaller or larger heart, scale W and H by the same factor and repeat the landmark steps. For example, if W is 8 cm and H is 7.2 cm, a half-size version uses W equal to 4 cm and H equal to 3.6 cm. These numbers are hypothetical examples; measure your own paper and choose values that fit.
Outline the final heart with a darker pencil line, keeping the line weight even. For shading, choose a light direction and apply gentle pencil strokes on the side away from the light. Keep shading inside the outline and leave a narrow unshaded band near the top midline if you want a highlight. The shading is optional and should not change the shape checks.
- Choose a scale factor and recalculate W and H.
- Repeat the landmark and arc steps at the new size.
- Outline the heart with a consistent line weight.
- Add light shading on one side, keeping strokes inside the outline.
- Check the outline and shading against the rubric before finishing.
Worked example
Construct a heart with width W equal to 10 cm and height H equal to 9 cm. Mark the top midline, bottom point, and widest limits, then describe the arcs and lower sides.
Worked answer
Mark the top midline at the center. Mark the bottom point 9 cm below it on the center line. Mark the left and right widest limits 5 cm from the center line, so the total width is 10 cm. Draw the left arc from the top midline to the left widest limit, and mirror it on the right. Draw straight lower sides from each widest limit to the bottom point. The resulting heart has a width-to-height ratio of 10 to 9, matching the chosen proportion.
Four practice exercises
Exercise 1
Draw a heart with W equal to 6 cm and H equal to 5.4 cm. State the distances from the center line to the widest limits and the distance from the top midline to the bottom point.
Show answer and check
The widest limits are 3 cm from the center line on each side, and the bottom point is 5.4 cm below the top midline.
Why: Half of W is 3 cm, so each widest limit is 3 cm from the center. H is the vertical distance from the top midline to the bottom point, so it is 5.4 cm.
Check: Measure the total width across the widest limits; it should be about 6 cm. Measure the vertical distance from the top midline to the bottom point; it should be about 5.4 cm.
Exercise 2
A heart is drawn with W equal to 8 cm and H equal to 7.2 cm. A second heart uses the same proportion but is half the size. What are the new W and H?
Show answer and check
The new W is 4 cm and the new H is 3.6 cm.
Why: Half of 8 cm is 4 cm, and half of 7.2 cm is 3.6 cm. Scaling both dimensions by the same factor keeps the proportion.
Check: Divide the new W by the old W and the new H by the old H; both ratios should be 0.5.
Exercise 3
Describe how to check that the two upper arcs are symmetric when W is 12 cm and H is 10.8 cm.
Show answer and check
Mark the center line and the widest limits at 6 cm on each side. Compare the height of the left arc and the right arc at two or three horizontal levels; the heights should match within a small tolerance.
Why: Symmetry means the left and right sides mirror each other. Equal distances to the widest limits and matching arc heights at the same levels are simple checks.
Check: Measure from the center line to each widest limit; both should be about 6 cm. Measure the vertical distance from the top midline to a point on each arc at the same horizontal distance from the center; the two distances should be close.
Exercise 4
Draw a heart with W equal to 9 cm and H equal to 8.1 cm, then add light shading on the right side. State one check that the shading did not change the shape.
Show answer and check
After shading, re-measure the total width across the widest limits and the vertical distance from the top midline to the bottom point. They should still be about 9 cm and 8.1 cm.
Why: Shading should stay inside the outline and should not move the landmarks. Re-measuring the same dimensions confirms the shape is unchanged.
Check: Use the same measuring points as before shading. If the width and height match the original values within a small tolerance, the shading did not alter the construction.
Common mistakes
- Making the two upper arcs different sizes. Compare the left and right widest limits to the center line and adjust the smaller arc outward or inward until the distances match.
- Letting the lower sides bulge outward below the widest limits. Redraw the lower sides as straight or gently inward-curving lines from the widest limits to the bottom point.
- Shading outside the outline or pressing too hard. Use light strokes and stop at the outline; build shade in layers rather than one heavy pass.
- Changing width and height by different amounts when resizing. Multiply both W and H by the same scale factor so the proportions stay consistent.
Self-check rubric
- The heart has a clear top midline, two upper arcs, and a single bottom point.
- The left and right widest limits are approximately equal distances from the center line.
- The lower sides connect the widest limits to the bottom point without bulging outward.
- The outline is continuous and the line weight is reasonably even.
- If shading is used, it stays inside the outline and is lighter than the outline.
- The chosen width and height are stated and the construction matches them within a small tolerance.
Questions and answers
Do I need a template to draw a heart?
No. The landmark method uses a bounding box, two arcs, and a bottom point. A template is optional and not required for the checks.
What proportion should I use?
A starting proportion of height equal to width times 0.9 is a hypothetical example. You can choose another proportion if you state it and keep it consistent.
How do I check symmetry without measuring every point?
Compare the left and right widest limits to the center line, then compare the arc heights at two or three levels. If those match, the heart is likely symmetric enough.
Can I leave the construction lines visible?
Yes, if they are light and do not confuse the outline. The rubric focuses on shape, proportion, and shading, not on erasing every construction mark.