Free original lessons
Draw Owl Eyes: Pupil Dilation and Iris Ring Detail
Learn to draw two owl eye variants with accurate pupil dilation and layered iris rings, using a simple convention and clear self-checks.
Free lesson
Four exercises
Worked answers
Object Drawing Lessons
Owl eyes are striking because the pupil and iris rings create a strong focal pattern. This lesson teaches a repeatable method for drawing a pair of owl eyes with either a dilated or constricted pupil, and for adding iris ring detail. You will use a simple convention: the eye outline is an oval, the iris is a smaller oval inside it, and the pupil is a circle centered in the iris. The midline is a faint horizontal reference line through each eye oval; use it to center the iris and pupil. All measurements are hypothetical examples you can adjust to your paper and tools. The goal is not a single universal answer but a clear, checkable drawing that shows pupil size and ring structure.
Practice materials: Printable downloads are not available for this lesson yet. Use the instructions and four exercises below.
Reference illustration
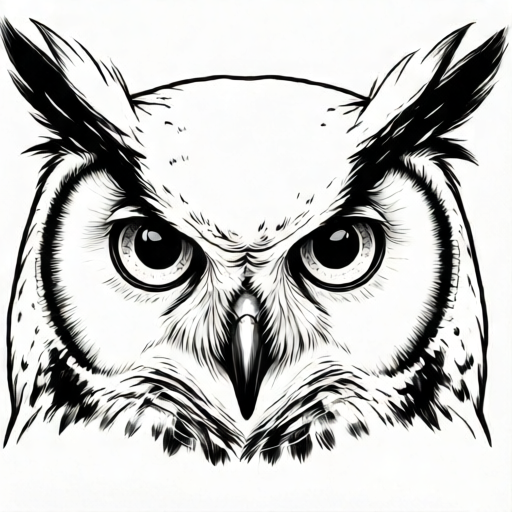
Use the stated measurements and conventions for each exercise.
Setting Up the Eye Pair and Convention
Begin by drawing two ovals side by side for the eye outlines. Keep them equal in size and level. A useful hypothetical example is an eye oval 6 cm wide and 4 cm tall, with a 2 cm gap between the eyes. Mark a faint horizontal midline through both ovals; this is your reference for centering the iris and pupil. The convention for this lesson is that the iris is an oval about 70 percent of the eye width, and the pupil is a circle whose diameter you choose to show dilation. Constricted pupils are small; dilated pupils are large. You will label your chosen sizes so the drawing is self-explanatory.
Work lightly at first. Use a graphite pencil and a soft eraser. Draw the eye outlines with a single continuous line, then check that both ovals have the same height and width by measuring with a ruler or by comparing them visually. If one is larger, adjust before adding detail. The midline helps you place the iris symmetrically. This setup prevents the common problem of mismatched eyes and gives you a stable base for the pupil and ring detail.
- Draw two equal ovals for the eye outlines, leaving a gap between them.
- Mark a faint horizontal midline through both ovals.
- Measure and note the width and height of each oval as hypothetical examples.
- Check that both ovals match in size and level before continuing.
Drawing the Iris and Pupil for Two Variants
Inside each eye oval, draw the iris as a smaller oval centered on the midline. For the left eye, draw a constricted pupil: a small circle about 20 percent of the iris width. For the right eye, draw a dilated pupil: a larger circle about 60 percent of the iris width. These percentages are hypothetical examples; the key is that the difference is obvious and consistent. Keep the pupil centered in the iris. If you want both eyes to show the same dilation, draw two identical pupils instead. The lesson focuses on comparing dilation, so one constricted and one dilated pupil is a clear choice.
After the pupil, add the iris ring detail. Draw two or three concentric rings inside the iris, spaced evenly. Use a light line for the outer ring and slightly darker lines for inner rings. The rings should follow the iris oval shape, not the pupil circle. This creates the layered look typical of owl eyes. Avoid filling the rings with heavy shading at this stage; the goal is structure. You can add short radial marks between rings later if you want texture, but keep them subtle so the rings remain readable.
- Draw a centered iris oval in each eye, about 70 percent of the eye width.
- Draw a small constricted pupil in the left iris and a large dilated pupil in the right iris.
- Add two or three concentric iris rings inside each iris, following the iris oval shape.
- Check that each pupil is centered and that the ring spacing is even.
Refining and Self-Checking the Drawing
Once the structure is in place, refine the lines. Darken the pupil outline and the outermost iris ring slightly, but keep the inner rings lighter. This creates depth without shading. Check that the pupil is a true circle by rotating your paper and looking from different angles. Check that the iris rings are concentric by measuring the distance from the pupil edge to each ring at several points; the distances should be similar. If a ring is lopsided, erase and redraw it. Use a ruler for straight measurements, but allow slight hand-drawn variation because the convention permits valid alternatives.
Finally, label your drawing with the pupil size you chose, for example 'constricted pupil: 20 percent of iris width' and 'dilated pupil: 60 percent of iris width'. This makes the drawing a clear record of your choices. Compare the two eyes: the difference in pupil size should be obvious, and the iris rings should be visible in both. If the rings are too faint, darken them slightly; if they are too heavy, lighten them with an eraser. The drawing is complete when the pupil and ring structure is clear and the two variants are easy to compare.
- Darken the pupil outline and outermost iris ring for depth.
- Check pupil circularity by rotating the paper and viewing from different angles.
- Measure ring spacing at several points to confirm concentricity.
- Label the chosen pupil sizes and compare the two variants.
Worked example
Draw a pair of owl eyes with one constricted pupil and one dilated pupil, using an eye oval 6 cm wide and 4 cm tall, an iris 70 percent of the eye width, a constricted pupil 20 percent of the iris width, and a dilated pupil 60 percent of the iris width. Add two iris rings in each eye.
Worked answer
The drawing shows two equal eye ovals 6 cm wide and 4 cm tall with a 2 cm gap. Each iris is 4.2 cm wide (70 percent of 6 cm). The left pupil is 0.84 cm wide (20 percent of 4.2 cm), and the right pupil is 2.52 cm wide (60 percent of 4.2 cm). Two concentric iris rings are drawn inside each iris, following the iris oval shape. The pupils are centered on the midline, and the ring spacing is even. The drawing is labeled with the pupil percentages.
Four practice exercises
Exercise 1
Draw two owl eye ovals 5 cm wide and 3 cm tall with a 1.5 cm gap. Draw an iris in each eye at 70 percent of the eye width. In the left eye, draw a constricted pupil at 25 percent of the iris width. In the right eye, draw a dilated pupil at 50 percent of the iris width. Add two iris rings in each eye.
Show answer and check
Eye ovals: 5 cm by 3 cm. Iris width: 3.5 cm (70 percent of 5 cm). Left pupil: 0.875 cm (25 percent of 3.5 cm). Right pupil: 1.75 cm (50 percent of 3.5 cm). Two concentric rings inside each iris, following the iris oval.
Why: The iris width is calculated as 0.70 times the eye width. Pupil widths are calculated as the given percentage of the iris width. The rings are drawn inside the iris, not the pupil.
Check: Measure the iris width and pupil widths with a ruler. Confirm the left pupil is about half the width of the right pupil. Check that the rings are evenly spaced and oval.
Exercise 2
Draw a single owl eye oval 8 cm wide and 5 cm tall. Draw an iris at 75 percent of the eye width. Draw a dilated pupil at 60 percent of the iris width. Add three iris rings. Label the pupil width.
Show answer and check
Eye oval: 8 cm by 5 cm. Iris width: 6 cm (75 percent of 8 cm). Pupil width: 3.6 cm (60 percent of 6 cm). Three concentric rings inside the iris. Label: 'pupil 3.6 cm'.
Why: The iris width is 0.75 times 8 cm. The pupil width is 0.60 times the iris width. Three rings are drawn inside the iris oval.
Check: Measure the iris and pupil widths. Confirm the pupil is centered and leaves a margin to the iris edge. Check that three rings are visible and evenly spaced.
Exercise 3
Draw two owl eye ovals 4 cm wide and 2.5 cm tall with a 1 cm gap. Draw an iris in each eye at 80 percent of the eye width. Draw a constricted pupil in both eyes at 20 percent of the iris width. Add two iris rings in each eye.
Show answer and check
Eye ovals: 4 cm by 2.5 cm. Iris width: 3.2 cm (80 percent of 4 cm). Pupil width: 0.64 cm (20 percent of 3.2 cm) in both eyes. Two concentric rings inside each iris.
Why: Both eyes have the same pupil size because the prompt specifies constricted pupils in both. The iris width is 0.80 times the eye width, and the pupil width is 0.20 times the iris width.
Check: Measure both pupils to confirm they are equal. Check that the iris is centered and the rings are oval and evenly spaced.
Exercise 4
Draw two owl eye ovals 7 cm wide and 4 cm tall with a 2 cm gap. Draw an iris in each eye at 70 percent of the eye width. In the left eye, draw a dilated pupil at 55 percent of the iris width. In the right eye, draw a constricted pupil at 15 percent of the iris width. Add three iris rings in the left eye and two in the right eye.
Show answer and check
Eye ovals: 7 cm by 4 cm. Iris width: 4.9 cm (70 percent of 7 cm). Left pupil: 2.695 cm (55 percent of 4.9 cm). Right pupil: 0.735 cm (15 percent of 4.9 cm). Left eye: three rings. Right eye: two rings.
Why: The iris width is 0.70 times the eye width. The left pupil is 0.55 times the iris width, and the right pupil is 0.15 times the iris width. The ring counts differ as specified.
Check: Measure the pupil widths and confirm the left pupil is much larger than the right. Check that the left eye has three rings and the right eye has two, all following the iris oval shape.
Common mistakes
- Drawing the iris rings as circles instead of ovals. Follow the iris oval shape; measure the ring distance from the pupil edge at several points to keep the rings oval and concentric.
- Making the pupil too large so it touches the iris edge. Leave a clear margin between the pupil and the iris edge; for a dilated pupil, keep the pupil at about 60 percent of the iris width as a hypothetical example.
- Placing the pupil off-center in the iris. Use the midline and measure from the iris edge to the pupil on both sides; adjust until the distances match.
- Making both eyes identical when comparing dilation. Deliberately choose one constricted and one dilated pupil, and label the sizes so the comparison is clear.
Self-check rubric
- Two eye ovals are equal in size and level.
- Each iris is centered and about 70 percent of the eye width.
- Pupils are centered and clearly show the chosen dilation difference.
- Two or three iris rings are visible and follow the iris oval shape.
- Ring spacing is even and concentric.
- Pupil and ring lines are clear enough to compare the two variants.
- Chosen pupil sizes are labeled or noted.
- Valid hand-drawn variation is acceptable if the structure is clear.
Questions and answers
Do I have to use the same pupil size in both eyes?
No. The lesson compares dilation, so one constricted and one dilated pupil is a valid choice. You can also draw two identical pupils if you prefer, but label your choice.
How many iris rings should I draw?
Two or three rings are enough to show detail without clutter. Keep the spacing even and follow the iris oval shape.
What if my hand-drawn ovals are not perfect?
Slight variation is acceptable. The convention allows valid alternatives; focus on clear pupil size and visible ring structure rather than perfect geometry.
Can I shade the iris?
Yes, but keep shading light so the rings remain visible. Darken the pupil and outermost ring slightly for depth.