Free original lessons
Draw a Concentric-Ring Target with an Arrow Hitting It
Learn to construct evenly spaced concentric rings and place a convincing arrow at any impact point using simple geometry and clear drawing conventions.
Free lesson
Four exercises
Worked answers
Object Drawing Lessons
This lesson teaches a reliable method for drawing a target made of concentric rings and an arrow striking it. You will set a center point, build rings with consistent spacing, and construct an arrow whose shaft, head, and fletching align with the impact point. The approach uses a defined convention: ring spacing is measured from the center outward, and the arrow is drawn as a straight shaft passing through the impact point with the head embedded at that point. Because letter styles and line weights vary, the rubric accepts any consistent, legible execution that follows the stated geometry. All measurements below are hypothetical examples; measure your own paper and tools to choose workable values.
Practice materials: Printable downloads are not available for this lesson yet. Use the instructions and four exercises below.
Reference illustration
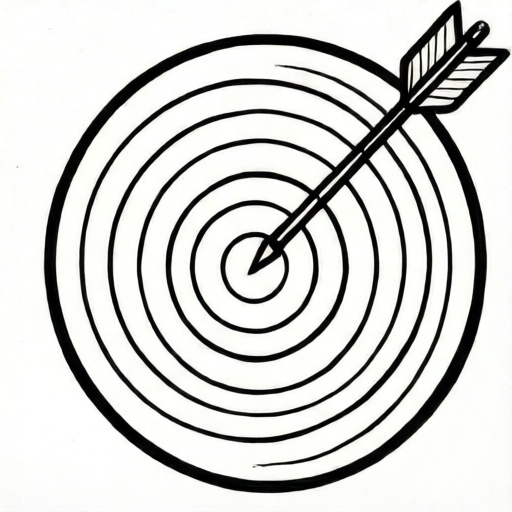
Use the stated measurements and conventions for each exercise.
Setting the Center and Ring Spacing
Begin by choosing a center point on your paper. Mark it lightly with a small cross. Decide a ring spacing value, for example 1.5 cm between ring edges, and write it down so every ring uses the same value. Concentric rings share the center, so each ring is a circle whose radius increases by the spacing value.
Use a compass or a circular template. If using a compass, set the radius to the first spacing value and draw the innermost ring. Increase the compass setting by the same spacing value for each subsequent ring. Keep the compass point fixed at the center cross to preserve concentricity.
- Mark the center with a light cross and label it C.
- Choose a spacing value, for example 1.5 cm, and record it.
- Set the compass to the spacing value and draw ring 1.
- Increase the compass by the spacing value and draw ring 2.
- Repeat for ring 3 and ring 4, keeping the point at C.
- Check that the gap between adjacent ring edges equals the spacing value.
Constructing the Arrow Shaft and Head
The arrow is drawn as a straight line from the tail to the impact point. Choose an impact point on one of the rings or between rings. Draw a light guide line through the impact point at the angle you want the arrow to travel. The shaft lies along this guide line, ending at the impact point.
The arrowhead is a small triangle whose tip coincides with the impact point. The base of the triangle sits on the shaft line, and the triangle points in the direction of travel. Keep the head small relative to the rings so the impact point remains readable.
- Choose an impact point P on or between rings.
- Draw a light guide line through P at the chosen angle.
- Mark the tail point T on the guide line away from P.
- Draw the shaft as a straight line from T to P.
- Draw a small triangle with its tip at P and its base on the shaft line.
- Erase the guide line outside the arrow.
Adding Fletching and Checking Alignment
Fletching is drawn near the tail as two or three short shapes attached to the shaft. Use a consistent convention: each fletching shape is a narrow triangle or parallelogram whose long edge touches the shaft. Space them evenly along the last portion of the shaft. The fletching should not cross the shaft line.
Check alignment by confirming that the shaft is straight, the head tip is exactly at P, and the fletching sits behind the head along the shaft. Verify that ring gaps remain equal and that the arrow does not distort the ring circles.
- Mark three evenly spaced positions near the tail.
- Draw one fletching shape at each position, touching the shaft.
- Keep all fletching on the same side convention or alternate consistently.
- Confirm the shaft is straight and the head tip is at P.
- Confirm ring gaps are equal and circles are not flattened.
Worked example
Draw a target with three concentric rings spaced 2 cm apart and an arrow hitting the second ring at the top. Describe the construction.
Worked answer
Mark center C. Set compass to 2 cm and draw ring 1. Set to 4 cm and draw ring 2. Set to 6 cm and draw ring 3. Choose impact point P on ring 2 at the top. Draw a guide line through P angled downward toward the center. Mark tail T on the guide line 8 cm from P. Draw the shaft from T to P. Draw a small triangle with tip at P and base on the shaft. Add three fletching shapes near T, each touching the shaft. Check that ring gaps are 2 cm and the head tip is at P.
Four practice exercises
Exercise 1
Draw a target with four concentric rings spaced 1 cm apart. Place an arrow hitting the third ring on the left side. Describe each construction step.
Show answer and check
Mark center C. Draw rings at radii 1, 2, 3, and 4 cm. Choose impact point P on ring 3 at the left. Draw a guide line through P angled toward the center. Mark tail T 7 cm from P along the guide line. Draw shaft from T to P. Draw a triangle with tip at P. Add three fletching shapes near T. Check gaps are 1 cm and tip is at P.
Why: The spacing value is 1 cm, so radii increase by 1 cm. The impact point is on ring 3, which has radius 3 cm. The shaft must pass through P and the head tip must sit at P.
Check: Measure the gap between adjacent ring edges; each should be 1 cm. Confirm the head tip touches P and the shaft is straight.
Exercise 2
A target has rings spaced 1.5 cm apart. The outermost ring has radius 6 cm. How many rings are there, and what are their radii? Then describe placing an arrow hitting between ring 2 and ring 3.
Show answer and check
There are four rings with radii 1.5, 3, 4.5, and 6 cm. Choose impact point P between ring 2 and ring 3, for example at radius 3.75 cm. Draw a guide line through P, mark tail T, draw the shaft to P, add a triangle with tip at P, and add fletching near T.
Why: Dividing the outer radius 6 cm by the spacing 1.5 cm gives 4 rings. The radii are multiples of 1.5 cm. An impact point between ring 2 and ring 3 lies between radii 3 cm and 4.5 cm.
Check: Verify that 6 divided by 1.5 equals 4. Check that P lies between the circles of radius 3 cm and 4.5 cm.
Exercise 3
Draw a target with three rings spaced 2 cm apart. Place an arrow hitting the innermost ring near the center. Explain how to keep the arrowhead readable.
Show answer and check
Draw rings at radii 2, 4, and 6 cm. Choose P on ring 1 near the center. Use a small triangle for the head so it does not cover the center mark. Draw the shaft from a tail point T outside the rings to P. Add fletching near T. Check that the head tip is at P and the triangle is small relative to the 2 cm spacing.
Why: A small head preserves the visibility of the center and ring 1. The shaft still passes through P, and the fletching remains near the tail.
Check: Confirm the head triangle fits within the 2 cm spacing and its tip is at P. Check that the center mark remains visible.
Exercise 4
A target has rings spaced 1.2 cm apart and an outer radius of 4.8 cm. An arrow hits the second ring at the bottom. Describe the full construction and state the radius of the second ring.
Show answer and check
There are four rings with radii 1.2, 2.4, 3.6, and 4.8 cm. The second ring has radius 2.4 cm. Choose P on ring 2 at the bottom. Draw a guide line through P, mark tail T, draw the shaft to P, add a triangle with tip at P, and add fletching near T. Check gaps are 1.2 cm.
Why: Dividing 4.8 by 1.2 gives 4 rings. The second ring radius is 2 times 1.2 cm, which is 2.4 cm. The impact point lies on that circle at the bottom.
Check: Verify that 4.8 divided by 1.2 equals 4 and that the second ring radius is 2.4 cm. Confirm the head tip is at P and gaps are 1.2 cm.
Common mistakes
- Moving the compass point between rings, causing rings to be non-concentric. Keep the compass point fixed at the center cross for every ring and re-check the center mark before drawing.
- Changing the spacing value between rings, producing uneven gaps. Record the spacing value and increase the compass setting by exactly that value each time.
- Placing the arrowhead tip away from the impact point. Draw the triangle so its tip coincides with the chosen impact point P on the guide line.
- Drawing fletching that crosses the shaft line or overlaps the head. Attach fletching only near the tail and keep each shape touching but not crossing the shaft.
Self-check rubric
- Center is marked and all rings share the same center point.
- Ring spacing is consistent and recorded; gaps between adjacent ring edges are equal.
- Arrow shaft is straight and passes through the chosen impact point.
- Arrowhead tip coincides with the impact point and points in the travel direction.
- Fletching is attached near the tail, touches the shaft, and does not cross it.
- Line work is legible and consistent; valid alternative styles are accepted if geometry is preserved.
Questions and answers
Do the rings have to be perfect circles?
Aim for smooth circles, but slight hand-drawn variation is acceptable if the center and spacing remain consistent. The rubric checks concentricity and equal gaps rather than perfect curvature.
Where can the arrow hit the target?
Any point on or between the rings is valid. Choose one impact point and keep the shaft, head, and fletching aligned to it.
How many rings should I draw?
Three or four rings are typical for this exercise. Use the same spacing value for every ring and keep the center fixed.
Can I use a template instead of a compass?
Yes. Use circular templates sized to your spacing value, but keep the same center point for every ring.