Free original lessons
Continuous Contour Face Drawing: One Unbroken Line
Learn to draw a face in a single continuous contour line, with blind and observed variants, clear conventions, and checkable practice tasks.
Free lesson
Four exercises
Worked answers
Object Drawing Lessons
Continuous contour drawing asks you to describe the visible edges of a face with one unbroken line, without lifting the pencil. This lesson defines a simple convention for what counts as a contour, explains blind and observed variants, and gives four self-contained practice tasks with reasoning and check methods. The aim is disciplined looking and steady line control, not shading or perfect proportion. All measurements use centimetres, and any numerical values are hypothetical examples you can adjust to your own paper and pencil.
Practice materials: Printable downloads are not available for this lesson yet. Use the instructions and four exercises below.
Reference illustration
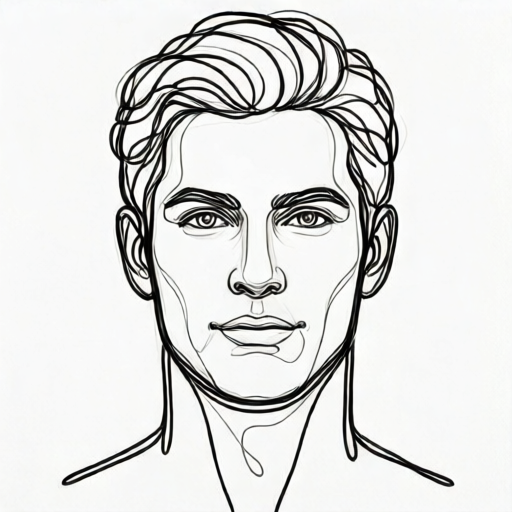
Use the stated measurements and conventions for each exercise.
What counts as a continuous contour line
A contour line traces a visible boundary or a clear change of direction on the face: the outline of the head, the edge of the jaw, the rim of an ear, the fold of an eyelid, the line where lips meet. In this lesson, the line must stay on the paper and must not lift between the start and the end of the drawing. You may retrace a short segment to reposition, but the pencil tip stays in contact with the paper.
Use one convention throughout: the line follows edges you can actually see from your viewing position, and it may cross itself when the face folds back on itself, such as where the nose overlaps the cheek. Do not invent hidden edges. Keep the line weight even unless you deliberately vary it; either choice is valid if applied consistently.
Work on plain paper with a soft graphite pencil. A hypothetical example is a 20 cm by 25 cm sheet with a 2 cm margin, but measure your own paper and label any chosen values as examples. The drawing area should be large enough that the face fills at least half the height.
- Place the paper so you can see the whole drawing area without turning your head.
- Choose a starting point on the outer edge of the face, such as the top of the forehead.
- Keep the pencil tip on the paper and move slowly along visible edges.
- When you reach a feature, trace its visible rim and return along a nearby edge rather than lifting.
- End at a point that connects back to an earlier line or at the outer edge.
Blind contour: looking without peeking
In a blind contour, you look at the face or reference and do not look at your paper until the drawing is finished. The purpose is to train your eye to follow edges rather than to produce an accurate likeness. The line may be distorted, and that is acceptable under this convention.
Set a time limit you can measure, such as a hypothetical three minutes, and keep the pencil moving at a slow, steady pace. If you lose your place, continue from where your pencil is rather than lifting to correct. A blind contour is judged on uninterrupted contact and on whether the line responds to observed edges, not on resemblance.
- Choose a reference face or a partner who holds still.
- Fix your eyes on one edge and begin the line without looking down.
- Move your eyes slowly along the edge and let your hand follow at the same pace.
- Do not lift the pencil; if you become lost, keep the line moving and rejoin an edge.
- Stop at the time limit or when you return to the starting edge, then look at the paper.
Observed contour: glancing to check
In an observed contour, you may glance at your paper briefly to check placement, but the pencil still does not lift. Glancing is limited to short checks; the majority of time is spent looking at the subject. This variant allows a more readable face while preserving the single-line rule.
Use the same edge convention as the blind variant. You may cross lines where features overlap, and you may retrace a short segment to adjust. Keep the line continuous from start to finish. A useful check is to trace the finished line with your finger from beginning to end without jumping gaps.
- Study the face for a few seconds and note three or four major edges.
- Start at the outer edge and draw while looking mostly at the face.
- Glance at the paper for no more than a second to check scale or position.
- Continue along visible edges, crossing the line where the nose or ear overlaps.
- Finish by connecting to an earlier line or closing the outer edge.
Judging your drawing with a fair rubric
Because letter styles and facial features vary, there is no single correct contour. Judge the drawing on the convention you chose, not on likeness alone. A valid alternative is a line that crosses itself more often but still follows visible edges and never lifts.
Use the rubric below consistently. For each criterion, mark met or not met and note one specific observation. This keeps feedback checkable and avoids rewarding or penalising style differences.
- Confirm the pencil never lifted between start and end.
- Check that the line follows visible edges rather than invented hidden ones.
- Check that crossings occur only where features overlap.
- Confirm the chosen variant, blind or observed, was followed.
- Note one strength and one specific improvement.
Worked example
A learner draws an observed contour of a face on a 20 cm by 25 cm sheet. They start at the top of the forehead, follow the outer edge down the jaw, trace the visible rim of the left ear, cross the line where the nose overlaps the cheek, and end where the line meets the starting forehead edge. The pencil never lifts. The face fills about 12 cm of the 25 cm height. Evaluate the drawing against the lesson convention.
Worked answer
The drawing meets the continuous-line rule because the pencil stayed on the paper from start to end. It follows visible edges, including the ear rim and the nose overlap, and the crossing is justified by overlap. The observed variant allows brief glances, which are not described as excessive. The face fills about 12 cm of 25 cm, which is under half the height, so scale is the main weakness. Overall it is a valid contour with one specific improvement: enlarge the face to fill at least half the drawing height.
Four practice exercises
Exercise 1
Blind contour task: place a reference face in front of you. Without looking at your paper, draw the face in one continuous line for a measured two minutes. Start at the top of the forehead and end at the outer edge of the jaw. Do not lift the pencil. Afterward, look at the paper and trace the line with your finger from start to end.
Show answer and check
A valid result is any single unbroken line that follows visible edges and shows no deliberate lifting. Distortion is acceptable. The line should begin at the forehead and end at the jaw edge, with crossings only where features overlap.
Why: The blind variant tests looking behaviour and continuous contact. Because the drawer cannot see the paper, resemblance is not the criterion; the check is whether the line responds to observed edges and stays unbroken.
Check: Trace the finished line with your finger from the start point to the end point. If your finger jumps a gap, the line is not continuous. Confirm you did not look at the paper during the two minutes.
Exercise 2
Observed contour task: draw a face in one continuous line, allowing brief glances at your paper. Include the outer head edge, one ear rim, the line where the lips meet, and one crossing where the nose overlaps the cheek. Keep the pencil on the paper throughout. Use a 20 cm by 25 cm sheet and aim for the face to fill at least 12 cm of the height.
Show answer and check
A valid drawing is one unbroken line that includes the four required edges, crosses once at the nose-cheek overlap, and fills at least 12 cm of the 25 cm height. Brief glances are allowed; constant looking is not.
Why: The observed variant permits short checks for placement while preserving the single-line rule. The required edges make the task self-contained and checkable, and the scale target is a hypothetical example measured on the stated sheet.
Check: Measure the drawn face height against 12 cm. Trace the line for gaps. Confirm the four required edges appear and that the crossing occurs at a visible overlap.
Exercise 3
Convention check: a learner draws a continuous line that follows the outer head edge, then lifts the pencil to reposition at the ear, then continues. They claim the drawing is a valid contour because the line looks connected. Decide whether it meets the lesson convention and state one fix.
Show answer and check
It does not meet the convention because the pencil lifted between the head edge and the ear. The fix is to retrace a short segment without lifting, or to continue from the ear without repositioning, accepting the placement.
Why: The defining rule is uninterrupted contact from start to end. A visually connected line is not enough if the pencil left the paper. The fix preserves the single-line rule rather than correcting appearance.
Check: Ask the learner to describe every point where the pencil left the paper. If any lift occurred, mark the continuous-line criterion as not met.
Exercise 4
Scale and crossing task: on a 20 cm by 25 cm sheet, draw an observed contour face in one continuous line. Make the face fill at least 12 cm of the height and include exactly one self-crossing at a visible overlap. Then measure the face height and count the crossings.
Show answer and check
A valid result has one unbroken line, a measured face height of at least 12 cm, and exactly one crossing at a visible overlap such as the nose over the cheek. More or fewer crossings fails the stated count.
Why: This task combines the continuous-line rule with two checkable quantities: height in centimetres and crossing count. The values are hypothetical examples tied to the stated sheet size, so they can be measured directly.
Check: Use a ruler to measure the face height in centimetres. Count self-crossings and confirm each occurs at a visible overlap. Trace the line for gaps.
Common mistakes
- Lifting the pencil to correct a misplaced feature. Retrace a short segment without lifting, or accept the placement and continue; the single-line rule matters more than correction.
- Drawing hidden edges that cannot be seen from the viewing position. Return to the visible rim of the feature and follow only edges you can actually observe.
- Looking at the paper constantly during a blind contour. Fix your eyes on the reference and let the hand follow; treat distortion as expected under the blind convention.
- Making the line too fast and skipping edges. Slow the pace so the pencil tip stays on an edge; a steady slow line is easier to check than a fast one.
Self-check rubric
- Continuous line: pencil tip stayed on the paper from start to end, with no gaps.
- Edge convention: line follows visible edges and does not invent hidden edges.
- Crossings: any self-crossing corresponds to a visible overlap.
- Variant discipline: blind variant shows no looking at paper; observed variant shows only brief glances.
- Scale: face fills at least half the drawing height, or a specific reason is noted.
- Checkability: the finished line can be traced by finger from start to end without jumping gaps.
Questions and answers
May the line cross itself?
Yes, when a feature overlaps another, such as the nose crossing the cheek. Crossings are valid if they follow visible edges.
How long should a blind contour take?
Any measured time you choose is valid; a hypothetical example is three minutes. The check is uninterrupted contact, not the clock.
Can I use an eraser?
No, because erasing usually requires lifting the pencil. Accept the line and continue; the convention is about continuous contact.
Is a distorted blind contour a failure?
No. Under this convention, distortion is expected. Judge blind contours on looking behaviour and continuous line, not resemblance.