Free original lessons
Owl Head Drawing: Facial Disk, Ear Tufts, and Beak Placement
Learn to construct an owl head by mapping the facial disk, building ear tufts, and placing the beak with clear steps and self-checks.
Free lesson
Four exercises
Worked answers
Object Drawing Lessons
This lesson teaches a reliable construction order for an owl head: first the facial disk, then the ear tufts, then the beak. You will use a simple convention for height and alignment so that your drawing stays consistent and easy to check. The focus is on structure, not feather texture or eye detail. All measurements are hypothetical examples; measure your own paper and tools before drawing.
Practice materials: Printable downloads are not available for this lesson yet. Use the instructions and four exercises below.
Reference illustration
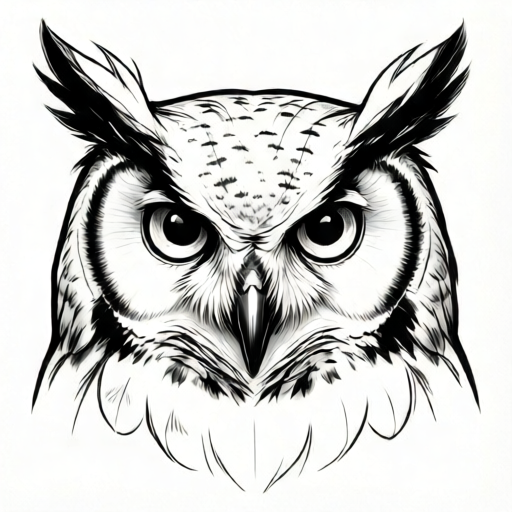
Use the stated measurements and conventions for each exercise.
Set the frame and the facial disk
Choose a drawing area and mark a vertical center line. Decide a head height H as the distance from the top of the head to the bottom of the facial disk. For this lesson, H is a hypothetical 10 cm on a 15 cm wide frame; adjust to your paper.
The facial disk is the shallow heart or rounded shield that frames the face. Draw it as two mirrored arcs that meet at a soft point below the beak area. Keep the disk width about 0.8H and the disk height about 0.9H. These ratios are examples, not rules.
Mark the midline and a horizontal midline at 0.5H. The disk should be symmetric about the vertical center line. Check symmetry by folding the paper lightly or by measuring equal distances left and right at three heights.
- Draw a vertical center line and mark top and bottom points of the head height H.
- Mark the horizontal midline at 0.5H.
- Draw the left disk arc from the top center to the lower point, staying about 0.4H from the center line at its widest.
- Mirror the right arc and check that both arcs meet cleanly at the lower point.
- Measure three horizontal pairs across the disk to confirm equal left and right distances.
Build ear tufts as shaped wedges
Ear tufts are not random spikes; treat each as a wedge with a base on the head outline and a tip above it. Place the base so it starts about 0.1H inward from the outer edge of the disk and rises about 0.25H above the top of the head.
Draw the tuft as two lines from the base to a single tip, then soften the inner line so the tuft reads as part of the head. Keep left and right tufts mirrored in angle and length. A valid alternative is a rounded tuft; the rubric accepts any tuft that has a clear base, a tip, and mirrored placement.
Check tuft height by measuring from the top of the head to each tip. The two measurements should be within a small tolerance you choose, for example 0.5 cm on a 10 cm head.
- Mark the base of each tuft on the head outline at about 0.1H inward from the disk edge.
- Mark each tip about 0.25H above the top of the head, mirrored left and right.
- Draw two lines per tuft from base to tip, then soften the inner line.
- Measure tip heights and compare left and right; adjust to your chosen tolerance.
Place the beak and run a final alignment check
Place the beak on the vertical center line, with its top at about 0.55H from the top of the head and its tip at about 0.7H. The beak is a small triangle or rounded wedge, wider at the top and narrowing to the tip. Keep it inside the facial disk.
Check that the beak is centered by measuring equal distances from the beak sides to the disk arcs at the same height. Then check that the disk, tufts, and beak share the same vertical center line.
Finally, review the whole head against the rubric: clear disk shape, mirrored tufts with base and tip, centered beak, and consistent units. Erase construction lines only after these checks pass.
- Mark the beak top at 0.55H and the tip at 0.7H on the center line.
- Draw the beak as a narrow wedge inside the disk.
- Measure left and right distances from the beak to the disk arcs at two heights.
- Confirm all parts align to the center line and record your measurements.
Worked example
On a 15 cm wide frame, use H = 10 cm. Mark the center line, draw a facial disk with width 8 cm and height 9 cm, add mirrored ear tufts rising 2.5 cm above the head, and place the beak top at 5.5 cm and tip at 7 cm from the top of the head. Describe the checks.
Worked answer
The disk spans 4 cm each side of the center line at its widest and meets at a lower point 9 cm below the top. Each tuft base sits 1 cm inward from the disk edge and each tip is 2.5 cm above the head top. The beak sits on the center line from 5.5 cm to 7 cm. Checks: three horizontal disk pairs measure equal left and right; tuft tip heights match within 0.5 cm; beak side distances to the disk arcs are equal at two heights.
Four practice exercises
Exercise 1
Use H = 8 cm. Draw a facial disk 6.4 cm wide and 7.2 cm high, centered on a vertical line. Mark three horizontal check pairs and state the expected equal distances at the widest point.
Show answer and check
At the widest point, each side is 3.2 cm from the center line, so each pair should measure 3.2 cm left and 3.2 cm right.
Why: Disk width is 0.8H = 6.4 cm; half-width is 3.2 cm. Symmetry means equal left and right distances at the same height.
Check: Measure from the center line to each arc at the widest height; both should read 3.2 cm within your chosen tolerance.
Exercise 2
With H = 12 cm, place ear tuft tips 3 cm above the head top. The left tip measures 3.2 cm and the right tip measures 2.7 cm. Are they within a 0.5 cm tolerance? What adjustment is needed?
Show answer and check
The difference is 0.5 cm, so they are at the tolerance limit. Adjust one tip by 0.5 cm so both read 3.0 cm or within 0.5 cm of each other.
Why: Tolerance is a chosen limit; here 0.5 cm. The measured difference equals the limit, so a small correction keeps the tufts mirrored.
Check: Re-measure both tips from the head top after adjustment and confirm the difference is 0.5 cm or less.
Exercise 3
Use H = 10 cm. Place the beak top at 0.55H and the tip at 0.7H. Give the two distances from the top of the head and the beak length.
Show answer and check
Top is 5.5 cm and tip is 7.0 cm from the head top; beak length is 1.5 cm.
Why: 0.55 times 10 cm is 5.5 cm; 0.7 times 10 cm is 7.0 cm; the difference is 1.5 cm.
Check: Measure from the head top to the beak top and tip; subtract to confirm 1.5 cm.
Exercise 4
A facial disk is drawn 9 cm wide on a head with H = 10 cm. Is the width within the example ratio of 0.8H? If not, state the difference and one correction.
Show answer and check
0.8H is 8 cm, so 9 cm is 1 cm too wide. Reduce each side by 0.5 cm to reach 8 cm total width.
Why: The example ratio gives 8 cm; the drawing exceeds it by 1 cm. Splitting the correction keeps symmetry.
Check: Measure total disk width and each half-width; after correction, total should be 8 cm and each side 4 cm.
Common mistakes
- Drawing the facial disk as a perfect circle that hides the lower point. Use two mirrored arcs that meet at a soft lower point; check width and height ratios against your chosen H.
- Making ear tufts different lengths or angles. Mark both tips at the same height above the head and measure each tuft from base to tip.
- Placing the beak off the center line or too low. Mark the beak top and tip on the vertical center line at your chosen fractions of H, then measure left and right distances.
- Mixing units or changing H midway. Write H and all fractions on the page before drawing; use one unit throughout and re-measure after each stage.
Self-check rubric
- Facial disk is a clear shallow heart or rounded shield with a soft lower point and is symmetric about the center line.
- Ear tufts each have a visible base on the head outline and a tip, and left and right tufts are mirrored in placement and length within the chosen tolerance.
- Beak is centered on the vertical center line, sits inside the disk, and uses the chosen fractions of H.
- Construction lines are consistent, units are stated once, and measurements are recorded.
- Valid alternatives such as rounded tufts or a wider disk are accepted if the structural checks pass.
Questions and answers
Do I need to draw feathers or detailed eyes?
No. This lesson covers only the facial disk, ear tufts, and beak placement. Feather texture and eye detail are outside the boundary.
Can ear tufts be rounded instead of pointed?
Yes. The rubric accepts any tuft with a clear base, a tip, and mirrored placement. Rounded and pointed tufts are both valid if they meet those checks.
What if my paper is a different size?
Choose your own head height H and keep the fractions consistent. The numerical values here are hypothetical examples; measure your actual paper.
How do I know the drawing is symmetric enough?
Measure equal left and right distances at three heights across the disk and compare tuft tip heights within a tolerance you set, such as 0.5 cm.