Free original lessons
Drawing on a Napkin: Fold Creases, Edge Framing, and Pen vs. Pencil
Learn to sketch on napkin surfaces by planning around fold creases, using edge framing, and comparing pen and pencil on textured paper.
Free lesson
Four exercises
Worked answers
Object Drawing Lessons
A napkin is a small, textured, often folded surface. Its creases interrupt lines, its edges offer a natural frame, and its absorbency changes how pen and pencil behave. This lesson teaches a repeatable approach: map the creases, choose an edge frame, test your tool, then draw with deliberate line breaks. All measurements are hypothetical examples; measure your own napkin and tools. The convention for judging line placement is simple: a line is valid if it follows the intended path within one pencil-width of the reference point, and any break at a crease is acceptable if the line resumes within two pencil-widths on the other side. Letter styles and handwriting vary, so rubric items reward consistent choices rather than a single universal look.
Practice materials: Printable downloads are not available for this lesson yet. Use the instructions and four exercises below.
Reference illustration
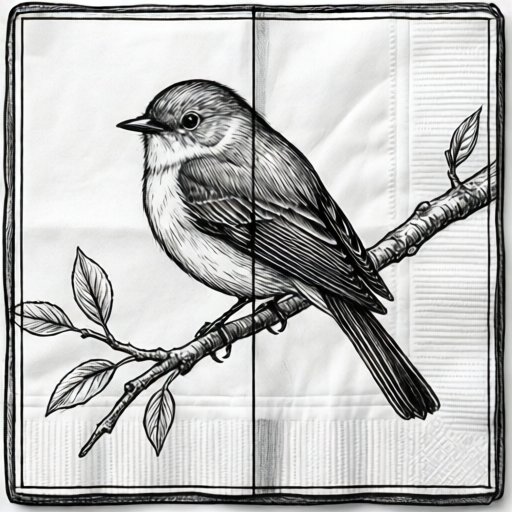
Use the stated measurements and conventions for each exercise.
Map the napkin before you draw
Place the napkin flat and identify every fold crease. Creases are raised or depressed ridges that catch pen tips and skip pencil graphite. Treat each crease as a planned interruption, not a mistake. Lightly mark the crease lines with a pencil if the napkin is plain, or note them mentally if patterned. Decide which side of the napkin is smoother; that side usually gives more consistent line flow.
Choose a drawing area that avoids placing a critical curve directly on a crease. If a crease must cross the subject, plan a natural break there, such as the gap between two petals or the joint of a limb. Keep your hand off the drawing area to reduce smudging, especially with pencil on textured paper.
- Lay the napkin flat and count the creases.
- Mark each crease lightly with a pencil dot at both ends.
- Choose a drawing area that keeps the main subject away from the deepest crease.
- Decide where lines will break at creases and where they will continue.
Use edge framing to control scale
Napkin edges are ready-made frames. Leave a margin of about one finger-width from each edge so the drawing does not feel cramped. For a hypothetical example, if the napkin is 20 cm by 20 cm, a 2 cm margin leaves a 16 cm by 16 cm drawing area. Measure your own napkin and label your chosen margin as a hypothetical value.
Edge framing helps you judge proportion. Compare the height of your subject to the framed height, not to the whole napkin. If the subject is too tall, rotate the napkin or reduce the margin. Keep the frame consistent on all sides unless you deliberately choose an off-center composition.
- Measure the napkin width and height in centimeters.
- Choose a margin, for example 2 cm, and label it as a hypothetical example.
- Draw four light guide dots at the framed corners.
- Check that the subject fits inside the frame before adding detail.
Compare pen and pencil on textured paper
Pen and pencil respond differently to napkin texture. A ballpoint pen glides but can skip over creases and bleed into absorbent fibers. A pencil catches on ridges and produces lighter, grayer lines that smudge easily. Test both tools on a spare corner or a separate scrap of similar paper before committing to the main drawing.
Use pen for confident, continuous contours and pencil for light planning lines. If you use both, draw pencil guides first, then pen over them, and wait for ink to dry before erasing pencil. On a napkin, erasing can tear fibers, so keep erasing minimal. Record which tool you used and where it skipped so you can plan breaks at those points.
- Test pen and pencil on a spare corner with three short lines each.
- Note where each tool skips or catches.
- Use pencil for light guides and pen for final contours.
- Mark planned line breaks at creases and rough texture patches.
Draw with deliberate breaks and checks
Start with the largest shape inside your edge frame. Draw slowly and stop at each crease rather than forcing the line across. Resume on the other side after checking alignment. A valid break is one that resumes within two pencil-widths of the intended path. This convention allows natural interruptions without penalizing the drawing.
After the main shape, add one or two details that help identify the subject. Keep details away from the deepest crease. Finish by checking the frame margin, the number of planned breaks, and whether pen and pencil lines are consistent with your test. If a line drifts, note the drift and correct the next line rather than erasing aggressively.
- Draw the largest shape first, stopping at creases.
- Resume each line within two pencil-widths of the intended path.
- Add one or two identifying details inside the frame.
- Check margin width, break count, and tool consistency.
Worked example
A napkin measures 18 cm by 18 cm and has one vertical crease 9 cm from the left edge. You want a 2 cm margin and a simple leaf shape 10 cm tall. Plan the frame, the crease break, and the tool choice.
Worked answer
Framed area: 18 minus 2 minus 2 equals 14 cm wide and 14 cm tall. The leaf at 10 cm tall fits inside 14 cm. Place the leaf centered so the vertical crease at 9 cm crosses near its middle. Plan one break at the crease: draw the left half of the leaf, stop at the crease, resume on the right within two pencil-widths of the intended path. Test pen and pencil on a spare corner; if pen skips at the crease, use pencil for guides and pen for the outer contour, breaking at the crease. Check that the leaf stays inside the 14 cm frame and that the break resumes within the allowed tolerance.
Four practice exercises
Exercise 1
A napkin is 16 cm wide and 16 cm tall with a horizontal crease 8 cm from the top. You choose a 2 cm margin. State the framed width and height, and say whether a 9 cm tall subject fits.
Show answer and check
Framed width is 16 minus 2 minus 2 equals 12 cm. Framed height is also 12 cm. A 9 cm tall subject fits inside 12 cm.
Why: Subtract the margin twice from each dimension. Compare the subject height to the framed height.
Check: Recompute 16 minus 4 equals 12. Confirm 9 is less than 12.
Exercise 2
A napkin has two creases: one at 5 cm from the left and one at 11 cm from the left. Your subject is 8 cm wide and centered. Describe where you would plan line breaks and why.
Show answer and check
With an 8 cm wide subject centered on a 16 cm napkin, it spans from 4 cm to 12 cm. The crease at 5 cm and the crease at 11 cm both cross the subject. Plan breaks at both creases, resuming within two pencil-widths of the intended path on each side.
Why: Centering an 8 cm subject on 16 cm leaves 4 cm on each side. The subject occupies 4 cm to 12 cm, so both creases fall inside it.
Check: Mark 4 cm and 12 cm on the napkin edge. Confirm 5 cm and 11 cm lie between them.
Exercise 3
You test pen and pencil on a spare corner. Pen skips twice on a crease; pencil catches once but smudges. You need a dark outline and light guides. Which tool do you use for each task, and what break do you plan?
Show answer and check
Use pencil for light guides because it catches less than pen on the crease, and use pen for the dark outline but plan a break at the crease where it skipped. Resume the pen line within two pencil-widths of the intended path.
Why: Match tool strengths to tasks: pencil for planning, pen for dark final lines. Plan breaks where the test showed skipping.
Check: Repeat the test on the same corner. Confirm the pen skip location matches your planned break.
Exercise 4
A napkin is 20 cm by 20 cm. You want a 3 cm margin. Your subject is 15 cm tall. Does it fit? If not, what margin would allow it to fit with at least 1 cm margin?
Show answer and check
With a 3 cm margin, framed height is 20 minus 6 equals 14 cm. A 15 cm subject does not fit. With a 1 cm margin, framed height is 18 cm, so 15 cm fits. A 2 cm margin gives 16 cm, which also fits.
Why: Subtract twice the margin from the napkin height. Compare the subject height to the framed height.
Check: Recompute 20 minus 2 times margin for each case. Confirm 15 is less than the framed height.
Common mistakes
- Drawing straight across a deep crease and forcing the line. Stop at the crease, lift the tool, and resume on the other side within two pencil-widths of the intended path.
- Ignoring the napkin edge and drawing too close to the border. Measure a margin, mark four guide dots, and keep the subject inside the framed area.
- Using pen without testing it on the napkin texture. Test pen and pencil on a spare corner first, then choose the tool that skips less.
- Erasing heavily on a napkin and tearing fibers. Use light pencil guides, erase minimally, and correct by drawing the next line rather than scrubbing.
Self-check rubric
- The drawing stays inside the chosen edge frame, with margin width stated as a hypothetical example.
- At least one planned line break occurs at a crease and resumes within two pencil-widths of the intended path.
- Pen and pencil are tested on a spare corner before the main drawing.
- The main shape is drawn before small details.
- Tool choice is consistent with the test results and noted in the sketch.
- Valid alternatives are accepted: different margins, different break locations, and different tool choices are allowed if the reasoning is consistent.
Questions and answers
Do I have to break every line at every crease?
No. Break lines only where the crease interferes with tool flow or where a break looks natural. The convention allows breaks that resume within two pencil-widths of the intended path.
Which is better on a napkin, pen or pencil?
Neither is universally better. Test both on a spare corner. Pen gives darker continuous lines but may skip; pencil gives lighter planning lines but smudges. Choose based on your test.
How wide should the edge margin be?
A margin of about one finger-width is a practical starting point. For a hypothetical 20 cm napkin, a 2 cm margin leaves a 16 cm drawing area. Measure your own napkin and label your margin as a hypothetical example.
Can I rotate the napkin to fit the subject?
Yes. Rotating the napkin changes which creases cross the subject. Choose the orientation that keeps the main shape away from the deepest crease.