Free original lessons
Colored Flower Drawing: Petal Layering and Palette Practice
Learn to render a colored flower by planning petal layers, blending hues, and choosing a limited palette with clear, checkable steps.
Free lesson
Four exercises
Worked answers
Object Drawing Lessons
This lesson teaches colored flower rendering with a focus on petal layering, color blending, and palette selection. You will work from a simple flower structure, build layers from back to front, and use a small palette to keep colors harmonious. The convention for this lesson is that any petal shape is valid if it follows the layer order and color plan you set. All resources described are planned and free; they are not yet built. Measure your own paper and tools, and treat any numbers here as hypothetical examples.
Practice materials: Printable downloads are not available for this lesson yet. Use the instructions and four exercises below.
Reference illustration
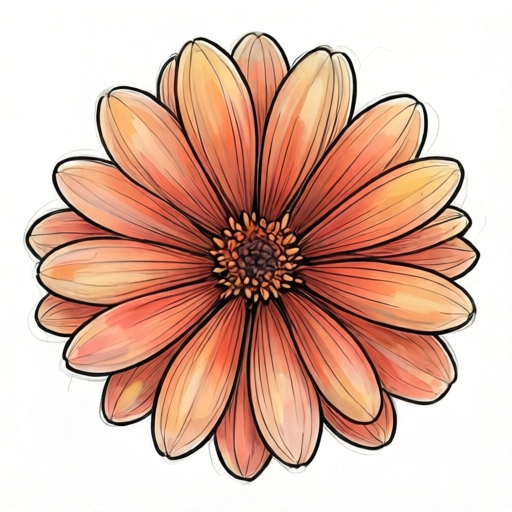
Use the stated measurements and conventions for each exercise.
Plan the flower structure and petal layers
Start by drawing a light center point and a stem line. Decide how many petals you want in each layer, such as five back petals, five middle petals, and three front petals. This is a hypothetical example; adjust to your flower. Mark the back layer first because it sits behind the others. Keep petal shapes simple: a rounded teardrop or a pointed oval both work. The convention is that a petal is valid if it connects to the center area and does not cross a petal in a later layer.
Number your layers on scrap paper: 1 for back, 2 for middle, 3 for front. Draw layer 1 lightly, then layer 2 so it overlaps layer 1, then layer 3 so it overlaps layer 2. Overlap is what creates depth. Leave a small gap between petals in the same layer so the flower does not look crowded. Check that every petal has a clear front-to-back order before adding color.
- Draw a center point and a stem line lightly.
- Sketch layer 1 petals behind the center, spaced evenly.
- Sketch layer 2 petals overlapping layer 1.
- Sketch layer 3 petals overlapping layer 2 at the front.
- Label each layer and check that no front petal is hidden by a back petal.
Choose a limited palette and test blends
Pick three to five colors: one light, one medium, one dark, and optionally one accent. A hypothetical palette could be light yellow, medium orange, dark red, and a small green for leaves. Write the color names on a swatch strip and make a small patch of each. Then test two blends: light plus medium, and medium plus dark. Record which blend looks smooth and which looks muddy. Muddy means the blend loses brightness or turns gray unexpectedly.
Use the palette panel to assign colors to layers. For example, layer 1 uses the light color, layer 2 uses the medium, and layer 3 uses the dark. Blends can go on the edges of petals to soften transitions. Keep the accent color for the center or a few petal tips. Check that every color in your palette appears at least once and that no more than five colors are used.
- Write three to five color names on a swatch strip.
- Make a small patch of each color.
- Blend light with medium and medium with dark on scrap paper.
- Assign one main color to each petal layer.
- Mark where the accent color will go.
Render petals from back to front with blending
Color layer 1 first, using the light color. Keep the color even and leave the edges slightly lighter if you want a soft look. Then color layer 2 with the medium color, overlapping the base of layer 1 petals. Blend the medium into the light at the overlap by lightly dragging the medium color into the light area. Next, color layer 3 with the dark color and blend its base into the medium. Work from back to front so front petals stay crisp.
For blending, use short strokes that follow the petal direction. If a blend looks streaky, add a thin layer of the lighter color over the streak and smooth it. Check each petal for three things: it sits in the correct layer, its color matches the palette plan, and its blend zone is smooth enough that you cannot see a hard line unless you intended one. The center can be colored last with the accent color.
- Color layer 1 with the light color.
- Color layer 2 with the medium color and blend into layer 1.
- Color layer 3 with the dark color and blend into layer 2.
- Add the accent color to the center or petal tips.
- Smooth any streaky blends with a thin layer of the lighter color.
Check the finished flower against the rubric
Review the flower using the rubric below. The rubric allows valid alternatives: a pointed petal and a rounded petal can both score full marks if the layer order and palette plan are clear. Check that the palette has no more than five colors, that each layer uses its assigned color, and that blends are smooth in at least two overlap zones. Also check that the flower is recognizable as a flower and that the center is distinct from the petals.
If a check fails, fix only that part. For example, if a front petal is hidden, redraw it on top. If a blend is muddy, test a new blend on scrap paper before applying it. Keep the original layer labels visible until the end so you can verify the order.
- Count the colors used and confirm five or fewer.
- Confirm each layer uses its planned color.
- Check two overlap zones for smooth blending.
- Confirm the center is distinct from the petals.
- Fix any failed check without redrawing the whole flower.
Worked example
A flower has three layers: layer 1 with four light-yellow petals, layer 2 with four medium-orange petals, and layer 3 with three dark-red petals. The palette also has green for the stem. Describe the coloring order and one blend check.
Worked answer
Color layer 1 light yellow first. Then color layer 2 medium orange, overlapping the base of layer 1, and blend the orange into the yellow at the overlap. Next, color layer 3 dark red, overlapping layer 2, and blend the red into the orange. Color the stem green last. For the blend check, look at the overlap between layer 2 and layer 1: the orange should fade into the yellow without a hard line. If a hard line appears, add a thin layer of yellow over the line and smooth it with short strokes.
Four practice exercises
Exercise 1
A flower has two layers. Layer 1 has five light-blue petals. Layer 2 has three medium-blue petals. The palette also has one dark-blue accent for the center. List the coloring order and state how many colors are used.
Show answer and check
Color layer 1 light blue first, then layer 2 medium blue, then the center dark blue. Three colors are used.
Why: Back layer comes first, then front layer, then the center. The palette has light, medium, and dark blue, which is three colors.
Check: Count the colors named: light blue, medium blue, dark blue. Confirm layer 1 is colored before layer 2.
Exercise 2
You have a palette of light pink, medium pink, dark pink, and green. You want four petals in layer 1, four in layer 2, and two in layer 3. Assign one main color to each layer and say where the green goes.
Show answer and check
Layer 1 light pink, layer 2 medium pink, layer 3 dark pink, green for the stem and leaves.
Why: The three pinks map naturally to back, middle, and front layers. Green is not a petal color here, so it goes to the stem and leaves.
Check: Confirm each layer has exactly one main color and that green is not used on petals.
Exercise 3
A blend between medium orange and dark red looks streaky. Describe one fix using only colors already in the palette.
Show answer and check
Add a thin layer of medium orange over the streak and smooth it with short strokes, or add a thin layer of dark red and smooth it.
Why: A thin layer of one of the blended colors softens the streak without adding a new color.
Check: Check that the fix uses only medium orange or dark red and that the streak is less visible after smoothing.
Exercise 4
A flower drawing uses six colors: light yellow, medium yellow, dark yellow, light red, medium red, and green. The rubric allows five or fewer colors. Name one color to remove and explain how to keep the layer plan clear.
Show answer and check
Remove light red. Keep layer 1 light yellow, layer 2 medium yellow, layer 3 dark yellow, and use green for the stem. The layer plan stays clear because each layer still has one main color.
Why: Removing one color brings the palette to five. The remaining colors still cover three layers plus the stem.
Check: Count the remaining colors: light yellow, medium yellow, dark yellow, medium red, green. That is five.
Common mistakes
- Coloring front petals before back petals, which hides the layer order. Color layer 1 first, then layer 2, then layer 3, and keep the layer labels visible.
- Using too many colors, which makes the flower look busy. Limit the palette to three to five colors and assign one main color per layer.
- Blending with long, heavy strokes that create streaks. Use short strokes that follow the petal direction and smooth streaks with a thin layer of the lighter color.
- Making all petals the same size and spacing, which flattens the flower. Vary petal size slightly between layers and leave small gaps within each layer.
Self-check rubric
- Layer order is clear: back petals sit behind middle petals, and middle petals sit behind front petals.
- Palette uses five or fewer colors, and each layer has an assigned main color.
- At least two overlap zones show smooth blending with no unintended hard line.
- The flower is recognizable, and the center is distinct from the petals.
- Valid alternatives are accepted: any petal shape that connects to the center area and respects layer order scores full marks.
Questions and answers
Do I have to use the same number of petals in each layer?
No. The layer order matters more than the count. Use any count that fits your flower, but keep back petals behind front petals.
Can I use a pointed petal instead of a rounded one?
Yes. The convention allows any petal shape that connects to the center area and respects the layer order.
How do I know if a blend is smooth enough?
A blend is smooth enough when you cannot see a hard line between the two colors unless you intended one. Check two overlap zones.
What if my palette has only three colors?
Three colors are fine. Use light, medium, and dark, and skip the accent or use the medium as the accent.