Free original lessons
Face Contour and Highlight: Drawing Light Direction
Learn to place contour lines and highlights on a face by choosing a light direction, using a simple convention and checkable steps.
Free lesson
Four exercises
Worked answers
Object Drawing Lessons
This lesson teaches how to draw a face with contour and highlight by first choosing a light direction. You will use a defined convention: contour lines mark where the form turns away from the light, and highlights mark the areas that face the light most directly. The face is treated as a set of simple rounded forms—forehead, cheeks, nose, chin—so you can place marks consistently. You will practice reading a light-direction arrow, mapping contour and highlight zones, and checking your placement with simple arithmetic and visual tests. The goal is not full portrait proportion or feature detail, but clear, repeatable placement of contour and highlight driven by one chosen light direction.
Practice materials: Printable downloads are not available for this lesson yet. Use the instructions and four exercises below.
Reference illustration
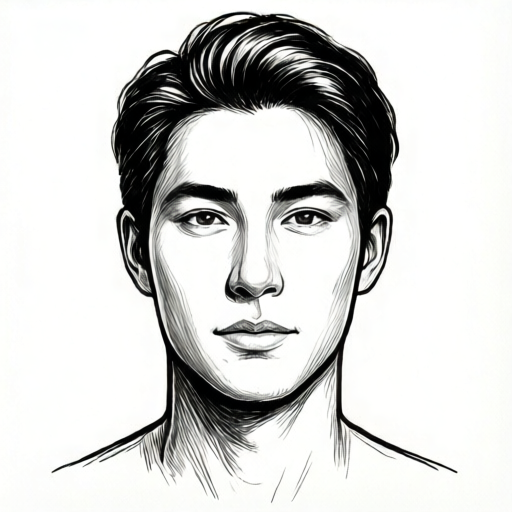
Use the stated measurements and conventions for each exercise.
Choose a light direction and define your convention
Start by drawing a light-direction arrow on your page. For this lesson, use a single arrow that points from the light source toward the face. A hypothetical example is an arrow pointing from the upper left toward the lower right. Label the arrow tip as the light side and the tail as the shadow side. Keep the arrow visible while you draw so every mark can be checked against it.
Use this convention: a contour line is a thin line placed where the face surface turns away from the light. A highlight is a small, bright area placed where the surface faces the light most directly. Contour lines do not outline the whole face; they sit inside the face where the form changes direction. Highlights are not large white patches; they are small zones on the forehead, cheek, nose bridge, and chin that face the arrow.
- Draw the light-direction arrow and label light side and shadow side.
- Draw a simple face oval with a vertical midline and a horizontal eye line.
- Mark the forehead, cheek, nose bridge, and chin as rounded forms.
- Decide which side of each form faces the arrow; that side can receive a highlight.
- Decide where each form turns away from the arrow; that is where a contour line goes.
Place contour lines where the form turns away
Contour lines follow the turning edge of a form. On a cheek, the contour line sits on the shadow side of the cheek’s rounded surface, not at the outer face outline. On the nose, a contour line can sit along the side of the nose bridge that turns away from the light. On the forehead, a contour line can curve where the forehead rounds back toward the temple on the shadow side.
Keep contour lines thin and broken rather than continuous outlines. A broken line suggests a turning surface without flattening the face. Check each contour line by asking whether it sits on the side of a form that turns away from the arrow. If a line sits on the light side, move it toward the shadow side or remove it.
- Identify the shadow side of each rounded form relative to the arrow.
- Draw a thin, broken line along the turning edge on that shadow side.
- Leave gaps where the form still faces the light.
- Compare each line to the arrow; move any line that sits on the light side.
Place highlights where the surface faces the light
Highlights sit on the part of each rounded form that faces the arrow most directly. With an upper-left arrow, the highlight on the forehead sits slightly left of center and above the brow line. The cheek highlight sits on the upper-left cheek. The nose bridge highlight sits on the left side of the bridge. The chin highlight sits on the upper-left chin.
Keep highlights small and simple. A highlight can be a small oval or a short soft mark. Do not place a highlight on a contour line; the two marks describe opposite conditions. Check each highlight by asking whether a flat surface at that spot would face the arrow. If not, move the highlight toward the light side.
- Find the spot on each form that faces the arrow most directly.
- Place a small highlight mark there, keeping it inside the form.
- Keep highlights away from contour lines and face outlines.
- Check each highlight against the arrow and adjust toward the light side if needed.
Check placement with simple arithmetic and a visual test
Use a simple count to check balance. Count the number of contour marks on the shadow side and the number of highlights on the light side. For a balanced study, the counts should be close, such as three contour marks and three highlights. This is a checkable arithmetic guide, not a universal rule. If one count is much larger, review whether marks are misplaced.
Use a visual test by turning the page so the arrow points upward. The highlights should sit on the upper-facing parts of the forms, and the contour lines should sit on the lower-facing turning edges. This test helps catch marks that were placed by habit rather than by the chosen light direction.
- Count contour marks and highlight marks separately.
- Compare the counts; if they differ greatly, review placement.
- Turn the page so the arrow points up and check which marks face the light.
- Adjust any mark that fails the visual test.
Worked example
A face oval is drawn with a light-direction arrow pointing from the upper left toward the lower right. Place three contour marks and three highlights using the lesson convention.
Worked answer
Place a highlight on the upper-left forehead, the upper-left cheek, and the left side of the nose bridge. Place a thin broken contour line on the right side of the forehead where it turns toward the temple, on the right side of the nose bridge, and on the lower-right chin where it turns away from the light. Count: three highlights on the light side, three contour marks on the shadow side. Turn the page so the arrow points up; highlights face upward and contour lines sit on lower turning edges.
Four practice exercises
Exercise 1
A face oval has a light-direction arrow pointing from the upper right toward the lower left. Describe where to place one highlight on the forehead and one contour line on the cheek.
Show answer and check
Place the forehead highlight on the upper-right forehead, slightly right of center. Place the cheek contour line on the left side of the cheek where it turns away from the light.
Why: The arrow points from the upper right, so the right side of each rounded form faces the light and the left side turns away. The highlight goes on the light-facing upper-right forehead; the contour line goes on the shadow-side left cheek.
Check: Turn the page so the arrow points up. The highlight should face upward on the right; the contour line should sit on the lower turning edge on the left.
Exercise 2
A face oval has a light-direction arrow pointing straight down from above. Describe where to place a highlight on the nose bridge and a contour line on the chin.
Show answer and check
Place the nose bridge highlight on the upper part of the bridge. Place the chin contour line along the lower edge of the chin where it turns downward away from the light.
Why: With light from above, upward-facing surfaces receive highlights and downward-facing surfaces turn away. The upper nose bridge faces up; the lower chin turns down.
Check: Count one highlight and one contour mark. Turn the page so the arrow points up; the highlight should be on an upward-facing surface and the contour line on a downward turning edge.
Exercise 3
A face oval has a light-direction arrow pointing from the left toward the right. A student places a highlight on the right cheek and a contour line on the left cheek. Using the lesson convention, explain what is wrong and how to fix it.
Show answer and check
The marks are reversed. Move the highlight to the left cheek and the contour line to the right cheek.
Why: The arrow points from the left, so the left side faces the light and the right side turns away. A highlight belongs on the light-facing left cheek; a contour line belongs on the shadow-side right cheek.
Check: Check each mark against the arrow: the highlight should be on the side the arrow comes from, and the contour line on the side the arrow goes toward.
Exercise 4
A face oval has a light-direction arrow pointing from the lower left toward the upper right. Describe a balanced set of two highlights and two contour marks, and state the count check.
Show answer and check
Place highlights on the lower-left cheek and the left side of the chin. Place contour lines on the upper-right forehead and the right side of the nose bridge. Count: two highlights on the light side, two contour marks on the shadow side.
Why: The arrow points from the lower left, so lower-left surfaces face the light and upper-right surfaces turn away. The chosen marks follow that pattern and keep the counts equal.
Check: Count highlights and contour marks separately; both should be two. Turn the page so the arrow points up and confirm highlights face upward while contour lines sit on turning edges.
Common mistakes
- Drawing contour lines as a continuous outline around the whole face. Use thin, broken lines only where a form turns away from the light, and leave gaps on the light side.
- Placing highlights on the shadow side because that area looks empty. Check each highlight against the light-direction arrow and move it to the side that faces the arrow.
- Making highlights too large so they read as white patches. Keep highlights small and inside the rounded form; a short soft mark is enough.
- Putting a highlight directly on a contour line. Separate the marks: contour lines sit on turning edges, highlights sit on light-facing surfaces.
Self-check rubric
- A light-direction arrow is drawn and labeled light side and shadow side.
- Contour lines are thin, broken, and placed on the side of a form turning away from the light.
- Highlights are small and placed on the side of a form facing the light.
- Highlights are not placed on contour lines or face outlines.
- The count of contour marks and highlights is close, and each mark passes the arrow check.
- Valid alternatives are accepted if the convention is consistently applied and marks can be checked against the chosen arrow.
Questions and answers
Do I need to draw a full portrait to practice this?
No. A simple face oval with a midline and eye line is enough. The lesson focuses on contour and highlight placement, not full portrait proportion.
What if my light direction is different from the example?
Use your own arrow. The convention stays the same: contour lines on the side turning away, highlights on the side facing the light.
How many contour lines and highlights should I use?
There is no fixed number. A practical check is to keep the counts close, such as three contour marks and three highlights, and to verify each mark against the arrow.
Can I use soft shading instead of lines?
Yes, as long as the convention is clear. A soft edge can act as a contour line if it marks where the form turns away from the light.