Free original lessons
Front Face Drawing: Symmetry and Feature Placement
Learn to draw a front-facing face using a symmetry axis, proportion guides, and mirrored feature boxes. Includes checks, practice tasks, and a rubric.
Free lesson
Four exercises
Worked answers
Object Drawing Lessons
This lesson teaches front-face drawing by focusing on symmetry and feature placement. You will use a vertical symmetry axis, horizontal proportion guides, and feature-placement boxes to position the eyes, nose, and mouth consistently. The goal is a balanced front view, not shading or three-quarter angles. All measurements are simple and checkable; any numerical values are hypothetical examples you can adjust to your paper size.
Practice materials: Printable downloads are not available for this lesson yet. Use the instructions and four exercises below.
Reference illustration
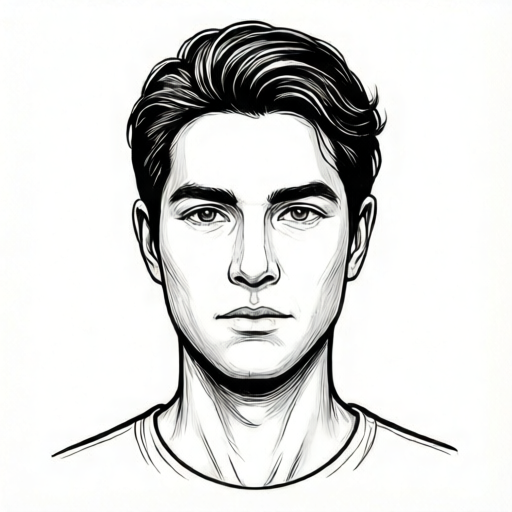
Use the stated measurements and conventions for each exercise.
Set Up the Symmetry Axis and Proportion Guides
Begin with a light vertical line down the center of your paper. This is the symmetry axis. It is a guide, not a final line. Next, mark the top and bottom of the face oval on the axis. Divide the vertical distance into equal parts to place horizontal guides. A common hypothetical example is a face height of 12 cm, divided into thirds of 4 cm each: hairline to brow, brow to nose base, nose base to chin. These values are examples only; measure your own paper and choose simple divisions.
Draw horizontal guides lightly across the face area at the brow, nose base, and chin. Add a guide halfway between the brow and nose base for the eye line. Keep all guides faint so they can be erased later. The axis and guides create a coordinate system for placing features symmetrically.
- Draw a light vertical symmetry axis.
- Mark the top and bottom of the face oval on the axis.
- Divide the height into equal parts and draw horizontal guides at brow, nose base, and chin.
- Add an eye-line guide halfway between brow and nose base.
- Label each guide lightly so you can check placement later.
Place Mirrored Feature Boxes
Feature-placement boxes are small rectangles drawn on both sides of the axis. For the eyes, draw a box on the left and an identical box on the right, each centered on the eye-line guide. The distance from the axis to each box center should be equal. A hypothetical example is 2 cm from the axis to each eye center on a 12 cm face. Check equality with a ruler or by counting grid squares.
For the nose, place a narrow box centered on the axis, spanning from the eye line to the nose-base guide. For the mouth, place a wider box centered on the axis, between the nose base and chin. The mouth box should be wider than the nose box but narrower than the distance between the outer eye boxes. These relationships are checkable without a universal standard.
- Draw a left eye box and a right eye box at equal distances from the axis.
- Center a nose box on the axis between eye line and nose base.
- Center a mouth box on the axis between nose base and chin.
- Compare widths: mouth box wider than nose box, narrower than outer eye span.
- Erase or lighten boxes after features are sketched.
Sketch Features with a Defined Convention
Use a simple convention: x-height is the distance from baseline to midline for lowercase letters, and for facial features treat the eye-line guide as a baseline and the brow guide as a midline reference. Letter styles vary, so this convention is a guide, not a rule. Draw each eye as an oval or almond shape inside its box, with the pupil centered. Mirror the left and right eye shapes by checking equal distances from the axis.
Draw the nose as a soft triangle or curved line centered on the axis, with the base at the nose-base guide. Draw the mouth as a curved line inside the mouth box, centered on the axis. Keep features simple and symmetrical. Valid alternatives include different eye shapes, nose shapes, and mouth curves, as long as placement and mirroring are consistent.
- Sketch left eye inside its box; sketch right eye as a mirrored shape.
- Check that both eye centers are equidistant from the axis.
- Sketch nose centered on the axis with base at the nose-base guide.
- Sketch mouth centered in the mouth box.
- Lightly erase guides and boxes, keeping the face sketch.
Check Symmetry and Placement
Use simple arithmetic to check symmetry. Measure the distance from the axis to the left eye center and to the right eye center. They should be equal within your chosen tolerance, such as 2 mm on a 12 cm face. Repeat for the outer corners of the eyes and the mouth. Check vertical placement: eye line halfway between brow and nose base; nose base at the lower third guide; mouth between nose base and chin.
A valid alternative is to fold the paper along the axis and hold it to a light source to compare left and right feature positions. Do not claim printer tolerances; measure your actual equipment and paper. If a feature is off, adjust the box and redraw the feature lightly before finalizing.
- Measure axis-to-eye-center distances on both sides; compare.
- Measure axis-to-mouth-corner distances on both sides; compare.
- Check vertical guides: eye line, nose base, mouth position.
- Fold along axis to compare left and right if paper is thin enough.
- Adjust any feature that fails the check.
Worked example
On a 12 cm face height, place the eye line halfway between brow and nose base. Brow is at 4 cm from top, nose base at 8 cm from top. Where is the eye line?
Worked answer
The eye line is at 6 cm from the top, because halfway between 4 cm and 8 cm is 6 cm.
Four practice exercises
Exercise 1
A face height is 15 cm. Brow is at 5 cm from top, nose base at 10 cm from top. Where should the eye line be placed?
Show answer and check
7.5 cm from the top.
Why: The eye line is halfway between brow and nose base: (5 + 10) / 2 = 7.5 cm.
Check: Measure from the top to the eye line; it should equal 7.5 cm and be equidistant from 5 cm and 10 cm.
Exercise 2
On a 12 cm face, the left eye center is 2 cm from the axis. Where should the right eye center be?
Show answer and check
2 cm from the axis on the right side.
Why: Mirrored features must be equidistant from the symmetry axis.
Check: Measure both distances with a ruler; they should match within your chosen tolerance.
Exercise 3
The nose box is 2 cm wide and the outer eye span is 6 cm. The mouth box is 7 cm wide. Is the mouth box acceptable?
Show answer and check
No. The mouth box should be wider than the nose box but narrower than the outer eye span, so it should be between 2 cm and 6 cm.
Why: The placement rule compares widths: nose < mouth < outer eye span. 7 cm is wider than 6 cm, so it fails.
Check: Compare the three widths with a ruler; adjust the mouth box until it is between 2 cm and 6 cm.
Exercise 4
A sketch has the eye line at 7 cm from the top, brow at 4 cm, and nose base at 9 cm. Is the eye line correctly placed?
Show answer and check
No. Halfway between 4 cm and 9 cm is 6.5 cm, so the eye line should be at 6.5 cm, not 7 cm.
Why: Compute (4 + 9) / 2 = 6.5 cm. The sketch is 0.5 cm too low.
Check: Measure the eye line and compare to the computed halfway value; adjust if the difference exceeds your tolerance.
Common mistakes
- Drawing the axis but not using it to mirror features. Measure equal distances from the axis for each paired feature before sketching.
- Placing the eye line too high or too low. Use the halfway guide between brow and nose base; check with a ruler.
- Making the mouth box wider than the outer eye span. Compare widths and narrow the mouth box until it is between nose width and outer eye span.
- Erasing guides too early and losing placement checks. Keep guides light until all symmetry checks are complete.
Self-check rubric
- Symmetry axis is present and used as a guide.
- Eye centers are equidistant from the axis within the chosen tolerance.
- Eye line is halfway between brow and nose base.
- Nose box is centered on the axis with base at the nose-base guide.
- Mouth box is centered on the axis and wider than nose box but narrower than outer eye span.
- Features are sketched with a defined convention and valid alternatives are accepted if placement checks pass.
Questions and answers
Do I need to use exact centimeters?
No. The centimeter values are hypothetical examples. Choose simple divisions that fit your paper and keep units consistent.
Can I use different eye shapes?
Yes. The convention allows valid alternatives. Keep placement and mirroring consistent, and check equal distances from the axis.
What if my paper is too thick to fold?
Use a ruler to measure equal distances from the axis instead of folding.
Does this lesson cover shading?
No. This lesson focuses on front-face symmetry and feature placement only.