Free original lessons
Draw a Halo Ring with Glow and Tilt: A Guided Construction
Learn to draw a tilted halo ring with soft glow above a head. Build ellipses, shade glow, and place the ring using clear steps and checks.
Free lesson
Four exercises
Worked answers
Object Drawing Lessons
A halo is a simple ring, but tilt and glow make it read as floating light. This guide teaches a repeatable construction: define an ellipse with a tilt axis, place it above a head reference, then shade a glow that fades outward. You will use a convention for line weight and value so results are checkable, not subjective. All measurements are hypothetical examples; measure your own paper and tools.
Practice materials: Printable downloads are not available for this lesson yet. Use the instructions and four exercises below.
Reference illustration
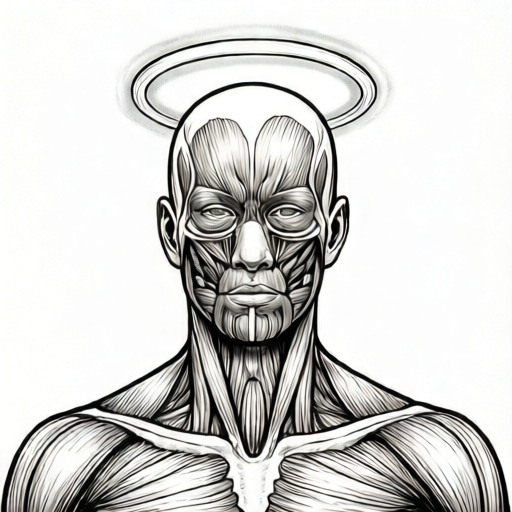
Use the stated measurements and conventions for each exercise.
Build the tilted ellipse
Start with a center point and a tilt axis. The tilt axis is a straight line through the center at the angle you want the ring to lean. For a gentle tilt, use 20 to 30 degrees from horizontal; for a stronger tilt, use 45 degrees. These are hypothetical example angles, not standards.
Draw the ellipse by marking the major axis along the tilt line and the minor axis perpendicular to it. The major axis is the ring's visible width; the minor axis is its apparent thickness. Choose the tilt angle and the axis ratio independently: the angle sets how the ring leans, while the major-to-minor ratio sets apparent foreshortening. A 2:1 ratio is moderate foreshortening; 3:1 or greater is strong foreshortening. These are hypothetical examples, not standards. Keep the ellipse smooth by rotating the paper rather than bending your wrist.
Check symmetry: fold the paper lightly or use a mirror to compare left and right halves. The ellipse should have no corners. If it looks like a lens, the minor axis is too short; if it looks like a circle, the minor axis is too long for the chosen foreshortening.
- Mark a center point and draw a tilt axis at your chosen angle.
- Mark the major axis endpoints on the tilt line at equal distances from center.
- Mark the minor axis endpoints perpendicular to the tilt line, using your chosen ratio.
- Connect the four endpoints with a smooth closed curve, rotating the paper as needed.
- Check symmetry with a mirror and adjust the curve before adding glow.
Place the ring above a head reference
Draw a simple head reference: an oval for the skull and a vertical center line for the face. The halo sits above the head, not around it. A common placement is one to two head-heights above the top of the skull, but this is a hypothetical example; adjust to your composition.
Align the halo's center with the head's vertical center line unless you want a deliberate offset. The tilt axis should cross the center line at the halo's center. The ring's lowest point should clear the top of the head by a visible gap so the halo reads as floating.
Check placement by drawing a light vertical line through the head and halo centers. If the halo center is off the line, decide whether the offset is intentional. The gap between head top and ring bottom should be consistent on both sides when viewed from the front.
- Draw an oval head and a vertical center line.
- Mark the top of the skull and decide a gap distance above it.
- Place the halo center on the vertical line at the chosen height.
- Draw the tilt axis through the halo center at your angle.
- Check that the ring's lowest point clears the head by the chosen gap.
Shade the glow with a value convention
Use a three-value convention: core (the ring itself), near-glow (a band just outside the ring), and far-glow (a faint outer band). The core is the darkest line; near-glow is lighter; far-glow is lightest. This convention makes the glow checkable and allows different shading styles.
Shade the near-glow by drawing short strokes parallel to the ring's curve, fading outward. Keep the band width roughly equal to the ring's minor axis. For far-glow, use a lighter pencil or reduce pressure, and stop before the glow touches the head unless you want a soft overlap.
Check value order: core should be darker than near-glow, and near-glow darker than far-glow. Use a scrap paper test strip to compare values. If the glow looks like a solid outline, widen the near-glow and lighten the far-glow.
- Draw the ring core with a firm, even line.
- Add a near-glow band outside the ring, strokes parallel to the curve.
- Add a far-glow band outside the near-glow with lighter pressure.
- Compare values on a test strip and adjust pressure.
- Erase any glow that crosses the head unless overlap is intended.
Refine tilt and glow together
Tilt affects how glow reads. A strongly tilted ring shows more of the near-glow on the lower edge and less on the upper edge. Keep the glow band width consistent around the ring, but let the visible amount vary with the ellipse's curvature.
Refine the ellipse by checking that the major and minor axes remain perpendicular. A common error is letting the minor axis drift, which makes the ring look twisted. Use a light construction line and erase it after the final curve is drawn.
Final check: the ring should look like a floating ellipse with a soft halo, not a flat circle or a thick donut. The glow should fade outward in at least two steps. The placement should show a clear gap above the head.
- Recheck the tilt axis and perpendicular minor axis.
- Adjust glow band width to match the minor axis.
- Soften the far-glow with light strokes or blending.
- Erase construction lines and compare values one last time.
- Confirm the gap above the head and the ring's symmetry.
Worked example
Draw a halo with a 30-degree tilt above a head. Use a major axis of 6 cm and a minor axis of 3 cm. Place the halo center 3 cm above the top of the skull. Shade a near-glow band 3 cm wide and a far-glow band 1.5 cm wide.
Worked answer
Draw a vertical head center line and mark the skull top. Mark the halo center 3 cm above the skull top on the same line. Draw a tilt axis through the halo center at 30 degrees from horizontal. Mark major axis endpoints 3 cm from center along the tilt line. Mark minor axis endpoints 1.5 cm from center perpendicular to the tilt line. Connect the four points with a smooth ellipse. Shade the core firmly, add a near-glow band with medium pressure, then a far-glow band with light pressure. Check that the ring's lowest point is 1.5 cm above the skull top (center 3 cm above skull minus 1.5 cm minor-axis half-length) and that the glow values fade outward.
Four practice exercises
Exercise 1
Draw a halo with a 45-degree tilt. Use a major axis of 8 cm and a minor axis of 2 cm. Place the halo center 4 cm above the top of a head oval. Describe the ellipse and placement.
Show answer and check
A smooth ellipse centered 4 cm above the skull top, with major axis 8 cm along a 45-degree tilt line and minor axis 2 cm perpendicular to it. The ring's lowest point is 3 cm above the skull top (center 4 cm above skull minus 1 cm minor-axis half-length).
Why: The 45-degree tilt line sets the major axis direction. The 2 cm minor axis gives a 4:1 ratio, strong foreshortening. Placing the center 4 cm above the skull top keeps the ring floating.
Check: Verify the major axis endpoints are 4 cm from center along the tilt line, the minor axis endpoints are 1 cm from center perpendicular to it, and the ring's lowest point is 3 cm above the skull top.
Exercise 2
Draw a halo with a 20-degree tilt. Use a major axis of 5 cm and a minor axis of 2.5 cm. Place the halo center 2 cm above the skull top. Add a near-glow band 1.5 cm wide and a far-glow band 0.75 cm wide. Describe the value order.
Show answer and check
A smooth ellipse with a 20-degree tilt, major axis 5 cm, minor axis 2.5 cm, centered 2 cm above the skull top. The ring's lowest point is 0.75 cm above the skull top (center 2 cm above skull minus 1.25 cm minor-axis half-length). The core is darkest, the near-glow is medium, and the far-glow is lightest.
Why: The 20-degree tilt is chosen independently of the 2:1 ratio, which gives moderate foreshortening. The glow bands are proportional to the minor axis. The value order makes the glow fade outward.
Check: Check that the minor axis is half the major axis, the tilt is 20 degrees, the ring's lowest point is 0.75 cm above the skull top, and the three values go dark to light from core to far-glow.
Exercise 3
A student draws a halo with a major axis of 6 cm and a minor axis of 1 cm, then shades a single thick outline. Identify two problems and give fixes.
Show answer and check
Problem one: the 6:1 ratio makes the ellipse too thin and lens-like. Fix: increase the minor axis to at least 2 cm for a 3:1 ratio, which gives strong but readable foreshortening. Problem two: a single thick outline does not read as glow. Fix: use a core plus a near-glow and far-glow with lighter values.
Why: A very short minor axis creates corners or a lens shape. A single outline has no value fade, so it looks like a rim rather than light.
Check: Measure the axes to confirm the ratio, and compare values on a test strip to confirm at least two glow steps.
Exercise 4
Draw a halo with a 30-degree tilt and a major axis of 7 cm. Choose a minor axis that gives a 3.5:1 ratio. Place the halo center 3 cm above the skull top. State the minor axis length and the gap check.
Show answer and check
The minor axis is 2 cm (7 divided by 3.5). The halo center is 3 cm above the skull top, so the ring's lowest point is 2 cm above the skull top (center 3 cm above skull minus 1 cm minor-axis half-length).
Why: Dividing the major axis by the ratio gives the minor axis. The gap check confirms the ring floats above the head.
Check: Verify 7 divided by 3.5 equals 2 cm, the tilt line is 30 degrees, and the vertical distance from skull top to ring bottom is 2 cm.
Common mistakes
- Drawing a circle instead of an ellipse. Shorten the minor axis to at least half the major axis and recheck the tilt angle.
- Making the glow a thick uniform outline. Use two glow bands with different values and fade the outer band with lighter pressure.
- Placing the halo around the head like a collar. Raise the halo center above the skull and keep a visible gap above the head top.
- Letting the minor axis drift from perpendicular. Draw a light perpendicular construction line and erase it only after the final ellipse is smooth.
Self-check rubric
- Ellipse is smooth and closed with no corners.
- Major and minor axes are perpendicular and match the chosen ratio.
- Tilt axis passes through the halo center at the chosen angle.
- Halo center aligns with the head's vertical center line unless an offset is intentional.
- A visible gap exists between the ring's lowest point and the top of the head.
- Glow uses at least two value steps that fade outward.
- Core is darker than near-glow, and near-glow is darker than far-glow.
- Construction lines are erased or faint.
- Valid alternatives are accepted if the tilt, placement, and value order are consistent and checkable.
Questions and answers
What angle should the tilt be?
Any angle you choose. A 20 to 30 degree tilt from horizontal is a gentle example; 45 degrees is stronger. The tilt angle is independent of the axis ratio. Measure your own reference and label chosen values as examples.
How wide should the glow be?
A practical starting point is a near-glow band about as wide as the ring's minor axis, with a far-glow band half that width. Adjust to your composition.
Can the halo overlap the head?
Yes, if intentional. Otherwise keep a clear gap so the ring reads as floating. Check the gap on both sides when viewed from the front.
Do I need special tools?
No. A pencil, eraser, and paper are enough. A mirror helps check symmetry. Measure your actual paper and tools rather than assuming sizes.