Free original lessons
Layered Mountain Scene Drawing: Foreground, Midground, Background
Plan and draw a mountain scene with clear depth using three overlapping layers, simple value contrast, and a checkable composition rubric.
Free lesson
Four exercises
Worked answers
Object Drawing Lessons
A convincing mountain scene depends less on perfect peaks and more on clear depth. This lesson teaches a three-layer approach: background ridges sit highest and lightest, midground mountains overlap them with stronger contrast, and foreground shapes anchor the scene with the darkest values and largest details. You will plan placement, draw overlapping silhouettes, and check depth using a simple convention: each nearer layer overlaps the farther one and uses a darker value. Lettering and handwriting are not part of this task, so no x-height rule applies; any labels you add are for planning only. All measurements below are hypothetical examples unless you measure your own paper.
Practice materials: Printable downloads are not available for this lesson yet. Use the instructions and four exercises below.
Reference illustration
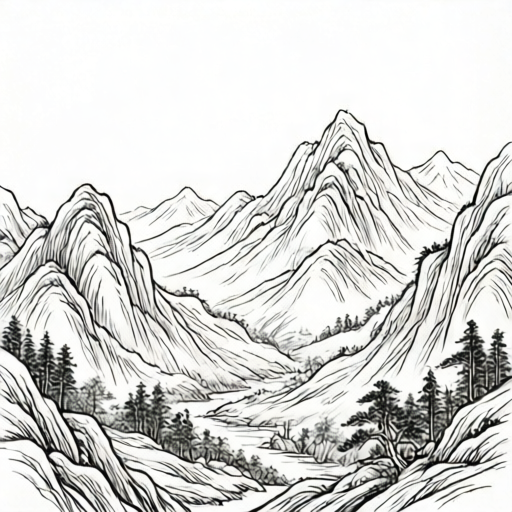
Use the stated measurements and conventions for each exercise.
Plan the three depth zones
Divide your paper into three horizontal bands using light pencil marks. A hypothetical example on 9 by 12 inch paper: background band from the top edge to 4 inches down, midground from 4 to 8 inches, foreground from 8 inches to the bottom. These numbers are examples only; measure your actual paper and adjust.
Decide where the horizon sits. Placing it in the upper third gives more room for foreground detail; placing it lower emphasizes sky. Mark one horizon line and keep all mountain bases related to it so the scene reads as one landscape.
- Measure your paper and record its width and height in inches.
- Draw three faint horizontal guide lines to mark band boundaries.
- Label the bands background, midground, foreground in small pencil notes.
- Mark a horizon line within the background or midground band.
Draw overlapping silhouettes from far to near
Start with the background: draw two or three low, simple ridge lines near the top. Keep them light in value and small in scale. Next, draw midground mountains that overlap the background ridges; their peaks should cross the background lines so overlap is visible. Finally, draw foreground shapes such as a large hill, rocks, or trees that overlap the midground.
Use a consistent value convention: background lightest, midground medium, foreground darkest. This convention is a planning tool, not a universal rule; valid alternatives include reversing values for a night scene, as long as the nearest layer still reads as nearest through overlap and detail size.
- Sketch background ridges with shallow angles and small peaks.
- Sketch midground mountains with steeper angles, overlapping at least two background lines.
- Sketch foreground shapes that overlap the midground by at least one line.
- Shade each layer using the light-medium-dark convention or a stated alternative.
Check depth and composition
Depth reads when three cues agree: overlap, value contrast, and detail size. Check each layer against these cues. If a background ridge is darker than a foreground hill, the depth cue conflicts; adjust one value. If no lines overlap, add an overlap by extending a nearer silhouette across a farther one.
Keep the composition simple. A hypothetical target is three background ridges, two midground mountains, and one large foreground shape. Count your shapes and note whether any layer is crowded; crowding flattens depth because details compete.
- Trace each overlap and confirm nearer layers cross farther lines.
- Compare values: background lightest, foreground darkest, or state your alternative.
- Check detail size: foreground details largest, background smallest.
- Count shapes per layer and simplify if any layer exceeds the planned number.
Worked example
On 9 by 12 inch paper, plan a three-layer mountain scene with a horizon at 3 inches from the top. Describe band boundaries, shape counts, and value order.
Worked answer
Background band: top edge to 4 inches down, containing three low ridges, lightest value. Midground band: 4 to 8 inches, containing two mountains overlapping background lines, medium value. Foreground band: 8 to 12 inches, containing one large hill overlapping midground, darkest value. Horizon at 3 inches sits in the background band. Check: overlaps present, values light to dark from back to front, foreground detail largest.
Four practice exercises
Exercise 1
On 8 by 10 inch paper, place a horizon 2 inches from the top. State three band boundaries in inches and name one shape for each layer.
Show answer and check
Example: background 0 to 3 inches, midground 3 to 6 inches, foreground 6 to 10 inches; background ridge, midground mountain, foreground hill.
Why: Bands must cover the full height and place the horizon inside one band. Any boundaries that sum to 10 inches and include the horizon are valid.
Check: Add the three band heights; the total must equal 10 inches, and the horizon must fall within one stated band.
Exercise 2
A drawing has background value 4, midground value 6, foreground value 8 on a 1 to 10 dark scale. Does the value order support depth? Explain.
Show answer and check
Yes, if the convention is lightest at back and darkest at front. Values increase toward the foreground, so the order supports depth.
Why: Depth reads when nearer layers are darker under this convention. The numbers rise from 4 to 8, matching back to front.
Check: Compare the three numbers in layer order; confirm they increase from background to foreground or match a stated alternative.
Exercise 3
You have drawn three background ridges and two midground mountains, but no line overlaps. Describe one specific change that creates an overlap and state which layers it connects.
Show answer and check
Extend the left midground mountain peak upward so it crosses the second background ridge line, connecting midground and background.
Why: Overlap requires a nearer line to cross a farther line. Extending a midground silhouette across a background ridge creates that crossing.
Check: Trace the changed line and confirm it crosses at least one background line without erasing the background shape.
Exercise 4
A foreground tree is drawn smaller than a background ridge. State the detail-size problem and one fix using the rubric.
Show answer and check
The foreground detail is too small relative to the background, weakening depth. Enlarge the foreground tree so its detail is the largest in the scene.
Why: Detail size should decrease with distance. A small foreground shape conflicts with that cue.
Check: Compare the largest foreground detail with the largest background detail; the foreground should be equal or larger.
Common mistakes
- Drawing all mountains at the same value, so layers merge. Assign light, medium, and dark values to background, midground, and foreground respectively, or state and apply a consistent alternative.
- No overlapping lines between layers, so depth cues are missing. Extend at least one nearer silhouette across a farther ridge line and redraw the crossing clearly.
- Foreground details are smaller than background details. Enlarge foreground shapes and simplify background shapes so detail size decreases with distance.
- Horizon line is ignored, so mountain bases float at different heights. Re-mark the horizon and align mountain bases to it or to a consistent ground plane.
Self-check rubric
- Three distinct layers are labeled or clearly separable: background, midground, foreground.
- At least two overlaps occur between adjacent layers, with nearer lines crossing farther lines.
- Value order is consistent: background lightest, midground medium, foreground darkest, or a stated alternative applied consistently.
- Detail size decreases from foreground to background.
- Mountain bases relate to a marked horizon or ground plane.
- Composition is uncluttered: shape counts per layer are stated and followed.
Questions and answers
Do I need special paper or tools?
No. Pencil, eraser, and any paper work. Measure your actual paper if you use band measurements; the inch values here are hypothetical examples.
Must the background always be lightest?
No. Light-medium-dark is a convention for clarity. A night scene might reverse values, but overlap and detail size must still make the nearest layer read as nearest.
How many mountains should I draw?
A simple plan is three background ridges, two midground mountains, and one foreground shape. Adjust to your paper size, but keep each layer uncluttered.
How do I know the depth is working?
Use the rubric: check overlap, value order, detail size, and horizon alignment. If two cues conflict, adjust the value or overlap first.