Free original lessons
Banquo Figure Drawing: Costume and Stance Construction
Learn to draw Banquo with layered costume, grounded stance, and proportion guides using a clear convention and self-checking rubric.
Free lesson
Four exercises
Worked answers
Object Drawing Lessons
This lesson teaches a repeatable method for constructing a full-body Banquo figure. You will establish a proportion guide, build a stable stance, layer costume elements in a logical order, and evaluate the result with a convention-based rubric. The approach prioritizes structural clarity over a single finished style, so variations in line quality, facial detail, and fabric rendering remain valid. All measurements are relative to the figure's own head height, and any numerical examples are hypothetical unless you measure your own paper and tools. Work on a blank sheet or a printed frame if one is available later; for now, use any plain paper and a pencil.
Practice materials: Printable downloads are not available for this lesson yet. Use the instructions and four exercises below.
Reference illustration
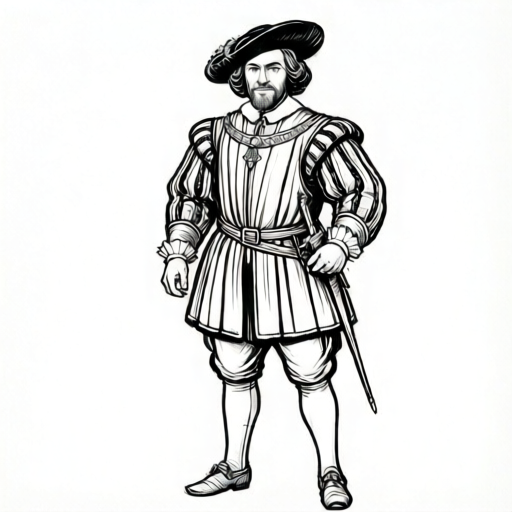
Use the stated measurements and conventions for each exercise.
Establishing Proportion and Stance
Begin by drawing a vertical center line and marking eight equal head-height units. This is a convention, not a universal rule; adjust to seven or nine units if your character design calls for a different build. Place the crown at unit zero, the chin at unit one, the waist near unit four, and the feet at unit eight. Mark shoulder width as roughly two head heights, but treat this as a starting guide.
Construct the stance before costume. Draw a hip line and a shoulder line, then place the feet slightly wider than the hips. For a grounded, watchful stance, shift the weight onto one leg: the supporting foot sits under the hip, while the free foot angles outward. Keep the pelvis level or tilt it slightly toward the supporting side. Draw simple cylinders for thighs and calves, then connect them with a curved spine line.
- Draw a vertical center line and mark eight head-height units.
- Place crown, chin, waist, and foot marks on the center line.
- Draw shoulder and hip lines, then sketch the supporting leg under the hip.
- Angle the free foot outward and check that both feet touch the same ground line.
- Add a curved spine and simple limb cylinders before any costume.
Layering the Costume
Build costume from the body outward. First, draw the underlayer as a close-fitting shape around the torso and upper legs. Second, add the main garment, such as a tunic or doublet, allowing it to overlap the underlayer at the neck, cuffs, and hem. Third, add the outer layer, such as a cloak or belt, which should follow the body's tilt and the stance's weight shift.
Use overlapping lines to show depth: the cloak edge sits in front of the tunic, and the belt sits in front of both. Keep fabric folds directional, radiating from points of tension such as the shoulder, elbow, and knee. Avoid symmetrical folds on a weight-shifted stance; the supporting side compresses, while the free side hangs more loosely.
- Draw the underlayer close to the torso and upper legs.
- Add the main garment with clear neck, cuff, and hem overlaps.
- Place the outer cloak or belt so it follows the body's tilt.
- Draw folds from tension points and vary them between supporting and free sides.
- Check that each layer overlaps the previous one in a consistent order.
Refining Head, Hands, and Grounding
Place the head on the center line at unit one. Use a simple oval and a cross for the eye line and nose line; facial features can remain minimal. For Banquo, a beard or hair shape can be suggested with a few directional strokes, but avoid portrait-level detail unless the task requires it. Hands should be simplified into mitt shapes with a thumb, then refined only where they grip or gesture.
Ground the figure by drawing a light ground line and checking that both feet meet it. Add a cast shadow shape under the supporting foot to reinforce weight. Finally, erase construction lines selectively, keeping the proportion marks faint if you want to compare your figure to the guide.
- Place the head oval at unit one and mark eye and nose lines.
- Suggest hair or beard with directional strokes, not detailed rendering.
- Draw hands as mitt shapes with a thumb before refining fingers.
- Draw a ground line and confirm both feet touch it.
- Add a cast shadow under the supporting foot and erase excess construction lines.
Worked example
A student draws a Banquo figure on a sheet where the head height is 3 cm. They mark eight head heights vertically. What is the total figure height in centimeters, and where should the waist mark fall if it is placed at four head heights from the crown?
Worked answer
Total height is 8 × 3 cm = 24 cm. The waist mark is 4 × 3 cm = 12 cm below the crown.
Why: Multiply the head height by the number of units to get total height. Multiply the head height by the waist unit number to get the waist position from the crown. Keep units in centimeters throughout.
Check: Measure the drawn distance from crown to foot mark and confirm it is 24 cm; measure from crown to waist mark and confirm it is 12 cm.
Four practice exercises
Exercise 1
On plain paper, draw a proportion guide for a Banquo figure using seven head heights. Mark crown, chin, waist at unit three, and feet at unit seven. Then sketch a stance with the weight on the left leg and the right foot angled outward. Describe where the left foot sits relative to the left hip.
Show answer and check
The left foot should sit roughly under the left hip, and the right foot should angle outward with both feet on the same ground line. The waist mark is three head heights below the crown.
Why: A seven-unit guide changes the vertical marks but keeps the same structural logic: supporting foot under the hip, free foot angled, and a single ground line. The waist position follows the chosen unit count.
Check: Measure that crown-to-waist equals three head heights and crown-to-feet equals seven head heights. Confirm both feet touch one drawn ground line.
Exercise 2
Draw a simple torso and hip block for a Banquo figure with a slight hip tilt toward the right supporting leg. Add an underlayer, a main tunic, and a belt. In what order should the overlaps appear at the waist?
Show answer and check
The belt should overlap the main tunic, and the main tunic should overlap the underlayer at the waist. The hip tilt should follow the supporting right leg.
Why: Costume is layered from body outward: underlayer first, main garment second, outer belt last. Overlaps at the waist therefore show belt over tunic over underlayer.
Check: Trace the waist lines from outermost to innermost and confirm the order is belt, tunic, underlayer. Check that the hip line tilts toward the supporting side.
Exercise 3
A figure is drawn with a head height of 2.5 cm and an eight-unit guide. The student places the waist at 10 cm below the crown. Is this consistent with a waist at four head heights? Show the arithmetic.
Show answer and check
Yes. Four head heights is 4 × 2.5 cm = 10 cm, so the placement is consistent with a waist at four head heights.
Why: Multiply the head height by the waist unit number. If the result matches the measured distance, the placement is consistent.
Check: Measure the crown-to-waist distance on the drawing and compare it with 10 cm.
Exercise 4
Draw a cloak over a weight-shifted Banquo stance. Add three folds on the supporting side and three on the free side. State one visible difference between the two sets of folds and one check that confirms the cloak follows the body's tilt.
Show answer and check
Supporting-side folds should compress or bunch near the hip or knee, while free-side folds hang more loosely. The cloak edge should follow the shoulder and hip lines rather than forming a vertical rectangle.
Why: Weight shift changes tension: the supporting side compresses, and the free side relaxes. The cloak must follow the underlying body tilt to read as worn rather than pasted on.
Check: Compare fold direction and spacing on each side, then trace the cloak edge against the shoulder and hip lines to confirm it follows the tilt.
Common mistakes
- Drawing costume before establishing the stance, which hides weight-shift errors. Complete the proportion guide and limb cylinders first, then layer costume over the confirmed stance.
- Making both legs straight and symmetrical, which removes the sense of weight. Bend the supporting knee slightly and angle the free foot outward; check that the hip tilts toward the supporting side.
- Letting the cloak cover the body's tilt with a vertical rectangle. Make the cloak edge follow the shoulder and hip lines, and vary fold direction on the supporting and free sides.
- Placing feet on different ground levels. Draw a single ground line before the feet and adjust both ankles to meet it.
Self-check rubric
- Proportion guide uses a consistent head-height unit and clearly marks crown, chin, waist, and feet.
- Stance shows a clear weight shift: supporting foot under the hip, free foot angled, and both feet on one ground line.
- Costume layers are drawn in a logical order with visible overlaps at neck, cuffs, hem, and belt or cloak edge.
- Folds follow tension points and differ between supporting and free sides.
- Head, hands, and grounding are simplified but structurally clear; construction lines are selectively reduced.
- Valid alternatives are accepted: different head-unit counts, costume variations, and line styles are allowed if the structural checks pass.
Questions and answers
Do I need to use exactly eight head heights?
No. Eight is a convention for this lesson. You may use seven or nine if your design calls for a different build, but keep the unit count consistent throughout the figure.
Can I change Banquo's costume from the suggested layers?
Yes. The method requires a logical layering order, not a specific historical garment. Keep underlayer, main garment, and outer layer distinct so overlaps remain readable.
How detailed should the face be?
A simple oval with eye and nose lines is sufficient for a full-body construction. Add hair or beard strokes only as needed to identify the character.
What if my paper is a different size?
Measure your actual paper and choose a head height that fits. Any numerical values in this lesson are hypothetical examples; use your own measurements consistently.