Free original lessons
Draw a Small Cross: Proportion and Shading Steps
Learn to draw a small cross with clear vertical and horizontal proportion guides, then add simple shading. Includes practice tasks, a worked example, and a rubric.
Free lesson
Four exercises
Worked answers
Object Drawing Lessons
This lesson teaches a reliable method for drawing a small cross with balanced proportions and basic shading. You will set a vertical guide, mark the arm-length ratio, build a clean outline, and shade the form with a single light direction. The convention used here is simple: the vertical bar is longer than the horizontal bar, and the horizontal bar crosses the vertical bar above its midpoint. Letter styles and handwriting vary, so treat the numerical ratios as starting points you can adjust while keeping the cross symmetrical and readable. All measurements are in centimeters, and any specific numbers are hypothetical examples you can replace with your own chosen values.
Practice materials: Printable downloads are not available for this lesson yet. Use the instructions and four exercises below.
Reference illustration
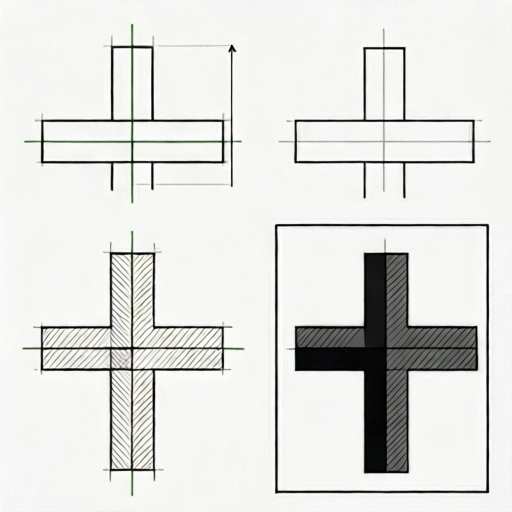
Use the stated measurements and conventions for each exercise.
Set the vertical guide and arm-length ratio
Begin with a light vertical line for the full height of the cross. Choose a total height, for example 8 cm. Mark the top and bottom ends. Decide where the horizontal bar will cross; a common choice is about one third of the way down from the top, for example 3 cm from the top on an 8 cm vertical. This placement keeps the lower arm longer and gives the cross a stable look.
Next, choose the arm-length ratio. A simple convention is that each horizontal arm is about one quarter of the total vertical height, so on an 8 cm cross each arm is about 2 cm. The full horizontal width is then about 4 cm. Mark the crossing point on the vertical guide, then measure left and right by the arm length. Keep both sides equal. These numbers are hypothetical examples; measure your own paper and adjust the ratio while keeping symmetry.
- Draw a light vertical line and mark the total height.
- Mark the crossing point above the midpoint, for example one third from the top.
- Measure equal left and right arm lengths from the crossing point.
- Check that the horizontal width is roughly half the vertical height, or your chosen ratio.
Build the outline with consistent bar widths
Choose a bar width that suits the small size, for example 1 cm. Mark half the bar width on each side of the vertical guide at the top and bottom, and on each side of the horizontal guide at the left and right ends. Connect these marks to form the outer outline. Keep the bar width constant along both bars so the cross looks deliberate rather than tapered.
Work lightly at first. A common mistake is to make one arm wider than the other; compare the left and right arm widths at the ends. Another mistake is to let the horizontal bar sit too low, which makes the cross look top-heavy. Adjust the crossing point before darkening the outline. When the outline is clean, erase the construction guides gently so they do not distract from the final shape.
- Mark half the bar width on both sides of each guide.
- Connect the marks to form the outer outline.
- Compare left and right arm widths and correct any difference.
- Erase construction guides lightly before shading.
Add simple shading with one light direction
Decide on a single light direction, for example from the upper left. Shade the lower right edges of both bars and the inner corners where the bars meet. Use light pressure and short strokes, building tone gradually. Leave the upper left edges lighter to suggest the light source. Avoid shading the entire cross evenly; contrast between light and dark edges is what makes the form read as solid.
Keep the shading simple. A common mistake is to shade every edge equally, which flattens the cross. Another is to use heavy pressure immediately, which makes corrections difficult. Build tone in two or three passes, checking that the darkest areas are consistently on the side away from the light. If you use a pencil, keep the point sharp enough for controlled strokes but not so sharp that it tears the paper.
- Choose one light direction and state it before shading.
- Shade the edges away from the light and the inner corners.
- Build tone in two or three light passes.
- Check that the darkest areas are consistent with the chosen light direction.
Check proportion and shading before finishing
Before finalizing, measure the vertical height and horizontal width with a ruler. Confirm that the horizontal bar crosses above the midpoint and that both arms are equal. Check that the bar width is consistent at the top, bottom, left, and right ends. For shading, look at the cross from a short distance and confirm that one side reads as lighter and the opposite side as darker.
If the cross looks unbalanced, adjust the crossing point or arm lengths rather than redrawing everything. Small corrections are easier and preserve the clean outline. Remember that handwriting and letter styles vary, so a slightly different ratio can still be valid if the cross is symmetrical and the shading is consistent. The goal is a readable small cross with deliberate proportion and simple, controlled shading.
- Measure height and width and compare with your chosen ratio.
- Confirm the crossing point is above the midpoint.
- Check bar width consistency at all four ends.
- View from a short distance to confirm the light and dark sides read clearly.
Worked example
Draw a small cross with a total vertical height of 8 cm, a crossing point 3 cm from the top, arm lengths of 2 cm each, and a bar width of 1 cm. Shade with light from the upper left.
Worked answer
The vertical guide is 8 cm. Mark the crossing point 3 cm from the top. Mark 2 cm left and 2 cm right from the crossing point, so the horizontal width is 4 cm. Mark half the bar width, 0.5 cm, on each side of the vertical guide at the top and bottom, and on each side of the horizontal guide at the left and right ends. Connect the marks to form a constant 1 cm bar width. Erase the guides lightly. Shade the lower right edges and the inner corners, leaving the upper left edges lighter. Check that the horizontal width is half the vertical height and that both arms are equal.
Four practice exercises
Exercise 1
Draw a small cross with a total vertical height of 6 cm, a crossing point 2 cm from the top, arm lengths of 1.5 cm each, and a bar width of 0.8 cm. State the horizontal width and check the ratio.
Show answer and check
The horizontal width is 3 cm because each arm is 1.5 cm. The horizontal width is half the vertical height, 3 cm to 6 cm. The crossing point is 2 cm from the top, which is above the midpoint at 3 cm.
Why: Add the two equal arm lengths to get the full horizontal width. Compare that width with the vertical height to confirm the chosen ratio. Check that the crossing point is above the midpoint so the lower arm is longer.
Check: Measure the vertical height and horizontal width with a ruler. Confirm the left and right arms are equal and that the crossing point is above the midpoint. Check that the bar width is 0.8 cm at all four ends.
Exercise 2
A cross has a vertical height of 10 cm and a crossing point 4 cm from the top. Each arm is 2.5 cm. What is the horizontal width, and is the crossing point above the midpoint?
Show answer and check
The horizontal width is 5 cm because 2.5 cm plus 2.5 cm equals 5 cm. The midpoint is at 5 cm from the top, and the crossing point is 4 cm from the top, so it is above the midpoint.
Why: The full horizontal width is the sum of the two equal arms. The midpoint of a 10 cm vertical is 5 cm from the top. A crossing point at 4 cm is closer to the top than the midpoint, so the lower arm is longer.
Check: Measure the arms and add them. Mark the midpoint on the vertical guide and compare it with the crossing point. Confirm the crossing point is closer to the top.
Exercise 3
Draw a small cross with a vertical height of 7 cm and a horizontal width of 3.5 cm. Choose a crossing point above the midpoint and a constant bar width of 0.7 cm. Describe where the shading should be darkest if light comes from the upper right.
Show answer and check
The arms are 1.75 cm each because half of 3.5 cm is 1.75 cm. A valid crossing point is 2.5 cm from the top, which is above the midpoint at 3.5 cm. With light from the upper right, the darkest shading should be on the lower left edges and the inner corners.
Why: The horizontal width is split equally between the two arms. The crossing point must be above the midpoint, so any value less than 3.5 cm from the top is valid if the cross remains symmetrical. The darkest shading is opposite the light direction.
Check: Measure the arms to confirm they are equal. Check that the crossing point is above the midpoint. View the cross from a short distance and confirm the lower left edges and inner corners are darker than the upper right edges.
Exercise 4
A student draws a cross with a vertical height of 9 cm, a crossing point 4.5 cm from the top, arm lengths of 2 cm each, and a bar width that is 1 cm at the top but 0.6 cm at the bottom. Identify two proportion problems and state how to fix them.
Show answer and check
The crossing point is at the midpoint, so the cross looks like a plus sign rather than a cross with a longer lower arm. The bar width changes from 1 cm at the top to 0.6 cm at the bottom, so the bars are not constant. Fix the crossing point by moving it above the midpoint, for example 3 cm from the top, and fix the bar width by marking half the chosen width on both sides of the vertical guide at the top and bottom.
Why: A crossing point at the midpoint makes the upper and lower arms equal, which does not match the convention of a longer lower arm. A changing bar width makes the outline look tapered and inconsistent. Both problems are corrected by adjusting the construction marks before darkening the outline.
Check: Measure the distance from the top to the crossing point and compare it with the midpoint. Measure the bar width at the top and bottom and confirm they match. Check that the left and right arms remain equal after the correction.
Common mistakes
- Making the horizontal bar cross at the midpoint, so the cross looks like a plus sign. Move the crossing point above the midpoint, for example one third from the top, and keep the lower arm longer.
- Using unequal left and right arm lengths. Measure both arms from the crossing point with the same value and compare the end marks before drawing the outline.
- Letting the bar width change from one end to another. Mark half the bar width on both sides of each guide and connect the marks with straight lines.
- Shading every edge equally so the cross looks flat. Choose one light direction and shade only the edges away from the light and the inner corners.
- Pressing hard on the first shading pass. Build tone in two or three light passes so you can correct the shading without smudging or tearing the paper.
Self-check rubric
- Vertical height and horizontal width match the chosen ratio within a small tolerance.
- The horizontal bar crosses above the midpoint, keeping the lower arm longer.
- Left and right arm lengths are equal.
- Bar width is consistent at the top, bottom, left, and right ends.
- The outline is clean and construction guides are lightly erased.
- Shading uses one stated light direction and is darker on the side away from the light.
- Shading is built in light passes rather than one heavy pass.
- The cross is symmetrical and readable at a small size; valid alternative ratios are accepted if symmetry and consistency are maintained.
Questions and answers
What ratio should I use for a small cross?
A simple starting convention is a vertical height of 8 cm, a crossing point 3 cm from the top, and arm lengths of 2 cm each. These are hypothetical examples; adjust them while keeping the crossing point above the midpoint and both arms equal.
How wide should the bars be?
Choose a bar width that suits the small size, for example 1 cm on an 8 cm cross. Keep the width constant along both bars and mark half the width on each side of the guides.
Can I use a different light direction?
Yes. Choose one light direction and apply it consistently. Shade the edges away from the light and the inner corners, and leave the edges facing the light lighter.
Do I need to erase the construction guides?
Erase them lightly after the outline is clean so they do not distract from the final shape. Keep the outline visible and avoid pressing hard on the eraser.
What if my cross looks unbalanced?
Check the crossing point and the left and right arm lengths first. Adjust those measurements rather than redrawing the whole cross, then confirm the bar width is consistent at all four ends.