Free original lessons
Kitchen Table Drawing: Top Shape, Legs, and Attachment
Learn to draw a kitchen table with a clear top shape, four tapered legs, and believable attachment points using simple guides and checkable proportions.
Free lesson
Four exercises
Worked answers
Object Drawing Lessons
This lesson teaches a reliable way to draw a kitchen table with legs and a top. You will first establish the tabletop as either an ellipse or a rectangle, then place four legs using a simple footprint plan, and finally show how the legs meet the top with visible attachment details. The method uses a defined drawing convention: x-height is measured from baseline to midline, and letter styles may vary, so valid alternatives are allowed wherever the brief does not fix a single answer. All measurements below are hypothetical examples chosen for practice; measure your own paper and tools before drawing. The goal is a coherent table, not a copied template.
Practice materials: Printable downloads are not available for this lesson yet. Use the instructions and four exercises below.
Reference illustration
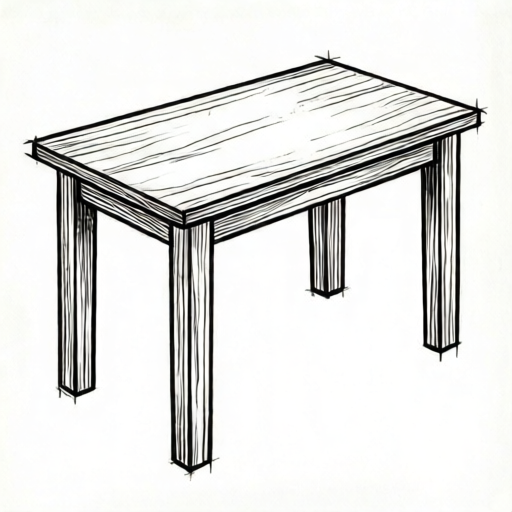
Use the stated measurements and conventions for each exercise.
Choose and draw the tabletop shape
A kitchen tabletop is usually drawn as an ellipse when seen from a slight angle, or as a rectangle when seen more directly from above. Pick one shape and commit to it. For an ellipse, draw a light horizontal midline and a shorter vertical midline crossing at the center. Mark the ellipse width and depth as simple whole-number units, for example 12 units wide and 8 units deep. Sketch the ellipse through those four extreme points, then refine the curve so it is smooth and symmetric.
For a rectangle, draw two horizontal edges and two vertical edges, then add a slight thickness line below the front edge to suggest the top has depth. Keep the top surface clear: no chairs, drawers, or room perspective. Label the top shape guide lightly so you can erase it later.
- Draw a light crosshair for the tabletop center.
- Mark the chosen width and depth on the crosshair using whole units.
- Sketch the ellipse or rectangle through the marks.
- Add a thin edge line to show tabletop thickness.
- Erase construction marks only after the top shape looks stable.
Plan the four leg positions
Legs must sit under the top, not float outside it. Use a footprint plan: draw a smaller ellipse or rectangle inside the tabletop outline to represent where the four legs touch the floor. For an elliptical top, place legs at the four compass points of the inner footprint, slightly inset from the outer edge. For a rectangular top, inset each leg by the same small margin from the corners.
Decide leg length before drawing. A hypothetical example is a top 12 units wide, 8 units deep, and legs 10 units long. Keep units consistent. Draw the two front legs first, then the two back legs, checking that all four leg bottoms sit on the same floor line.
- Draw an inner footprint shape inside the tabletop outline.
- Mark four leg centers on the footprint, inset equally from the edge.
- Draw vertical leg lines from each mark downward.
- Set a single floor line and stop all legs at that line.
- Check that no leg crosses outside the tabletop outline.
Add taper and attachment details
Tapered legs look narrower at the floor than at the top. Choose a simple taper, such as a top width of 2 units and a bottom width of 1 unit. Draw the taper symmetrically around each leg center. At the attachment point, show a small bracket, apron, or socket line where the leg meets the underside of the top. This detail makes the table read as constructed rather than as a top floating above sticks.
Use the x-height convention for any handwritten labels: measure from baseline to midline. Letter styles vary, so labels may be printed, cursive, or mixed as long as they are legible. Do not invent hardware standards or printer tolerances; if you measure your own paper or ruler, record those actual values and label any chosen numbers as hypothetical examples.
- Mark each leg top width and bottom width using whole units.
- Draw taper lines symmetrically around each leg center.
- Add a short apron or bracket line under the tabletop at each leg.
- Darken the final table outline and erase leftover guides.
- Check that taper and attachment details are consistent on all four legs.
Worked example
Draw a kitchen table with an elliptical top 12 units wide and 8 units deep, four legs 10 units long, and a taper from 2 units at the top to 1 unit at the floor. Show attachment brackets.
Worked answer
Draw a crosshair, mark 12 units horizontally and 8 units vertically, and sketch a smooth ellipse. Draw an inner footprint ellipse inset by 1 unit. Mark four leg centers at the footprint compass points. Draw four vertical legs down to a single floor line 10 units below the top. Taper each leg from 2 units at the top to 1 unit at the bottom, centered on its leg line. Add a short bracket line under the top at each leg. Erase guides and darken the final outline.
Four practice exercises
Exercise 1
Draw a rectangular kitchen tabletop 10 units wide and 6 units deep. Place four legs inset by 1 unit from each corner. Make each leg 8 units long and stop all legs at one floor line. Describe the finished drawing.
Show answer and check
A rectangle 10 by 6 units with an inner footprint rectangle inset 1 unit. Four legs at the inset corners, each 8 units long, all ending on the same floor line.
Why: The inset keeps legs under the top. One floor line guarantees equal leg length and a stable table.
Check: Measure the inset from each corner: it should be 1 unit. Measure each leg from tabletop underside to floor line: all should be 8 units.
Exercise 2
Draw an elliptical tabletop 14 units wide and 9 units deep. Place four legs at the compass points of an inner footprint ellipse inset by 1 unit. Taper each leg from 2 units at the top to 1 unit at the bottom. Describe how you check symmetry.
Show answer and check
A smooth ellipse 14 by 9 units with an inner footprint ellipse inset 1 unit. Four legs at north, south, east, and west footprint points, each tapered symmetrically from 2 to 1 unit.
Why: Compass-point placement distributes legs evenly under an elliptical top. Symmetric taper keeps each leg centered.
Check: Fold or lightly mirror the drawing along the vertical and horizontal midlines; leg positions and taper widths should match on both sides.
Exercise 3
A student draws a tabletop 12 units wide and 8 units deep but places the back legs 2 units outside the tabletop outline. State the mistake and give a correction using an inner footprint.
Show answer and check
The back legs are outside the top. Correct by drawing an inner footprint inset 1 unit and moving the back leg centers onto that footprint before redrawing the legs.
Why: Legs must attach under the top. An inner footprint gives a checkable boundary for all four leg centers.
Check: Trace the tabletop outline and confirm every leg center lies inside it; measure the inset from the edge to each leg center.
Exercise 4
Draw a kitchen table with a rectangular top 9 units wide and 7 units deep, four legs 9 units long, and a taper from 2 units to 1 unit. Add a bracket line at each attachment. Describe one valid alternative letter style for labeling the units.
Show answer and check
A 9 by 7 rectangle with four inset legs 9 units long, symmetric taper 2 to 1, and bracket lines at each leg. Labels may be printed or cursive as long as x-height is measured baseline to midline.
Why: The rectangle and inset legs satisfy the attachment rule. The taper and brackets show construction. Letter style is free because only x-height is fixed.
Check: Measure top width and depth, leg length, and taper widths. Check that each label's x-height runs from baseline to midline regardless of style.
Common mistakes
- Drawing legs outside the tabletop outline. Use an inner footprint shape and inset every leg by the same margin before drawing leg lines.
- Making the four legs different lengths. Set one floor line first and stop every leg at that line.
- Forgetting tabletop thickness so the top looks like paper. Add a thin edge line below the front edge and connect it to the leg attachment points.
- Tapering only one side of a leg. Measure equal taper amounts on both sides of each leg center.
Self-check rubric
- Tabletop shape is clearly an ellipse or rectangle and is smooth or straight as chosen.
- Four legs are present, inset under the top, and none fall outside the tabletop outline.
- All four legs stop at one floor line and have equal length.
- Taper is symmetric on each leg and consistent across legs.
- Attachment details such as brackets or apron lines are visible at each leg.
- Labels, if used, follow the baseline-to-midline x-height convention and remain legible; letter style may vary.
- Any numerical values are labeled as hypothetical examples or are actual measured values.
Questions and answers
Must the tabletop be an ellipse?
No. A rectangle is valid when the view is more direct. Choose one shape and keep the leg footprint consistent with it.
How many legs should I draw?
Four legs are the standard for this task. Place them at four inset points so the table looks stable.
Can I use different letter styles for labels?
Yes. The convention fixes x-height as baseline to midline, but letter styles may vary. Legible printed, cursive, or mixed labels are acceptable.
Are the numbers in this lesson real measurements?
They are hypothetical examples for practice. Measure your own paper and tools, and label any chosen values as examples.