Free original lessons
Realistic Pumpkin Drawing: Rib Shading, Stem Texture, and Cast Shadow
Learn to draw a realistic pumpkin with ribbed form, textured stem, and grounded cast shadow using simple construction and tonal shading.
Free lesson
Four exercises
Worked answers
Object Drawing Lessons
This lesson teaches a realistic pumpkin drawing from construction to finish. You will build the pumpkin as a flattened sphere divided into ribs, shade each rib to show volume, add stem texture with short directional strokes, and place a cast shadow that anchors the fruit to the ground. The approach uses simple geometry and checkable proportions rather than a single fixed outline, so variations in rib count and stem shape are acceptable. All measurements are hypothetical examples; measure your own paper and reference if you use numbers. The goal is a believable, three-dimensional pumpkin, not a cartoon or a scene.
Practice materials: Printable downloads are not available for this lesson yet. Use the instructions and four exercises below.
Reference illustration
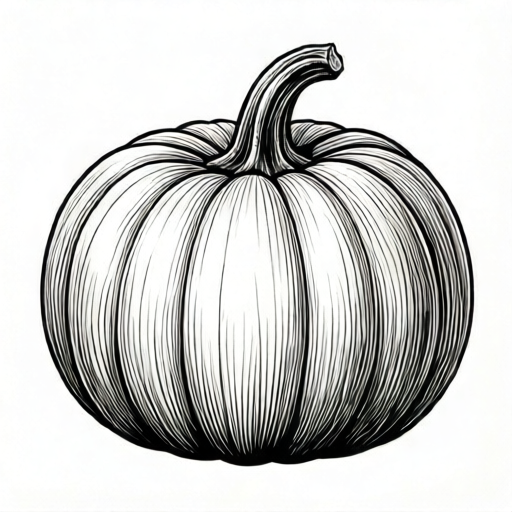
Use the stated measurements and conventions for each exercise.
Constructing the Pumpkin Body
Begin by drawing a light horizontal oval for the pumpkin's widest cross-section. This oval represents the equator of a flattened sphere. Its width should be roughly one and a half times its height for a typical pumpkin; treat this ratio as a hypothetical starting point and adjust to your reference. Mark a vertical center line through the oval to keep left and right ribs balanced.
Divide the oval into ribs by drawing curved vertical lines from the top pole to the bottom pole. A common choice is eight to twelve ribs; six ribs read as a simpler form, while twelve or more can look crowded. Each rib line should bow outward slightly at the equator and converge at the poles. Keep the spacing between rib lines even at the equator, then let the lines narrow toward the top and bottom.
Add the top and bottom poles as small flattened arcs. The top pole is where the stem attaches; the bottom pole is usually hidden or slightly flattened where the pumpkin rests. Check that every rib line meets the poles without crossing another line. Erase construction lines lightly before shading.
- Draw a light horizontal oval for the equator.
- Mark a vertical center line and a top and bottom pole.
- Draw four to six curved rib lines on each side, bowing outward at the equator.
- Check that rib lines converge at the poles and do not cross.
- Erase construction lines to a faint guide.
Rib Shading for Volume
Decide on a single light direction, for example from the upper left. Each rib is a rounded ridge, so it catches light on the side facing the light and falls into shadow on the opposite side. Shade each rib with a soft gradient: leave the light-facing edge pale, darken gradually toward the shadow side, and add a narrow darker band in the crease between ribs. The crease shadow is what makes ribs read as separate volumes.
Use a consistent tonal scale. A simple three-value scale works: light, middle, and dark. Assign the light value to the top-left area of each rib, the middle value to the central curve, and the dark value to the lower-right edge and crease. Blend with light circular strokes or a smudge tool if available. Avoid outlining every rib with a hard line; let the shading define the edge.
Check the overall form by squinting. The pumpkin should look like a rounded, slightly flattened sphere with raised ribs, not a flat circle with stripes. If a rib looks flat, increase the contrast between its light edge and its crease shadow.
- Choose one light direction and mark it lightly outside the drawing.
- On each rib, place the light value on the light-facing edge.
- Add a middle value across the central curve of the rib.
- Darken the shadow-side edge and the crease between ribs.
- Blend gently and squint to check the rounded form.
Stem Texture and Cast Shadow
The stem is a short, slightly tapered cylinder with a flared base where it meets the pumpkin. Draw its outline lightly, then add texture with short directional strokes that follow the stem's length. Vary stroke length and pressure to suggest ridges and roughness. Keep the light direction consistent: the light-facing side of the stem stays lighter, and the shadow side receives denser strokes. A few small darker marks near the base suggest the recess where the stem enters the fruit.
Place a cast shadow on the ground opposite the light direction. If the light comes from the upper left, the cast shadow falls to the lower right. Sketch its shape as a flattened oval or soft wedge that touches the pumpkin's base and extends outward. Shade the cast shadow darkest where it meets the pumpkin and lighter as it fades outward. The cast shadow should be wider than the pumpkin's base and should not float away from it.
Finally, check that the stem texture does not overpower the rib shading and that the cast shadow grounds the pumpkin. Adjust contrast so the pumpkin body remains the focal point.
- Draw the stem as a short tapered cylinder with a flared base.
- Add short directional strokes following the stem's length.
- Keep the light-facing side of the stem lighter.
- Sketch a cast shadow opposite the light direction, touching the base.
- Darken the cast shadow near the pumpkin and fade it outward.
Worked example
A pumpkin is drawn with its widest oval 12 cm wide and 8 cm tall. The light comes from the upper left. Describe where to place the light, middle, and dark values on a rib on the right side of the pumpkin, and where the cast shadow should fall.
Worked answer
On a right-side rib, the light-facing edge is the upper-left side of that rib, so place the light value there. The middle value goes across the central curve. The dark value goes on the lower-right edge and in the crease to its right. The cast shadow falls to the lower right, touching the base and extending outward.
Why: The light direction is upper left, so surfaces facing upper left receive more light. A right-side rib faces partly away from the light on its lower-right side, so that side is darker. The cast shadow is opposite the light, to the lower right.
Check: Squint at the drawing: the right-side rib should show a clear light-to-dark gradient from upper left to lower right, and the cast shadow should touch the base on the lower right without floating.
Four practice exercises
Exercise 1
A pumpkin oval is 10 cm wide and 6 cm tall. The light is from the upper right. On a left-side rib, where should the light value and dark value go? Where should the cast shadow fall?
Show answer and check
Light value on the upper-right edge of the left-side rib; dark value on the lower-left edge and crease. Cast shadow falls to the lower left, touching the base.
Why: Light from upper right means surfaces facing upper right are lighter. A left-side rib faces away on its lower-left side, so that side is darker. The cast shadow is opposite the light, to the lower left.
Check: Squint: the left-side rib should be lightest at upper right and darkest at lower left; the cast shadow should touch the base on the lower left.
Exercise 2
A student draws eight rib lines on a pumpkin but two lines cross near the top pole. Describe how to fix the construction and what to check at the poles.
Show answer and check
Erase the crossing lines and redraw each rib from the top pole to the bottom pole so lines converge without crossing. Check that every rib meets both poles and that spacing at the equator is even.
Why: Rib lines represent ridges that run from pole to pole. Crossing lines break the form and confuse the shading. Converging at the poles keeps the flattened-sphere structure readable.
Check: Trace each rib line with a finger: it should start at the top pole, bow outward at the equator, and end at the bottom pole without touching another line except at the poles.
Exercise 3
A pumpkin is lit from the upper left. The cast shadow is drawn as a small circle directly under the pumpkin, not touching the base. Identify the mistake and describe the corrected cast shadow.
Show answer and check
The cast shadow is misplaced and detached. It should touch the pumpkin's base and extend to the lower right, darkest near the base and fading outward.
Why: A cast shadow falls opposite the light and is anchored where the object meets the ground. A detached circle under the pumpkin contradicts the light direction and floats the object.
Check: Check that the cast shadow touches the base and lies on the side opposite the light. Squint: the pumpkin should look grounded, not floating.
Exercise 4
A stem is drawn with horizontal strokes across its width. The light is from the upper left. Describe how to change the strokes and where to keep the stem lighter and darker.
Show answer and check
Change strokes to run along the stem's length, varying length and pressure. Keep the upper-left side of the stem lighter and add denser strokes on the lower-right side and near the base recess.
Why: Stem texture should follow the stem's vertical ridges. Strokes along the length suggest those ridges. The light direction determines which side stays lighter.
Check: Look at the stem: strokes should run roughly top to bottom, and the upper-left side should be visibly lighter than the lower-right side.
Common mistakes
- Drawing rib lines that cross or do not meet at the poles. Redraw rib lines from top pole to bottom pole, checking that each line converges without crossing another.
- Shading each rib with a single flat tone. Use a three-value gradient on each rib: light edge, middle curve, dark crease.
- Making the cast shadow float away from the pumpkin base. Anchor the cast shadow so it touches the base and extends outward opposite the light.
- Adding stem texture strokes that run across the stem instead of along it. Direct strokes along the stem's length to suggest ridges and roughness.
Self-check rubric
- Pumpkin body reads as a flattened sphere with ribs that converge at top and bottom poles.
- Rib shading uses at least three values per rib and shows a consistent light direction.
- Crease shadows separate ribs without hard outlines on every rib.
- Stem texture strokes follow the stem's length and respect the light direction.
- Cast shadow touches the pumpkin base and falls opposite the light direction.
- Overall drawing reads as a realistic single pumpkin, not a cartoon or a scene.
- Valid alternatives: rib count from six to sixteen, any consistent light direction, and varied stem shapes are acceptable if the form and shading logic hold.
Questions and answers
How many ribs should a realistic pumpkin have?
Eight to twelve ribs is a common range, but six to sixteen can look realistic depending on the variety. Choose a count that fits your reference and keep spacing even at the equator.
Do I need to outline every rib?
No. Let shading define the rib edges. A hard outline on every rib can flatten the form. Use a soft crease shadow instead.
Where should the cast shadow go?
Opposite the light direction. If light comes from the upper left, the cast shadow falls to the lower right and touches the pumpkin's base.
Can I use a different light direction?
Yes. Keep it consistent across the body, stem, and cast shadow. The rubric checks consistency, not a single required direction.