Free original lessons
Pasture Drawing: Fence Lines, Grazing Animals, and Ground Planes
Learn to draw a pasture scene with a receding fence line, a grazing animal, and clear foreground-to-background layering using simple guides and checks.
Free lesson
Four exercises
Worked answers
Object Drawing Lessons
A convincing pasture drawing depends less on animal anatomy than on placement: where the fence line recedes, where the animal stands on the ground plane, and how foreground, middle ground, and background separate. This lesson defines a simple convention for judging size and position, then walks through a repeatable sequence for building the scene. All measurements are hypothetical examples; measure your own paper and tools before drawing.
Practice materials: Printable downloads are not available for this lesson yet. Use the instructions and four exercises below.
Reference illustration
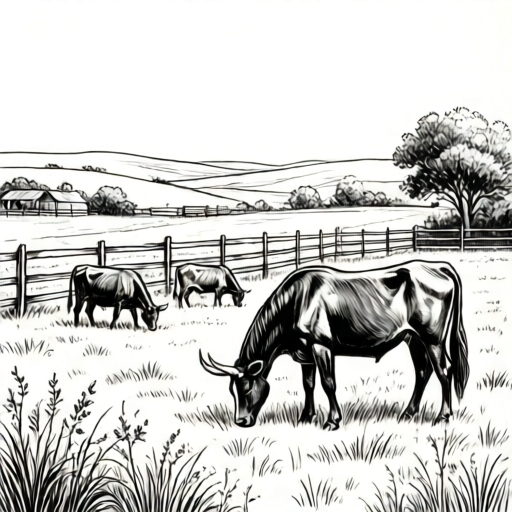
Use the stated measurements and conventions for each exercise.
Set the ground plane and horizon first
Begin by drawing a light horizontal horizon line across the middle third of the page. This line separates sky from ground and anchors every later decision. Mark a single vanishing point on the horizon, placed off-center so the fence line can recede diagonally rather than straight back.
Define the ground plane as everything below the horizon. Decide where the animal will stand by marking a small cross for its feet, then a second cross for the nearest fence post. Keep both marks below the horizon; anything placed above it will read as floating.
Use a light pencil throughout this stage. The convention for this lesson is that construction lines are erased or left faint, while final contour lines are darker and continuous.
- Draw the horizon line lightly across the page.
- Mark one vanishing point on the horizon, offset from center.
- Place a foot-mark cross for the animal in the middle ground.
- Place a cross for the nearest fence post in the foreground.
Build the fence line in perspective
A fence in a pasture reads as a line of posts that shrink and converge toward the vanishing point. Draw the nearest post first as a vertical line whose base sits on its cross. Its height is a chosen value: for example, a hypothetical 40 mm on a 200 mm-wide page. Measure your own page and pick a height that leaves room for sky above.
Draw a light guide line from the base of the nearest post to the vanishing point. Place the next post farther along this guide, making it slightly shorter, and repeat two or three times. Connect post tops with a gently sagging wire line; the sag should shrink as posts recede.
Check convergence by laying a straight edge along the post bases: they should all touch the guide line. If a post base drifts off the guide, reposition it before adding rails or wire.
- Draw the nearest post as a vertical line from its base cross.
- Run a light guide from that base to the vanishing point.
- Add two or three farther posts along the guide, each shorter than the last.
- Connect post tops with sagging wire lines that flatten with distance.
Place the grazing animal on the ground plane
A grazing animal is drawn with its head lowered toward the ground and its body roughly horizontal. Use a simple box for the body, a smaller box for the lowered head, and two or four short vertical lines for legs. The convention here is that the feet, not the body, determine placement: the animal stands where its feet meet the ground plane.
Size the animal relative to the nearest fence post. As a hypothetical example, if the nearest post is 40 mm tall, make the animal's body length about 50 mm and its standing height about 30 mm. These numbers are examples only; measure your page and keep the ratio consistent.
Overlap matters. If the animal stands behind the fence, draw the fence posts first and let them cross in front of the animal's body. If it stands in front, draw the animal after the fence and let its body overlap the posts.
- Draw a light body box and a lowered head box.
- Add leg lines whose ends touch the foot-mark cross.
- Compare animal height to the nearest post and adjust the ratio.
- Decide overlap order: fence in front of or behind the animal.
Layer foreground, middle ground, and background
Separate the scene into three bands. Foreground contains the nearest post and perhaps a few grass strokes; middle ground holds the animal and the next posts; background holds distant posts, a low tree line, and sky. Keep detail heaviest in the foreground and lightest in the background.
Use line weight as the layering signal: darker, thicker contours in front; lighter, thinner contours behind. Grass strokes should be short and sparse in the background, longer and more varied in the foreground.
Finish by checking that no background element crosses a foreground contour without a deliberate overlap decision. Erase stray construction lines only after the layering reads clearly.
- Mark the three bands lightly on the page.
- Draw foreground details with the darkest line weight.
- Add middle-ground animal and posts with medium weight.
- Add background tree line and distant posts with the lightest weight.
Worked example
On a 200 mm-wide page, draw a pasture scene with a horizon at mid-page, a vanishing point 60 mm right of center, a nearest post 40 mm tall, and a grazing animal whose body length is about 50 mm standing behind the fence in the middle ground.
Worked answer
Horizon line drawn at 100 mm from the top. Vanishing point marked on the horizon, 60 mm right of center. Nearest post base placed 30 mm from the left edge and 20 mm below the horizon; post drawn 40 mm tall. Guide line run from that base to the vanishing point. Two farther posts added along the guide at roughly 60 mm and 100 mm from the first, each about 30 mm and 22 mm tall. Animal foot-mark placed 80 mm from the left edge and 35 mm below the horizon, behind the fence line. Body box 50 mm long and 20 mm tall, head box lowered to within 10 mm of the ground, four leg lines ending on the foot-mark. Fence posts drawn before the animal so posts overlap its body. Foreground grass strokes dark and long; background tree line light and short.
Four practice exercises
Exercise 1
A student draws a horizon at 90 mm on a 180 mm-tall page. They place an animal's foot-mark at 70 mm from the top. Is the animal above or below the horizon, and what should change?
Show answer and check
The foot-mark is above the horizon (70 mm is less than 90 mm), so the animal would float. Move the foot-mark below 90 mm, for example to 120 mm from the top.
Why: Ground placement is judged by the feet relative to the horizon. Any foot-mark above the horizon reads as floating.
Check: Compare the foot-mark measurement to the horizon measurement using the same units; the foot-mark must be the larger number when measured from the top.
Exercise 2
Three fence posts are drawn with bases at 20 mm, 45 mm, and 70 mm along a guide line. Their heights are 40 mm, 32 mm, and 24 mm. Do the heights follow the convergence rule, and by how much does each shrink?
Show answer and check
Yes. Each farther post is shorter: the second is 8 mm shorter than the first, and the third is 8 mm shorter than the second.
Why: A receding fence line should show decreasing post height. Equal decrements are a simple, checkable pattern.
Check: Subtract consecutive heights: 40 minus 32 equals 8; 32 minus 24 equals 8. Both differences are positive, so the rule holds.
Exercise 3
On a 250 mm-wide page, the nearest post is 50 mm tall and the animal's body length is 60 mm. A second drawing uses a 30 mm post and a 36 mm animal. Do the two drawings use the same ratio of animal length to post height?
Show answer and check
Yes. Both use a ratio of 1.2 to 1 (60 divided by 50 equals 1.2; 36 divided by 30 equals 1.2).
Why: Scale consistency is checked by dividing animal length by post height. Equal quotients mean the same ratio.
Check: Compute 60 divided by 50 and 36 divided by 30; both equal 1.2.
Exercise 4
A scene has the animal drawn with the darkest line weight, the nearest post with medium weight, and the distant tree line with the lightest weight. Does the layering read correctly, and what single change would improve it?
Show answer and check
No. The nearest post should be the darkest or equal to the animal, since it is in the foreground. Darken the nearest post to match or exceed the animal's line weight.
Why: Line weight signals depth: foreground elements should be darkest, background lightest. The animal is middle ground, so the foreground post should not be lighter than it.
Check: Rank the three elements by intended depth and confirm the line-weight order matches: foreground darkest, middle medium, background lightest.
Common mistakes
- Placing the animal's feet above the horizon line. Move the foot-mark cross below the horizon and redraw the legs so they end on that cross.
- Making every fence post the same height. Shorten each farther post slightly and keep all bases on the guide line to the vanishing point.
- Drawing the animal at the same line weight as the background. Darken the animal's contour and lighten distant elements so the middle ground reads clearly.
- Letting the fence wire sag equally at all distances. Reduce the sag on farther spans so the wire flattens as it recedes.
Self-check rubric
- Horizon line is present and clearly separates sky from ground.
- All fence post bases lie on a single guide line toward the vanishing point.
- Farther posts are shorter than nearer posts.
- Animal feet touch a marked ground position below the horizon.
- Animal size maintains a consistent ratio to the nearest post.
- Overlap order between fence and animal is deliberate and visible.
- Foreground, middle ground, and background are distinguishable by line weight or detail.
- Construction lines are faint or erased; final contours are darker and continuous.
- Valid alternative: a different vanishing point, post height, or animal size is acceptable if the ratio and convergence checks pass.
Questions and answers
Do I need to draw a realistic animal?
No. A simple box-and-leg construction is enough for this scene. The lesson assesses placement, scale ratio, and layering, not animal anatomy.
Where should the vanishing point go?
Anywhere on the horizon line, but offset from center gives a more dynamic fence line. Mark it lightly and keep all post bases on the guide to it.
How do I decide whether the animal is in front of or behind the fence?
Choose one and draw in that order. If the fence is in front, draw posts first and let them cross the animal's body. If the animal is in front, draw it after the fence.
What if my page is a different size?
Measure your page and scale the hypothetical example values proportionally. The ratio between post height and animal size matters more than any absolute number.