Free original lessons
Four-Person Composition: Spacing, Overlap, and Depth
Plan and draw a four-figure group with clear spacing, intentional overlap, and readable depth using a placement grid and overlap-order notes.
Free lesson
Four exercises
Worked answers
Object Drawing Lessons
A four-person composition is a small group scene, not a pair and not a crowd. The goal is to arrange four figures so each person is readable, the group feels connected, and overlaps create depth without hiding faces or key gestures. This lesson uses a simple placement grid, an overlap-order plan, and a convention for figure height and head size. You will measure your own paper and tools, label any example numbers as hypothetical, and check your work with arithmetic and visual tests. The method works for any figure style, from simple shapes to detailed characters, because it focuses on placement and overlap rather than a single correct drawing.
Practice materials: Printable downloads are not available for this lesson yet. Use the instructions and four exercises below.
Reference illustration
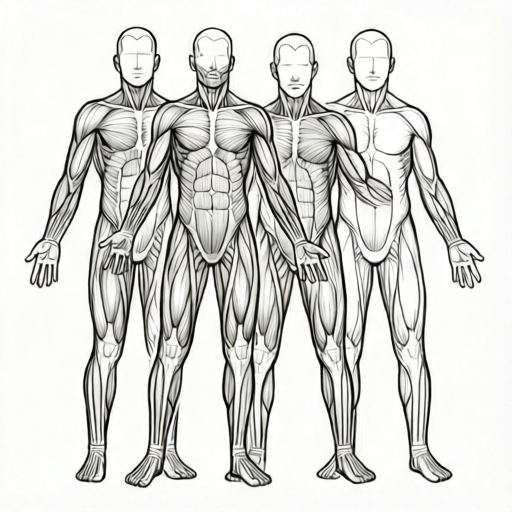
Use the stated measurements and conventions for each exercise.
Set up a four-figure placement grid
Measure your actual paper width and height in the same unit, such as centimeters. Divide the drawing area into a grid of four columns and three rows using light pencil lines. Label columns A to D left to right and rows 1 to 3 top to bottom. This grid is a planning tool, not a rule; you may shift lines after measuring your paper.
Choose a figure height convention. For this lesson, define one head unit as the distance from the top of the head to the chin. A common hypothetical example is a four-head-tall figure, but use whatever proportion you prefer and write it down. Keep the same head unit for all four figures unless you intentionally show a child or a distant person.
Place one figure per column as a starting point. Put the tallest or most important figure in column B or C, and place supporting figures in A and D. Leave at least half a head unit of empty space between adjacent figures at shoulder level so arms and gestures do not collide. If two figures must overlap, decide which one is in front before drawing.
- Measure paper width and height; draw a 4 by 3 grid in light pencil.
- Write your head-unit length and chosen figure height in heads.
- Assign each figure to a column and note front-to-back order.
- Mark shoulder-level gaps of at least half a head unit between non-overlapping figures.
Plan overlap order and spacing
Overlap is the main depth cue in a four-person group. Use a simple order list: front, middle-front, middle-back, back. Write the order beside the grid before drawing bodies. A figure in front should cross the outline of the figure behind it, and the behind figure's line should stop at the front figure's edge. This keeps the overlap readable.
Spacing controls whether the group feels connected or scattered. If all four figures are evenly spaced with large gaps, the group looks like four separate drawings. If they are too close, arms and faces merge. A practical check is to keep faces at least one head unit apart horizontally, while allowing shoulders or hands to overlap. Vary the gaps: one close pair, one wider gap, and one medium gap often reads as a natural group.
Use ground contact to anchor the group. Mark a ground line or a shallow ellipse for each figure's feet. Figures standing on the same ground plane should have feet near the same horizontal line unless you intend a slope. If one figure is seated or kneeling, lower the head height and adjust the ground contact point.
- Write the overlap order from front to back beside the grid.
- Draw the front figure first, then the next, stopping lines at the front figure's edge.
- Check face spacing: at least one head unit between faces unless intentionally close.
- Mark each figure's ground contact point and compare heights.
Draw, check, and refine the group
Start with simple shapes: an oval for the head, a rounded rectangle for the torso, and lines for arms and legs. Place all four figures as rough shapes before adding detail. This lets you move a figure without erasing finished work. Use the grid to compare column positions and the head unit to compare sizes.
Check overlap readability by tracing each figure's outline with your finger. If two outlines cross in a confusing way, decide which figure is in front and erase the behind line at the crossing. Faces should not be covered by another figure's torso unless the pose clearly shows a back view. Hands and gestures can overlap, but keep the gesture visible.
Refine with a consistent convention. For this lesson, x-height means the distance from the baseline to the midline of lowercase letters, and letter styles vary. Apply the same idea to figure details: choose a consistent eye-line height, shoulder width, and hand size, then vary poses and clothing. The rubric rewards clear spacing, intentional overlap, and readable faces, not a single universal style.
- Block all four figures with simple shapes before detail.
- Trace outlines to test overlap order; erase behind lines at crossings.
- Keep faces uncovered and gestures visible.
- Apply consistent eye-line, shoulder, and hand conventions across figures.
Worked example
A hypothetical paper is 24 cm wide and 18 cm high. The drawing area is divided into a 4 by 3 grid, so each column is 6 cm wide and each row is 6 cm high. The chosen head unit is 3 cm, and each standing adult is four head units tall, or 12 cm. Place four figures in columns A, B, C, and D. Figure B is front, figure C is middle-front, figure A is middle-back, and figure D is back. Describe the spacing and overlap plan.
Worked answer
Column centers are at 3 cm, 9 cm, 15 cm, and 21 cm from the left edge. Face centers can sit near row 1, about 3 cm from the top. With a 3 cm head unit, keep face centers at least 3 cm apart horizontally; the column centers are 6 cm apart, so the spacing is comfortable. Overlap order: B in front, C next, A behind C, D farthest back. Where B's shoulder crosses C's torso, stop C's line at B's edge. Where C's arm crosses A's shoulder, stop A's line at C's edge. Leave at least 1.5 cm (half a head unit) of empty space at shoulder level between A and D, since they do not overlap. Ground contact points for all four standing figures sit near the same horizontal line, about 15 cm from the top, leaving 3 cm below for feet and shadow. Check: four figures, four columns, one clear front-to-back order, faces uncovered, and at least one varied gap.
Why: The grid gives equal columns, but the overlap order creates depth. The head unit makes spacing checkable: 6 cm between column centers is two head units, which is more than the one-head-unit minimum. The half-head-unit shoulder gap prevents accidental collisions. The ground line keeps the group anchored.
Check: Measure column centers and face gaps with the head-unit gauge. Trace each outline to confirm the front figure's edge stops the behind figure's line. Confirm no face is covered and that at least one gap is wider than the others.
Four practice exercises
Exercise 1
A hypothetical paper is 20 cm wide and 16 cm high. You divide the drawing area into four equal columns. What is each column width in centimeters? If your head unit is 2.5 cm, how many head units wide is each column?
Show answer and check
Each column is 5 cm wide. Each column is 2 head units wide because 5 divided by 2.5 equals 2.
Why: Divide total width by four columns: 20 divided by 4 equals 5 cm. Divide column width by head unit: 5 divided by 2.5 equals 2 head units.
Check: Multiply 5 cm by 4 columns to get 20 cm. Multiply 2 head units by 2.5 cm to get 5 cm.
Exercise 2
You plan four figures in columns A, B, C, and D. The overlap order from front to back is C, A, D, B. You are drawing column A's figure. Which figures should stop their lines at A's edge, and which figure's edge should A stop at?
Show answer and check
C is in front of A, so A's lines should stop at C's edge. A is in front of D and B, so D's and B's lines should stop at A's edge.
Why: The order C, A, D, B means C is frontmost, then A, then D, then B. A behind C stops at C. A in front of D and B causes D and B to stop at A.
Check: Trace the order list: for each pair, the figure later in the list stops at the earlier figure's edge. Confirm A stops at C, and D and B stop at A.
Exercise 3
A hypothetical group has four standing adults, each four head units tall, with a head unit of 3 cm. The ground line is 14 cm from the top of the paper. Where is the top of each figure's head measured from the top of the paper?
Show answer and check
Each figure is 12 cm tall, so the top of each head is 2 cm from the top of the paper because 14 minus 12 equals 2.
Why: Four head units times 3 cm equals 12 cm. Subtract figure height from ground line distance: 14 minus 12 equals 2 cm.
Check: Add figure height to head-top distance: 12 plus 2 equals 14 cm, matching the ground line.
Exercise 4
You want faces at least one head unit apart. Your head unit is 2 cm. Face centers are at 4 cm, 7 cm, 10 cm, and 13 cm from the left edge. Which adjacent face gaps meet the minimum, and which do not?
Show answer and check
Gaps are 3 cm, 3 cm, and 3 cm. All three gaps meet the 2 cm minimum because each is greater than 2 cm.
Why: Subtract adjacent face centers: 7 minus 4 equals 3, 10 minus 7 equals 3, and 13 minus 10 equals 3. Compare each to the 2 cm minimum.
Check: Re-add the gaps: 4 plus 3 equals 7, 7 plus 3 equals 10, and 10 plus 3 equals 13. Confirm each gap is at least 2 cm.
Common mistakes
- Spacing all four figures evenly with large gaps, so the group looks like four separate drawings. Vary the gaps: make one pair close, one gap wide, and one medium. Keep faces at least one head unit apart unless intentionally close.
- Overlapping figures without a clear front-to-back order, so outlines cross confusingly. Write the overlap order before drawing. Draw front figures first and stop behind lines at the front figure's edge.
- Covering a face with another figure's torso or arm. Shift the covering figure or change the pose so the face remains visible. Overlap shoulders, hands, or clothing instead.
- Using different head units for each figure without a reason, making the group look inconsistent. Write one head-unit length and use it for all standing adults. Change it only for a child or a distant figure, and note why.
Self-check rubric
- Four distinct figures are present and each is readable as a person.
- Spacing is varied and intentional; faces are at least one head unit apart unless a close pair is clearly intended.
- Overlap order is clear and consistent; behind lines stop at front figure edges.
- Faces and key gestures remain visible; no accidental face covering.
- Figure heights use a consistent head unit or a noted reason for variation.
- Ground contact points are consistent for figures on the same ground plane.
- The composition reads as one group, not four separate drawings.
- Valid alternative styles and proportions are accepted if the spacing and overlap checks pass.
Questions and answers
How do I know if my four figures are spaced well?
Check face spacing: at least one head unit between faces unless you intentionally want a close pair. Also check that arms and gestures do not collide unless they overlap on purpose. Vary the gaps so the group feels connected but not crowded.
What is the best overlap order for four people?
There is no single best order. Choose front, middle-front, middle-back, and back based on who is most important and who is closest to the viewer. Write the order down and keep it consistent while drawing.
Can I use different figure heights in the same group?
Yes, if you have a reason such as a child, a seated person, or a distant figure. Keep the same head unit for standing adults and adjust the number of head units for the other figures. Note the reason beside your grid.
How do I check my drawing without a ruler?
Use your pencil as a measuring stick. Mark the head unit on the pencil with your thumb, then compare gaps and heights. You can also fold a scrap paper to match the head unit and use it as a gauge.