Free original lessons
Jewelry Design Drawing: Pendant, Ring, and Earring Construction
Learn to sketch pendant, ring, and earring forms using construction outlines, proportion guides, and a defined drawing convention for consistent, checkable results.
Free lesson
Four exercises
Worked answers
Object Drawing Lessons
This lesson teaches a repeatable method for sketching three jewelry forms: a pendant, a ring, and an earring. You will use construction outlines and proportion guides to build each form, then compare shapes to catch errors. The drawing convention is explicit: every form is built from a center line, and proportions are checked as ratios between measured features. All numerical values are hypothetical examples; measure your own equipment. The goal is not a single universal answer but a valid, checkable sketch that follows the stated convention.
Practice materials: Printable downloads are not available for this lesson yet. Use the instructions and four exercises below.
Reference illustration
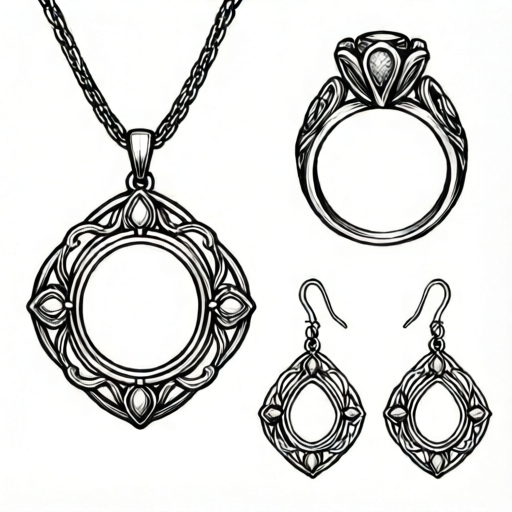
Use the stated measurements and conventions for each exercise.
Construction Outlines and Proportion Guides
Begin every jewelry sketch with a light construction outline. For a pendant, draw a vertical center line and a circle or oval for the main body. For a ring, draw a horizontal center line and a circle for the band. For an earring, draw a vertical center line and a small circle for the top loop. These outlines are guides, not final lines.
Proportion guides are simple ratios you can check with a ruler. For example, a pendant body might be twice as tall as its bail (the loop that attaches to a chain). A ring band might be one-third the width of its face. An earring drop might be equal in length to its top loop. Use hypothetical values like these, then measure your own sketch to confirm the ratio.
- Draw a light vertical or horizontal center line for the form.
- Add a circle or oval for the main body or band.
- Mark proportion guides with small tick marks at the chosen ratios.
- Compare the outline to the guide before adding details.
Pendant Construction
A pendant has three parts: a bail, a body, and an optional drop. Start with the bail as a small circle at the top. Draw the body below it, using a shape that matches your design (circle, oval, or teardrop). If there is a drop, attach it below the body with a short connector line.
Check the pendant by comparing the bail diameter to the body width. In a hypothetical example, the bail might be one-quarter the body width. Measure both with a ruler and adjust the outline until the ratio is close. Keep lines light until the proportions are confirmed.
- Draw the bail as a small circle on the center line.
- Draw the body below the bail, centered on the line.
- Add a drop if planned, using a connector line.
- Measure bail diameter and body width; compare to the chosen ratio.
Ring Construction
A ring sketch starts with the band. Draw a circle for the finger opening, then add the band thickness as a second circle inside or outside the first. The face of the ring sits on top of the band. Draw the face as a shape (oval, rectangle, or circle) centered on the band.
Use proportion guides to check the band thickness and face size. A hypothetical example: band thickness is one-eighth of the finger opening diameter, and the face width is half the outer band diameter (the diameter of the outer concentric circle). Measure your sketch and adjust. The ring should look balanced from the top view.
- Draw the finger opening as a circle.
- Add the band thickness as a concentric circle.
- Draw the face shape centered on the band.
- Measure band thickness and face width; compare to the chosen ratios.
Earring Construction
An earring has a top loop, a connector, and a drop. Draw the top loop as a small circle. Add a short connector line downward. Draw the drop as a shape below the connector. The drop can be a circle, oval, or teardrop.
Check the earring by comparing the top loop diameter to the drop width. A hypothetical example: the top loop is one-third the drop width. Also check that the connector length is equal to the top loop diameter. Measure and adjust the outline before adding details.
- Draw the top loop as a small circle on the center line.
- Add a connector line downward from the loop.
- Draw the drop shape below the connector.
- Measure loop diameter, connector length, and drop width; compare to the chosen ratios.
Worked example
Sketch a pendant with a bail diameter of 5 mm and a body width of 20 mm. Use a hypothetical ratio of bail diameter to body width of 1:4. Check the ratio after drawing.
Worked answer
Draw a center line. Draw the bail as a 5 mm circle at the top. Draw the body as a 20 mm wide oval below it. Measure: 5 mm to 20 mm is 1:4, so the ratio matches the hypothetical example. The sketch is valid under the convention.
Four practice exercises
Exercise 1
Sketch a ring with a finger opening diameter of 16 mm and a band thickness of 2 mm. Use a hypothetical ratio of band thickness to opening diameter of 1:8. Check the ratio.
Show answer and check
Draw a 16 mm circle for the opening. Add a concentric circle 2 mm larger for the band thickness. Measure: 2 mm to 16 mm is 1:8, matching the hypothetical example.
Why: The band thickness is drawn as a concentric circle, and the ratio is checked by comparing the two diameters.
Check: Measure the opening diameter and band thickness with a ruler. Confirm the ratio is close to 1:8.
Exercise 2
Sketch an earring with a top loop diameter of 4 mm, a connector length of 4 mm, and a drop width of 12 mm. Use hypothetical ratios: loop to drop width 1:3, connector length equal to loop diameter. Check both.
Show answer and check
Draw a 4 mm top loop. Add a 4 mm connector line. Draw a 12 mm wide drop. Measure: 4 mm to 12 mm is 1:3, and connector length equals loop diameter, so both checks pass.
Why: The connector length is compared directly to the loop diameter, and the drop width is compared to the loop diameter.
Check: Measure loop diameter, connector length, and drop width. Confirm 1:3 ratio and equal connector and loop measurements.
Exercise 3
Sketch a pendant with a bail diameter of 6 mm and a body width of 18 mm. Use a hypothetical ratio of 1:3. Then add a drop that is half the body width. Check all ratios.
Show answer and check
Draw a 6 mm bail and an 18 mm body. Measure: 6 mm to 18 mm is 1:3. Add a 9 mm drop (half of 18 mm). Check: drop width is half the body width, so the sketch is valid.
Why: The bail-to-body ratio is checked first, then the drop width is compared to the body width.
Check: Measure bail, body, and drop. Confirm 1:3 ratio and drop width equal to half the body width.
Exercise 4
Sketch a ring with an outer band diameter of 20 mm and a face width of 10 mm. Use a hypothetical ratio of face width to outer band diameter of 1:2. Check the ratio and confirm the face is centered.
Show answer and check
Draw a 20 mm outer band circle and a 10 mm face centered on it. Measure: 10 mm to 20 mm is 1:2, matching the hypothetical example. The face is centered on the band.
Why: The face width is compared to the outer band diameter, and centering is checked by measuring distances from the center line.
Check: Measure face width and outer band diameter. Confirm 1:2 ratio and equal distances from the center line to the face edges.
Common mistakes
- Drawing details before confirming proportions. Complete the construction outline and measure the proportion guides first. Add details only after the ratios are close.
- Using a single universal answer for every sketch. Follow the stated convention (center line and measured ratios) and allow valid alternatives. Check the ratios, not an exact copy.
- Ignoring the center line, causing asymmetry. Keep the center line visible and measure distances from it on both sides. Adjust until the form is balanced.
- Mixing units when measuring. Choose one unit (for example, millimeters) and use it for all measurements in a sketch. Label hypothetical values clearly.
Self-check rubric
- Construction outline is present and light.
- Center line is visible and the form is balanced.
- Proportion guides are marked and measured.
- Chosen ratios are stated and checked with a ruler.
- Center line and stated proportion ratios are followed and checked.
- Valid alternatives are accepted if the convention and ratios are met.
Questions and answers
What drawing convention should I follow?
Build every form from a visible center line, mark proportion guides as ratios between measured features, and check those ratios with a ruler. Letter styles and decorative details may vary, so valid alternatives are accepted as long as the convention and ratios are met.
Do I need to use exact numerical values?
No. The values in this lesson are hypothetical examples. Measure your own equipment and label any chosen values as examples.
How do I know if my sketch is correct?
Check the proportion guides with a ruler and confirm the construction outline matches the chosen ratios. Valid alternatives are allowed if the convention is followed.
Can I skip the construction outline?
The construction outline is the foundation for checking proportions. Skipping it makes errors harder to catch.