Free original lessons
Close-Up Eye Drawing: Enlarged Iris and Reflection Placement
Learn to draw a close-up eye with an enlarged iris, layered detail, and deliberate catchlight placement using a simple convention and checkable steps.
Free lesson
Four exercises
Worked answers
Object Drawing Lessons
This lesson teaches a close-up eye drawing that emphasizes an enlarged iris and intentional reflections. You will use a defined convention: the iris is drawn as a circle whose diameter is roughly half the visible eye width, and the pupil is centered within it. Catchlights are placed as small shapes on the iris surface, not as random white dots. The approach separates structure from detail: first establish the eye outline and iris ring, then add radial iris texture, then place reflections. Because letter styles and eye shapes vary, the rubric accepts valid alternatives as long as proportions and reflection logic are consistent. All measurements are hypothetical examples; measure your own paper and tools. No downloads or files exist yet; the resource plan describes what is planned.
Practice materials: Printable downloads are not available for this lesson yet. Use the instructions and four exercises below.
Reference illustration
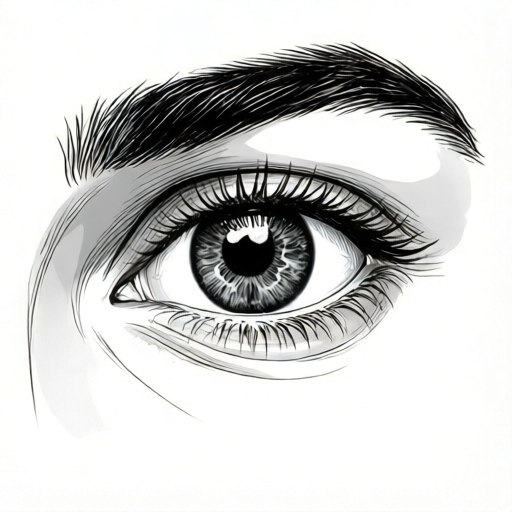
Use the stated measurements and conventions for each exercise.
Establish the eye outline and iris ring
Begin with a horizontal baseline for the lower eyelid and a curved upper lid line. The visible eye width is the distance between the inner and outer corners. Using the convention, draw the iris as a circle centered slightly above the baseline, with a diameter about half the eye width. This enlargement gives the iris more area for detail and reflections.
Draw a light ring guide around the iris edge to keep the circle true. Mark the pupil as a smaller circle centered in the iris; its diameter is about one third of the iris diameter. Keep lines light so you can adjust before committing.
- Draw a horizontal baseline about 8 cm long (hypothetical example) for the lower lid.
- Add a curved upper lid line that meets the baseline at both corners.
- Mark the eye width and place the iris center slightly above the baseline.
- Draw the iris circle with diameter about half the eye width.
- Add a centered pupil circle about one third of the iris diameter.
Add radial iris texture and lid shading
Iris texture radiates from the pupil toward the iris edge. Use short strokes that follow this radial direction, varying length and spacing. Darken the iris edge slightly to suggest depth, and keep the area near the pupil lighter if you want a luminous effect. Shade the upper lid with strokes that follow its curve, leaving a thin gap at the lid edge to suggest the lid thickness.
Check that texture strokes do not cross the pupil boundary. If they do, erase and redraw. The goal is controlled variation, not uniform lines.
- Draw 20 to 30 short radial strokes from pupil edge toward iris edge (hypothetical count).
- Vary stroke length and spacing to avoid a mechanical look.
- Darken the outer iris ring slightly with a soft pencil.
- Shade the upper lid following its curve, leaving a thin edge gap.
- Erase any strokes that cross the pupil boundary.
Place reflections and catchlights deliberately
Reflections should sit on the iris surface and relate to a light source. Choose one main catchlight shape, such as a small oval or crescent, and place it in the upper half of the iris, offset from the pupil. Add one or two smaller secondary reflections nearby, but keep them subordinate. Avoid placing catchlights on the pupil unless the light source is directly in front; even then, keep them small.
Use the blank close-up eye box in the planned worksheet to practice reflection placement independently. The convention is that the main catchlight is no larger than one quarter of the iris diameter and does not touch the iris edge.
- Decide the light direction and mark it lightly outside the eye.
- Draw the main catchlight as a small oval in the upper half of the iris, offset from the pupil.
- Add one or two smaller secondary reflections near the main one.
- Keep all reflections inside the iris and away from the iris edge.
- Check that the main catchlight is no larger than one quarter of the iris diameter.
Refine contrast and check proportions
Increase contrast by darkening the pupil and the outer iris ring, then lighten the catchlights by erasing cleanly. Check the iris diameter against the eye width: it should be about half. Check the pupil diameter against the iris: about one third. These are convention values, not universal rules; if your eye shape demands adjustment, note the change and keep it consistent.
Finally, review the reflection logic: does the main catchlight sit on the same side as your chosen light direction? Are secondary reflections smaller? If yes, the drawing meets the brief.
- Darken the pupil to near-black.
- Strengthen the outer iris ring with a darker stroke.
- Erase catchlights cleanly to bright white.
- Measure iris diameter and eye width; confirm the half-width relationship.
- Confirm reflection sizes and positions match the light direction.
Worked example
An eye outline is 10 cm wide. Using the convention, what is the iris diameter, and where should the main catchlight go if the light comes from the upper left?
Worked answer
Iris diameter is 5 cm (half of 10 cm). The main catchlight goes in the upper-left area of the iris, offset from the pupil, and no larger than 1.25 cm (one quarter of the iris diameter).
Four practice exercises
Exercise 1
An eye outline is 12 cm wide. Using the convention, calculate the iris diameter and the maximum main catchlight size.
Show answer and check
Iris diameter 6 cm; maximum main catchlight 1.5 cm.
Why: Iris is half the eye width: 12 ÷ 2 = 6 cm. Main catchlight is no larger than one quarter of the iris diameter: 6 ÷ 4 = 1.5 cm.
Check: Verify that 6 is half of 12 and that 1.5 is one quarter of 6.
Exercise 2
An iris is drawn 8 cm in diameter. The pupil is drawn 3 cm in diameter. Does this match the convention? Show the arithmetic.
Show answer and check
No. The convention pupil is about one third of the iris: 8 ÷ 3 ≈ 2.67 cm. A 3 cm pupil is slightly large but close; adjust to about 2.7 cm for consistency.
Why: One third of 8 is about 2.67 cm. The drawn pupil is 3 cm, which is 0.33 cm larger than the convention value.
Check: Multiply the iris diameter by one third and compare with the pupil diameter.
Exercise 3
A drawing has a main catchlight 2 cm wide on an iris 6 cm wide. Is the catchlight within the convention? If not, what is the maximum allowed?
Show answer and check
No. Maximum is 1.5 cm (one quarter of 6 cm). The 2 cm catchlight is too large.
Why: One quarter of 6 cm is 1.5 cm. The drawn catchlight exceeds this by 0.5 cm.
Check: Divide the iris diameter by 4 and compare with the catchlight width.
Exercise 4
An eye outline is 9 cm wide. The iris is drawn 4 cm wide and the pupil 1.5 cm wide. Check both against the convention and state any adjustments.
Show answer and check
Iris should be about 4.5 cm (half of 9 cm); 4 cm is 0.5 cm small. Pupil should be about one third of the iris: 4.5 ÷ 3 = 1.5 cm, so the pupil is correct if the iris is adjusted to 4.5 cm. Adjust the iris to 4.5 cm and keep the pupil at 1.5 cm.
Why: Half of 9 is 4.5 cm. One third of 4.5 is 1.5 cm. The drawn iris is small, but the pupil matches the corrected iris.
Check: Recalculate half the eye width and one third of the corrected iris diameter; compare with the drawn values.
Common mistakes
- Drawing the iris too small, leaving little room for detail. Use the convention: iris diameter about half the visible eye width. Measure and adjust before adding texture.
- Placing catchlights randomly or on the pupil edge. Choose a light direction first, then place the main catchlight in the upper half of the iris, offset from the pupil, and keep it smaller than one quarter of the iris diameter.
- Making iris texture strokes cross the pupil boundary. Start each stroke at the pupil edge and stop at the iris edge; erase any overshoot.
- Using uniform radial lines that look mechanical. Vary stroke length and spacing, and darken the outer ring slightly for depth.
Self-check rubric
- Iris diameter is about half the visible eye width, or a documented consistent alternative.
- Pupil is centered in the iris and about one third of the iris diameter.
- Iris texture radiates from pupil to edge without crossing the pupil boundary.
- Main catchlight is in the upper half of the iris, offset from the pupil, and no larger than one quarter of the iris diameter.
- Secondary reflections are smaller than the main catchlight and inside the iris.
- Contrast is clear: pupil dark, catchlights bright, outer iris ring slightly darker.
- Valid alternatives are accepted if proportions and reflection logic are consistent and documented.
Questions and answers
Is the half-width iris rule universal?
No. It is a convention for this lesson to ensure enough detail area. Real eyes vary; if you change it, keep the change consistent and note it.
How many catchlights should I draw?
One main catchlight and one or two smaller secondary reflections are enough. More can clutter the iris.
Can I place a catchlight on the pupil?
Only if the light source is directly in front, and keep it small. Otherwise place it on the iris.
What if my eye shape is not circular?
The iris is still drawn as a circle in this convention. Adjust the lids and corners, not the iris circle.