Free original lessons
Market Scene Drawing: Stall Layout, Figures, and Crowd Composition
Plan a market drawing with a stall grid, placed figures, and readable crowd spacing using a simple convention and checkable steps.
Free lesson
Four exercises
Worked answers
Object Drawing Lessons
A market scene works when the viewer can read three layers quickly: the stall layout, the figures who sell or shop, and the crowd that fills the gaps without hiding the action. This lesson uses a simple convention: x-height means the distance from a figure's baseline to its midline, and letter styles may vary, so treat x-height as a proportional guide rather than a fixed measurement. You will place stalls on a grid, position figures with circles, and space the crowd so paths and counters stay visible. All arithmetic uses consistent units, and any numerical values are hypothetical examples to be adjusted after measuring your actual paper and tools.
Practice materials: Printable downloads are not available for this lesson yet. Use the instructions and four exercises below.
Reference illustration
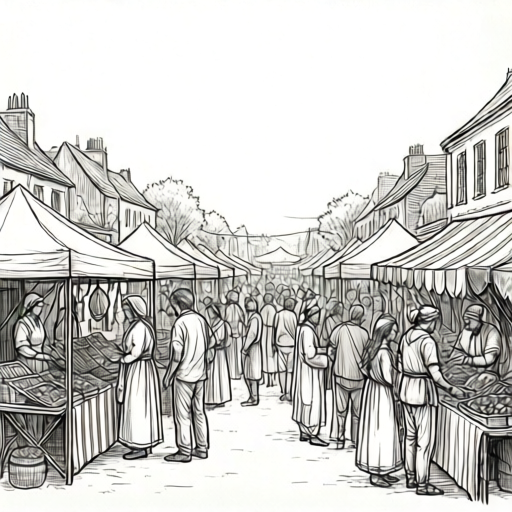
Use the stated measurements and conventions for each exercise.
Build the stall layout on a grid
Start with a rectangular frame and divide it into a simple grid. A hypothetical example is a 24 cm by 18 cm frame divided into 6 cm squares, giving four columns and three rows. Mark one row as the main walkway and place stall rectangles along the remaining rows. Keep stall fronts facing the walkway so shoppers and sellers have a clear relationship.
Use the grid to check spacing before drawing details. If a stall is two squares wide and one square deep, its footprint is easy to compare with neighbouring stalls. Leave at least one square between stall groups for movement. The grid is a planning tool, not a rule; adjust square size after measuring your actual paper.
- Draw the outer frame and label its width and height in centimetres.
- Divide the frame into equal squares and mark the walkway row.
- Place three to five stall rectangles along the stall rows, keeping fronts toward the walkway.
- Label each stall with a short purpose such as produce, bread, or tools.
Place figures with circles and x-height
Use circles to reserve space for each figure before drawing the body. A figure circle should be large enough to hold the head and shoulders, and its centre marks where the person stands. For a standing adult, a hypothetical x-height of 2 cm from baseline to midline can guide the torso proportion; children may use a smaller x-height. These values are examples only and should be replaced by measurements from your own test drawing.
Place sellers behind counters and shoppers in front of stalls. Keep at least half a circle between figures who are not interacting. When two figures face each other, align their circles along a short line so the conversation reads clearly. Letter styles vary, so do not force identical body shapes; use the circle as a spacing guide, not a template for one correct figure.
- Draw one circle per figure and write a role label beside it.
- Check that seller circles sit behind stall fronts and shopper circles sit in the walkway.
- Measure x-height on a test figure and record it before repeating the proportion.
- Adjust circle spacing so no two unrelated figures overlap completely.
Compose the crowd without hiding the stalls
Crowd composition is about readable gaps. Divide the walkway into short segments and place clusters of two or three figures, then leave an open segment. A hypothetical spacing guide is one figure circle of empty walkway between clusters. This keeps stall fronts visible and gives the eye a path through the scene.
Vary figure heights using the x-height convention, but keep baselines consistent with the ground plane. Figures farther back can use smaller circles and a higher baseline. Check the scene by covering details and looking only at circles and stall rectangles: if the walkway and stall fronts are still clear, the composition is working.
- Mark cluster positions along the walkway with small dots.
- Place two or three figure circles around each dot, leaving one circle of gap between clusters.
- Check that every stall front has at least one visible figure nearby.
- Erase or move any circle that blocks a stall label or the main walkway.
Refine details and self-check
Add simple details only after the layout and spacing are settled. Use short lines for counter edges, small shapes for goods, and clear role labels. Keep the convention visible: x-height from baseline to midline, with letter styles allowed to vary. A valid alternative composition may place the walkway diagonally or use more stalls, provided the spacing checks still pass.
Finish with a three-part check: stall fronts face the walkway, figure circles do not completely overlap unrelated figures, and at least one open path crosses the scene. Record any measurements you used so the drawing can be repeated or adjusted.
- Add counter edges and goods using short, simple marks.
- Recheck x-height proportions on two figures of different sizes.
- Confirm the open path and stall visibility from a distance.
- Write a short note listing the frame size and grid square size used.
Worked example
A frame is 24 cm wide and 18 cm high. It is divided into 6 cm squares. How many squares are in the grid, and how many squares are left if a walkway uses one full row of four squares?
Worked answer
The grid has 4 columns and 3 rows, so 12 squares. Removing one row of four squares leaves 8 squares for stalls and other content.
Why: Width divided by square size gives 24 divided by 6 equals 4 columns. Height divided by square size gives 18 divided by 6 equals 3 rows. The total is 4 times 3 equals 12 squares. One row contains 4 squares, so 12 minus 4 equals 8 squares remain.
Check: Multiply columns by rows to confirm 12, then subtract the walkway row and recount the remaining squares.
Four practice exercises
Exercise 1
A frame is 20 cm wide and 15 cm high, divided into 5 cm squares. How many squares are in the grid? If a walkway uses one row of four squares, how many squares remain?
Show answer and check
The grid has 4 columns and 3 rows, so 12 squares. Removing one row of four squares leaves 8 squares.
Why: 20 divided by 5 equals 4 columns; 15 divided by 5 equals 3 rows; 4 times 3 equals 12 squares. One row has 4 squares, so 12 minus 4 equals 8.
Check: Recount columns and rows on the frame, multiply, then subtract the walkway row.
Exercise 2
A walkway is 18 cm long. Each figure circle is 3 cm wide, and you want one circle of empty space between clusters. If each cluster uses two circles, how many clusters fit along the walkway?
Show answer and check
Two clusters fit, using 18 cm total: two circles at 3 cm each plus one 3 cm gap equals 9 cm per cluster, and 18 divided by 9 equals 2 clusters.
Why: Each cluster occupies two figure circles plus one gap: 3 plus 3 plus 3 equals 9 cm. The walkway is 18 cm, so 18 divided by 9 equals 2 clusters. The initial answer of three was corrected by the arithmetic.
Check: Add the widths for one cluster, divide the walkway length by that width, and confirm the total does not exceed 18 cm.
Exercise 3
A test figure has an x-height of 2 cm from baseline to midline. A second figure is drawn with an x-height of 3 cm. What is the difference in x-height, and which figure is proportionally taller under this convention?
Show answer and check
The difference is 1 cm, and the second figure is proportionally taller.
Why: 3 cm minus 2 cm equals 1 cm. A larger x-height means a larger baseline-to-midline distance, so the second figure is taller under the stated convention.
Check: Subtract the smaller x-height from the larger and compare the baseline-to-midline distances directly.
Exercise 4
A market frame has three stall rectangles, each 6 cm wide, placed along a 24 cm row with equal gaps between and at the ends. What is each gap if the stalls and gaps exactly fill the row?
Show answer and check
Each gap is 1.5 cm. Three stalls use 18 cm, leaving 6 cm for four gaps, and 6 divided by 4 equals 1.5 cm.
Why: Three stalls at 6 cm each equal 18 cm. The row is 24 cm, so 24 minus 18 equals 6 cm remaining. With gaps at both ends and between stalls, there are four gaps, so 6 divided by 4 equals 1.5 cm.
Check: Add three stall widths and four gap widths: 18 plus 6 equals 24 cm, matching the row length.
Common mistakes
- Placing stalls without a walkway, so shoppers and sellers have no clear relationship. Mark a walkway row on the grid first, then place stall fronts toward it.
- Drawing figures at random sizes without a proportional guide. Measure a test x-height from baseline to midline and use it consistently, allowing letter styles to vary.
- Filling every gap with crowd figures, which hides stall fronts and labels. Leave one figure circle of empty walkway between clusters and check stall visibility.
- Treating hypothetical numerical values as fixed rules. Measure your actual paper and tools, then label any chosen values as examples.
Self-check rubric
- Stall layout uses a grid or clear spacing plan, with stall fronts facing a walkway.
- Figures are placed with circles or equivalent space reservations and labelled by role.
- X-height convention is stated and used proportionally; valid alternative letter styles are accepted.
- Crowd clusters leave readable gaps and do not hide stall fronts or labels.
- At least one open path crosses the scene and can be identified from a distance.
- Measurements and hypothetical numerical values are labelled as examples, not fixed standards.
Questions and answers
What does x-height mean in this drawing convention?
X-height is the distance from a figure's baseline to its midline. It is a proportional guide, not a universal standard, and letter styles may vary.
How many stalls should a market scene have?
Three to five stalls is a practical starting range for a single frame. Adjust after measuring your paper and checking that the walkway stays clear.
Can the walkway be diagonal?
Yes. A diagonal walkway is a valid alternative if stall fronts still face it and the crowd spacing checks pass.
How do I check crowd spacing without a ruler?
Use one figure circle as a gap unit. Leave roughly one circle of empty walkway between clusters and confirm that stall labels remain visible.