Free original lessons
Racket Drawing: Oval Head, String Grid, and Grip
Learn to draw a racket by constructing an oval head, a consistent string grid, and a proportional grip using simple measured steps and a clear convention.
Free lesson
Four exercises
Worked answers
Object Drawing Lessons
This lesson teaches a reliable way to draw a racket: an oval head, a string grid, and a grip. You will use a defined convention so that your drawing can be checked and compared, while still allowing valid stylistic variation. The method relies on simple geometry and consistent units, not on special tools. All measurements are hypothetical examples; measure your own paper and tools if you adapt them. The goal is a clear, recognizable racket with a balanced head, evenly spaced strings, and a grip that connects naturally to the head.
Practice materials: Printable downloads are not available for this lesson yet. Use the instructions and four exercises below.
Reference illustration
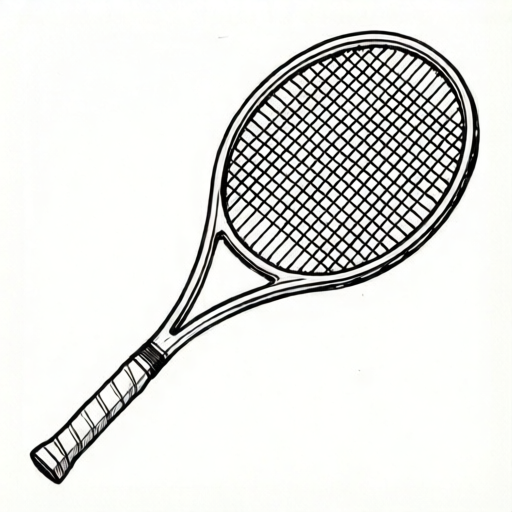
Use the stated measurements and conventions for each exercise.
Set the convention and proportions
Use a convention: the head is an ellipse whose width is about two-thirds of its height. The grip is a narrow rectangle whose length is roughly equal to the head height, and its width is about one-fifth of the head width. These ratios are hypothetical examples; you may adjust them, but keep them consistent within one drawing.
Place the head so its center is above the grip. The grip attaches at the bottom of the head, centered on the vertical axis. Draw lightly first, then darken the final lines.
- Draw a vertical center line for the whole racket.
- Mark the head height on the center line; mark the head width as two-thirds of that height.
- Sketch the ellipse using the marks as guides.
- Mark the grip length equal to the head height below the head, and the grip width as one-fifth of the head width.
- Connect the grip to the head with two short, slightly curved lines.
Build the string grid
The string grid is a set of evenly spaced lines inside the head. Use a spacing that divides the head width and height into equal parts. For example, if the head width is 60 mm, a spacing of 10 mm gives six intervals; if the head height is 90 mm, the same 10 mm spacing gives nine intervals. These numbers are hypothetical; choose a spacing that fits your drawing.
Draw the vertical strings first, then the horizontal strings. Keep the lines inside the ellipse and stop them at the inner edge. The grid should look even, not crowded.
- Choose a spacing that divides both head width and height evenly.
- Mark the spacing along the horizontal axis inside the head.
- Draw vertical lines through the marks, stopping at the ellipse.
- Mark the spacing along the vertical axis inside the head.
- Draw horizontal lines through the marks, stopping at the ellipse.
Refine the grip and check the whole
The grip should look like a handle, not a stick. Add a subtle taper: slightly narrower at the bottom. A center line helps keep it straight. Check that the grip is centered under the head and that the head ellipse is not lopsided.
Use a simple check: measure the head width at its widest point and the grip width at its top. The grip width should be about one-fifth of the head width. If it is far off, adjust lightly before darkening.
- Draw the grip outline with a slight taper.
- Add a center line down the grip.
- Check symmetry by folding the paper lightly or using a straight edge.
- Erase construction marks that are no longer needed.
- Darken the final outline and strings.
Worked example
Draw a racket with a head height of 90 mm and a head width of 60 mm. Use a string spacing of 10 mm. The grip length is 90 mm and the grip width is 12 mm. Describe the construction and the final check.
Worked answer
Draw a vertical center line. Mark 90 mm for head height and 60 mm for head width, centered on the line. Sketch the ellipse through these marks. For strings, 60 mm width with 10 mm spacing gives six intervals; 90 mm height with 10 mm spacing gives nine intervals. Draw vertical strings at the width marks and horizontal strings at the height marks, stopping at the ellipse. Below the head, mark 90 mm for grip length and 12 mm for grip width, centered on the line. Draw the grip with a slight taper. Check: grip width 12 mm is one-fifth of head width 60 mm; head width is two-thirds of head height 90 mm. The grid has even 10 mm spacing in both directions.
Four practice exercises
Exercise 1
A racket head is 80 mm high and 50 mm wide. What is the ratio of width to height, and is it close to the convention of two-thirds?
Show answer and check
The ratio is 50/80 = 0.625, which is close to two-thirds (about 0.667).
Why: Divide width by height to compare with the convention. 50 divided by 80 equals 0.625.
Check: Multiply the height by two-thirds: 80 × 2/3 ≈ 53.3 mm. The given width 50 mm is within about 3 mm, so it is close.
Exercise 2
A head is 72 mm wide. Using the convention, what should the grip width be? Show the arithmetic.
Show answer and check
The grip width should be about 14.4 mm, since 72 ÷ 5 = 14.4.
Why: The convention sets grip width to one-fifth of head width. Divide 72 by 5.
Check: Multiply the grip width by 5: 14.4 × 5 = 72 mm, which matches the head width.
Exercise 3
A head is 60 mm wide and 90 mm high. You want string spacing of 10 mm. How many intervals across the width and height, and how many vertical and horizontal strings if you draw one line at each interior mark?
Show answer and check
Width: 60 ÷ 10 = 6 intervals. Height: 90 ÷ 10 = 9 intervals. Interior marks: 5 vertical strings and 8 horizontal strings.
Why: Intervals equal the dimension divided by spacing. Interior lines are one fewer than intervals because the edges are not drawn as strings.
Check: Add the strings to the two edges: 5 + 2 = 7 vertical positions, which matches 6 intervals plus one; 8 + 2 = 10 horizontal positions, which matches 9 intervals plus one.
Exercise 4
A drawing has a head 100 mm high and 70 mm wide, and a grip 20 mm wide. Check the two convention ratios and state whether each is acceptable within 5 mm.
Show answer and check
Head width convention: two-thirds of 100 mm is about 66.7 mm; the drawing’s 70 mm differs by about 3.3 mm, so it is acceptable. Grip width convention: one-fifth of 70 mm is 14 mm; the drawing’s 20 mm differs by 6 mm, so it is not acceptable within 5 mm.
Why: Compute each convention value, then subtract the drawing value to find the difference.
Check: For the head: 100 × 2/3 ≈ 66.7; 70 − 66.7 = 3.3. For the grip: 70 ÷ 5 = 14; 20 − 14 = 6.
Common mistakes
- Drawing the head as a circle instead of an oval. Mark the height first, then set the width to about two-thirds of the height before sketching the ellipse.
- Making the string grid uneven or too dense. Choose a spacing that divides both head width and height evenly, and mark all intervals before drawing lines.
- Attaching the grip off-center. Use the vertical center line and check that the grip’s top edges are equidistant from it.
- Making the grip too wide or too narrow. Compare the grip width to one-fifth of the head width; adjust before darkening.
Self-check rubric
- Head is an ellipse with width about two-thirds of height.
- String grid is evenly spaced and stays inside the head.
- Grip is centered, about one-fifth of head width, and about as long as the head height.
- Construction lines are light and final lines are clear.
- Valid alternatives: slight taper, rounded grip end, or minor stylistic line weight changes are acceptable if proportions and even spacing are maintained.
Questions and answers
Do I need a ruler?
A ruler helps with even spacing, but you can use a folded paper strip as a simple measuring guide.
Can the string grid be diagonal?
The convention here uses vertical and horizontal strings. Diagonal strings would change the check method, so keep them vertical and horizontal for this lesson.
How many strings should I draw?
Choose a spacing that divides the head evenly. The number depends on your head size; even spacing matters more than a specific count.
What if my oval looks uneven?
Check that the width and height marks are correct and that the center line is straight. Lighten the line and redraw the ellipse through the marks.