Free original lessons
Moonlight Night Drawing: Silhouettes and Cast Shadows
Plan a moonlight night drawing with a defined moon position, silhouette shapes, and consistent cast-shadow direction using tonal shading and simple checks.
Free lesson
Four exercises
Worked answers
Object Drawing Lessons
A moonlight night drawing works when three decisions agree: where the moon sits, which shapes are silhouettes, and which way shadows fall. This lesson defines a simple convention for shadow direction, shows how to build a night scene in layers, and gives checkable arithmetic so you can verify consistency without guessing. You will use tonal shading to separate sky, ground, and silhouette, and you will test your shadow arrows against the moon position before committing to dark values. The tasks are self-contained and use plain materials: paper, pencil, eraser, and a straight edge. All measurements are hypothetical examples unless you measure your own paper.
Practice materials: Printable downloads are not available for this lesson yet. Use the instructions and four exercises below.
Reference illustration
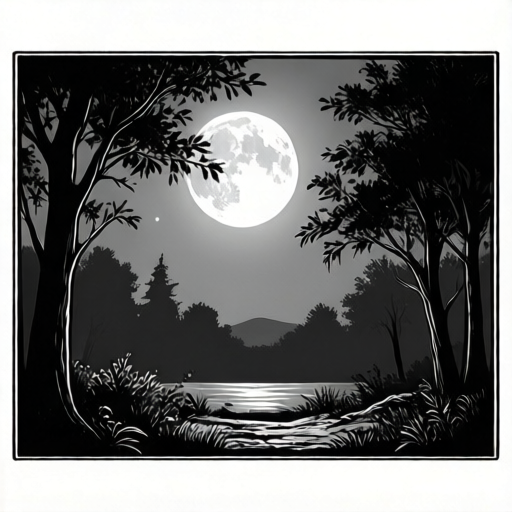
Use the stated measurements and conventions for each exercise.
Set the moon position and shadow convention
Choose a moon position on the page and mark it lightly. For this lesson, use the convention that cast shadows point directly away from the moon on the ground plane, and that a shadow's length is proportional to the object's height for a low moon. This is a drawing convention, not a physical simulation; it keeps the scene readable and checkable.
Draw a horizon line and a small moon circle. Decide whether the moon is low or high. A low moon gives longer shadows and a more dramatic night scene; a high moon gives shorter shadows and a calmer scene. Label the moon center and the horizon so you can measure distances later.
- Mark the moon center with a small dot and draw a circle around it.
- Draw a horizon line across the page and label it.
- Draw one arrow on the ground pointing away from the moon; this is your shadow-direction reference.
- Measure the distance from the moon center to the horizon and write it down in the same units you will use for shadow checks.
Build silhouettes in layers
Silhouettes are shapes that read as dark against a lighter sky or ground. Start with the largest shapes: hills, trees, buildings, or figures. Keep their edges simple and avoid internal detail until the outer shape reads clearly. Use a light pencil outline first, then fill with a dark tone.
Place silhouettes so they overlap the horizon and each other. Overlapping shapes create depth without needing detail. Leave a narrow lighter gap between some shapes to separate them. The moon should remain visible; do not let a silhouette cover the moon unless you intend an eclipse-like effect.
- Outline two or three large silhouette shapes in light pencil.
- Check that each shape touches or crosses the horizon line.
- Fill the shapes with a dark tone, keeping edges crisp.
- Add one smaller silhouette in front to create a foreground layer.
Shade the sky and ground with tonal steps
Use three tonal steps: light near the moon, medium across the sky, and dark at the top or far from the moon. On the ground, use a medium tone with darker patches where shadows fall. Keep the silhouette darker than the ground so it still reads as a silhouette.
Shade in one direction with light pressure, then build a second layer where you need darker values. Avoid smudging until the shapes are correct. If a shadow looks wrong, erase it before adding more tone.
- Shade a light band around the moon.
- Shade the rest of the sky with a medium tone, darker away from the moon.
- Shade the ground with a medium tone, leaving lighter areas where moonlight hits.
- Darken the silhouette shapes so they remain the darkest values.
Check shadow direction and length
Before finalizing, test each cast shadow against the moon position. Draw a straight line from the moon center through the base of the object; the shadow should continue along that line away from the moon. For length, use a simple ratio: if the moon is low, a shadow may be twice the object's height; if high, it may be half. These numbers are hypothetical examples; choose one ratio and apply it consistently.
Measure with a ruler or count grid squares. Write the object height and shadow length beside each object in light pencil, then erase the notes after checking. Consistency matters more than realism.
- Draw a line from the moon center through each object's base.
- Check that the shadow lies on that line and points away from the moon.
- Measure object height and shadow length in the same units.
- Confirm the ratio is the same for all objects at the same distance from the moon.
Worked example
A moon center is 6 cm above the horizon. A tree silhouette is 4 cm tall and stands on the horizon. Using the convention that shadow length equals twice the object height for a low moon, draw the shadow direction and length.
Worked answer
Draw a line from the moon center through the tree base. The shadow points away from the moon along that line. Shadow length is 4 cm times 2 equals 8 cm. Mark 8 cm from the tree base along the shadow line and shade the shadow darker than the ground.
Four practice exercises
Exercise 1
A moon center is 5 cm above the horizon. A post is 3 cm tall on the horizon. Using a shadow ratio of 1.5, state the shadow length and direction.
Show answer and check
Shadow length is 3 cm times 1.5 equals 4.5 cm. The shadow points away from the moon along a line from the moon center through the post base.
Why: The ratio multiplies object height by 1.5. Direction follows the convention: away from the moon through the base.
Check: Measure 4.5 cm from the post base along the shadow line and confirm the line passes through the moon center and the post base.
Exercise 2
Two trees stand at the same distance from the moon. Tree A is 4 cm tall with a 6 cm shadow. Tree B is 6 cm tall. Using the same ratio, what shadow length should Tree B have?
Show answer and check
Tree B shadow length is 9 cm.
Why: Tree A ratio is 6 divided by 4 equals 1.5. Apply 1.5 to Tree B: 6 times 1.5 equals 9 cm.
Check: Divide each shadow length by its object height; both should equal 1.5.
Exercise 3
A silhouette covers the moon center. State one fix that keeps the scene readable as a moonlight night drawing.
Show answer and check
Move the silhouette or the moon so the moon center is visible, or redraw the silhouette edge to leave a gap around the moon.
Why: The moon must remain visible to justify the moonlight and shadow direction.
Check: Look at the drawing and confirm the moon circle is not fully covered by a dark shape.
Exercise 4
A ground area is shaded medium, and a silhouette is shaded light. State the correction and why it matters.
Show answer and check
Darken the silhouette until it is darker than the ground. Silhouettes must be the darkest values to read as silhouettes.
Why: If the silhouette is lighter than the ground, it no longer reads as a dark shape against the scene.
Check: Compare the silhouette tone with the ground tone; the silhouette should be visibly darker.
Common mistakes
- Shadows point toward the moon. Redraw each shadow so it points away from the moon along a line from the moon center through the object's base.
- Silhouettes are lighter than the ground. Darken the silhouette shapes until they are the darkest values in the scene.
- Shadow lengths vary randomly. Choose one ratio for objects at the same distance and measure each shadow against its object height.
- The moon is covered by a silhouette without intent. Move the silhouette or the moon so the moon remains visible, or state clearly that an eclipse effect is intended.
Self-check rubric
- Moon position is marked and visible.
- At least two silhouette shapes are darker than the ground and sky.
- Each cast shadow points away from the moon along a line from the moon center through the object base.
- Shadow lengths use one consistent ratio for objects at the same distance.
- Sky and ground use at least three tonal steps.
- The scene reads as night, not sunrise or sunset.
Questions and answers
Do I need special art materials?
No. Pencil, paper, eraser, and a straight edge are enough. A ruler helps with shadow checks but is optional.
Can I use a high moon instead of a low moon?
Yes. A high moon gives shorter shadows. Choose one ratio and apply it consistently.
How dark should the silhouettes be?
Darker than the ground and sky. They should read as the darkest shapes in the drawing.
What if my shadow direction looks wrong?
Erase the shadow and redraw it along a line from the moon center through the object's base, pointing away from the moon.