Free original lessons
Draw Henna-Style Vine and Petal Line Patterns
Learn continuous-line vine paths with petal and dot motifs for decorative skin-style pattern design. Practice spacing, rhythm, and composition on paper.
Free lesson
Four exercises
Worked answers
Object Drawing Lessons
This lesson teaches you to draw henna-style decorative patterns using continuous vine lines, petal motifs, and dot fills. It focuses on original pattern design on paper, not cultural history or skin application. Use petal height from base to tip and petal width across its widest point; these drawing measures are separate from letter metrics. All measurements are hypothetical examples.
Practice materials: Printable downloads are not available for this lesson yet. Use the instructions and four exercises below.
Reference illustration
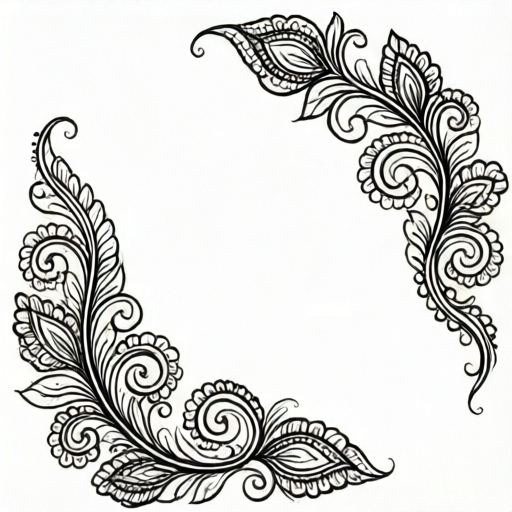
Use the stated measurements and conventions for each exercise.
Building a Continuous Vine Spine
A vine spine is a single curved line that flows across the page without lifting your pen. Start with a light pencil guide: draw a gentle S-curve about 12 cm long on A4 paper (hypothetical example). Keep the curve smooth by moving your whole arm, not just your wrist. The spine should have a consistent thickness; a fine pen line of about 0.5 mm works well (measure your own pen).
Once the spine is smooth, add small secondary curves branching off at intervals. Space branches about 2 cm apart along the spine (hypothetical). Each branch should leave the spine at a similar angle, roughly 30 to 45 degrees, to create rhythm. Do not worry about perfect symmetry; variation is part of the style.
- Draw a light S-curve guide 12 cm long on plain paper.
- Trace over the guide with a fine pen in one continuous motion.
- Mark branch points every 2 cm along the spine.
- Draw short curved branches from each point at a consistent angle.
Petal Motifs at Nodes
Petals are teardrop or leaf shapes attached to the vine at nodes. Define petal height from its base to its tip and width across its widest point; aim for 1 cm high and about half as wide in this hypothetical example. Draw each petal with two curved strokes meeting at a point, or one continuous loop.
Place petals alternately on left and right sides of the spine to balance the design. At each node, draw one petal, then skip the next node, or use a repeating pattern of two petals then a dot cluster. Consistency in size matters more than exact shape; slight variations are acceptable and often desirable.
- Choose a node on the vine spine.
- Draw a petal 1 cm tall with a curved outline.
- Repeat on alternating sides at every other node.
- Check that petal heights are within 2 mm of each other.
Dot Fills and Spacing
Dots fill gaps and add texture. Use a fine pen to make dots about 1 mm across (hypothetical). Space dots evenly, roughly 3 mm apart, in clusters of three to five. Place dot clusters between petals or along the vine to create visual interest without overcrowding.
A simple spacing rule: leave at least one dot-width of empty space between dots. This prevents merging and keeps the pattern readable. If dots touch, the design becomes muddy. Practice on a scrap strip by making rows of dots at 3 mm spacing and checking with a ruler.
- Draw a row of five dots 3 mm apart on scrap paper.
- Measure the gaps with a ruler to confirm even spacing.
- Add dot clusters between petals on your main design.
- Keep at least 1 mm of empty space around each dot.
Composing on a Hand-Outline Frame
A hand-outline frame is a simple traced outline of your own hand on paper. This gives a boundary for composing an original pattern. Draw the outline lightly, then plan your vine spine to flow from the wrist area toward the fingers, branching naturally.
Keep motifs inside the outline with a 5 mm margin (hypothetical). Use the practice strip to repeat a single motif until it feels consistent, then place motifs along the vine. Balance dense areas (petals and dots) with open space so the pattern does not feel cramped.
- Trace your hand outline lightly on A4 paper.
- Draw a vine spine from wrist to middle finger area.
- Add petals at nodes and dot clusters in gaps.
- Check that all marks stay 5 mm inside the outline.
Worked example
On a 10 cm straight guide line, draw a vine spine with three branch points spaced 2 cm apart, add one petal at each branch alternating sides, and place a three-dot cluster between the first and second branch.
Worked answer
A continuous slightly wavy line along the guide with branches at 2, 4, and 6 cm. Petals 1 cm tall on left, right, left, extending up to about 1 cm from the guide. Three dots spaced 3 mm apart centered between the 2 cm and 4 cm marks. All marks lie within 1 cm of the guide.
Four practice exercises
Exercise 1
Draw a continuous S-curve vine spine 8 cm long on plain paper. Mark three branch points at 2 cm intervals. Describe your line quality and spacing.
Show answer and check
A smooth S-curve with no pen lifts, branch marks at 2, 4, and 6 cm, each within 5 mm of the target.
Why: The S-curve practices whole-arm movement; marking intervals builds rhythm and prepares for motif placement.
Check: Measure the curve length with a ruler and check branch marks against the 2 cm intervals.
Exercise 2
At each of three nodes on a straight 6 cm line, draw one petal 1 cm tall alternating left and right. Keep petal widths about 0.5 cm. Describe how you checked consistency.
Show answer and check
Three petals at 2, 4, and 6 cm, alternating sides, heights within 2 mm of 1 cm, widths near 0.5 cm.
Why: Alternating sides balances the design; measuring height and width ensures consistent motif size.
Check: Use a ruler to measure each petal's height and width; compare against 1 cm and 0.5 cm targets.
Exercise 3
Create a dot cluster of five dots spaced 3 mm apart in a row, using dots about 1 mm across (hypothetical example). Then add a second row of five dots 3 mm below the first, offset by 1.5 mm. Describe the spacing pattern and check that no dots touch.
Show answer and check
Two rows of five dots. Within each row, dots are 3 mm apart horizontally. The rows are 3 mm apart vertically, and the second row is shifted 1.5 mm to the right. With 1 mm dots, each dot has a 0.5 mm radius. The same-row center-to-center distance is 3 mm, giving edge-to-edge clearance of 3 - 0.5 - 0.5 = 2 mm. The diagonal center-to-center distance between a dot and the nearest dot in the other row is sqrt(1.5^2 + 3^2) = sqrt(2.25 + 9) = sqrt(11.25) ≈ 3.35 mm (hypothetical example), giving edge-to-edge clearance of about 3.35 - 0.5 - 0.5 = 2.35 mm. The nearest center-to-center distance is the same-row 3 mm (edge-to-edge 2 mm); the diagonal center-to-center distance is farther at about 3.35 mm (edge-to-edge about 2.35 mm). The minimum edge-to-edge clearance is therefore the same-row 2 mm, so no dots touch.
Why: Offset rows create a staggered texture; consistent spacing prevents merging and keeps the pattern readable.
Check: Measure horizontal gaps within each row (target 3 mm), the vertical gap between rows (target 3 mm), and the horizontal shift of the second row (target 1.5 mm). Confirm no dot touches another. The same-row center-to-center distance is 3 mm (edge-to-edge 2 mm); the diagonal center-to-center distance is farther, about 3.35 mm (edge-to-edge about 2.35 mm). The minimum edge-to-edge clearance is therefore the same-row 2 mm, so no dots touch.
Exercise 4
On a simple hand-outline frame (describe it as a 12 cm tall outline), plan a vine spine from bottom to top with four branch points. Add petals at two branches and a dot cluster at one gap. Keep all marks 5 mm inside the outline.
Show answer and check
A continuous vine from bottom to top, four branches spaced about 2.5 cm apart, two petals 1 cm tall, one three-dot cluster, all marks at least 5 mm from the outline edge.
Why: Composing within a frame teaches boundary awareness and balanced placement of motifs and fills.
Check: Measure the distance from each mark to the nearest outline edge; confirm it is at least 5 mm.
Common mistakes
- Lifting the pen mid-vine, causing broken or jagged lines. Practice continuous S-curves on scrap paper, moving your whole arm slowly before drawing on the final design.
- Petals of wildly different sizes. Mark petal height with a light pencil tick at 1 cm from the base before drawing each petal.
- Dots touching or merging into blobs. Space dots at least 3 mm apart and check with a ruler; reduce dot size if needed.
- Pattern overcrowded with no empty space. Leave at least one dot-width of empty space between clusters and skip every other node for petals.
Self-check rubric
- Vine spine is continuous with no breaks or jagged edges.
- Branch points are spaced within 5 mm of the planned interval.
- Petal heights are within 2 mm of each other.
- Dots are spaced at least 3 mm apart with no merging.
- Pattern stays within the hand-outline frame with a 5 mm margin.
- Overall composition balances dense and open areas.
Questions and answers
Do I need special henna tools?
No. A pencil and fine pen on paper are enough. The lesson focuses on line and motif design, not application.
How do I keep vine curves smooth?
Draw light guides first, then trace in one motion using your whole arm. Practice on scrap paper before the final design.
What if my petals are not identical?
Slight variation is acceptable. Aim for consistent height within 2 mm and similar width-to-height ratio.
How many dots should I use?
Use clusters of three to five dots spaced 3 mm apart. Stop when the area feels balanced, not crowded.