Free original lessons
Eagle Head Drawing: Beak, Eye, and Contour Construction
Learn to draw an eagle head from front and profile views using proportion guides, beak shape, eye placement, and contour checks.
Free lesson
Four exercises
Worked answers
Object Drawing Lessons
This lesson teaches a repeatable method for drawing an eagle head with a convincing beak and eye. You will work from simple proportion guides rather than copying a finished picture. The approach separates head contour, beak construction, and eye placement so each part can be checked before adding detail. All measurements are relative to your own drawing, so the method works at any size. Use a pencil and paper; a ruler is optional for checking distances. The convention for line placement is simple: horizontal reference lines are measured from the baseline of the drawing area upward, and vertical lines from the left edge rightward. Letter styles and handwriting vary, so the rubric rewards consistent proportion and clear construction marks rather than a single perfect outline.
Practice materials: Printable downloads are not available for this lesson yet. Use the instructions and four exercises below.
Reference illustration
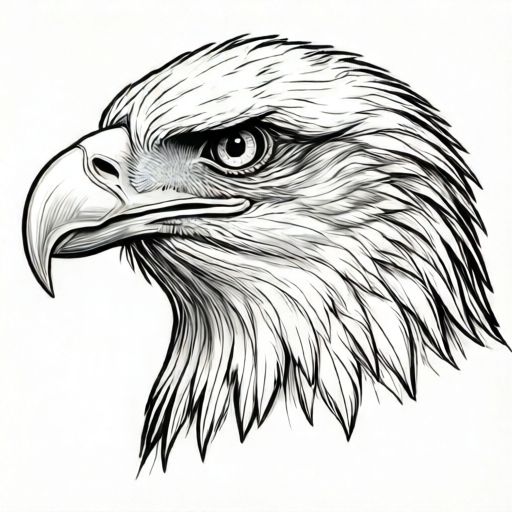
Use the stated measurements and conventions for each exercise.
Setting Up Proportion Guides
Begin by drawing a light rectangle that will contain the head. For a profile view, make the rectangle about twice as tall as it is wide. For a front view, make it slightly taller than wide. These are hypothetical starting proportions; adjust them after measuring your own reference or after deciding the head size you want.
Divide the rectangle with a horizontal midline and a vertical midline. The horizontal midline marks the approximate level of the eye. In profile, place the eye slightly behind the vertical midline. In front view, place the eye centers on either side of the vertical midline, each center about one eighth of the rectangle width from the center. This is a hypothetical starting offset; adjust it after measuring your own reference.
Mark a baseline at the bottom of the rectangle and a top line at the crown. The distance from baseline to midline is the lower head zone; from midline to top is the upper head zone. Keep these zones clearly labeled so you can compare them as you draw.
- Draw a light rectangle for the head boundary.
- Add a horizontal midline and a vertical midline.
- Label the baseline, midline, and crown line.
- Mark the eye level on the midline.
- Check that the rectangle proportions match your intended view.
Constructing the Beak
The beak attaches at the front of the head, roughly between the eye level and the lower third of the head. In profile, draw a short horizontal line from the face contour forward to mark the beak base. From that base, draw the upper beak as a curved wedge that slopes downward and forward. The lower beak sits beneath it, slightly shorter and angled back toward the throat.
Use two guide points: the beak tip and the beak base. The distance from base to tip should be about one third of the head height in profile. This is a hypothetical proportion; measure your own drawing to confirm consistency. Treat a result within about 5 percentage points of one third (roughly 28% to 38% of head height) as consistent, and record your measured percentage so the check is repeatable. Keep the beak edges as clean construction lines until the shape is correct.
In front view, the beak appears as a narrow triangle centered on the vertical midline. The upper beak overlaps the lower beak. Draw the center ridge as a light vertical line from the forehead down to the tip.
- Mark the beak base on the face contour.
- Draw the upper beak as a curved wedge to the tip.
- Add the lower beak beneath, slightly shorter.
- Check base-to-tip distance against head height.
- Refine edges only after the wedge shape is stable.
Placing and Building the Eye
The eye sits at approximately the level of the horizontal midline in profile, slightly behind the vertical midline. Draw a small circle for the eyeball, then a smaller circle inside for the pupil. The pupil should face the direction of the beak. Add a brow ridge above the eye as a short curved line that follows the head contour.
In front view, draw two eyes at the same height, placed symmetrically on either side of the vertical midline. Distinguish two measures: the eye-center offset from the midline is about one eighth of the rectangle width, and the eye diameter is also about one eighth of the rectangle width. In profile, the eye diameter is about one eighth of the head height. These are hypothetical proportions using different reference measures, not a single universal standard, so state which measure you are using. The pupils point slightly inward toward the beak. Keep both eyes the same size; check size by measuring each eye's diameter, and check placement symmetry by measuring the distance from each eye center to the vertical midline.
The eye is not a flat circle on the surface. Show the eyelid with a thin line that overlaps the top of the eyeball. Leave a small highlight unshaded on the pupil side facing the light. Do not shade the entire eye dark; keep the pupil distinct from the iris.
- Mark eye level on the horizontal midline.
- Draw the eyeball circle and pupil circle.
- Add the brow ridge above the eye.
- Check pupil direction toward the beak.
- Add eyelid line and a small highlight.
Refining the Head Contour
The head contour runs from the crown down the back of the head, around the throat, and forward to the beak base. In profile, the crown is rounded, the back of the head slopes gently, and the throat curves inward before meeting the beak. Draw this contour as a series of short straight segments first, then smooth them.
Compare the distance from the eye to the crown and from the eye to the throat. In a typical eagle head these distances are similar, but your chosen proportions may differ. Label the crown point, the back-of-head point, and the throat point so you can check symmetry and balance.
In front view, the head contour is widest at the brow and narrows toward the beak. Draw the outer contour as a rounded shield shape. Measure the brow width first, then place the eye offsets within that brow-width zone rather than against the full rectangle width. Check that the left and right sides are mirror images by measuring from the vertical midline to each side at three heights: brow, eye level, and beak base. The beak base should be the narrowest of the three.
- Draw short segments for crown, back, and throat.
- Smooth the contour without losing guide points.
- Compare eye-to-crown and eye-to-throat distances.
- Check front-view symmetry at three heights.
- Erase construction lines only after contour is stable.
Worked example
A profile eagle head is drawn in a rectangle 10 cm tall and 5 cm wide. The eye is on the midline at 5 cm from the baseline. The beak base is at 4 cm from the baseline. The beak tip is 3 cm forward of the base. Check the beak length proportion and eye placement.
Worked answer
Head height is 10 cm. Beak length is 3 cm, which is 3/10 or 30% of head height. The suggested one-third proportion is 33.3%, and the stated tolerance is about 5 percentage points (roughly 28% to 38%), so 30% counts as consistent. Eye is at 5 cm, exactly on the midline. Beak base at 4 cm is below eye level, consistent with the lesson's guidance that the beak attaches roughly between eye level and the lower third of the head. The proportions are consistent.
Four practice exercises
Exercise 1
Profile view: rectangle 12 cm tall, 6 cm wide. Eye on midline at 6 cm. Beak base at 5 cm from baseline. Beak tip 4 cm forward of base. Calculate beak length as a percentage of head height and state whether eye placement is correct.
Show answer and check
Beak length is 4 cm. 4/12 = 33.3%, about one third. Eye at 6 cm is on the midline, so placement is correct.
Why: Divide beak length by head height and multiply by 100. Compare eye position to the midline value.
Check: Re-measure rectangle height and beak length with a ruler; confirm eye mark is at half the height.
Exercise 2
Front view: rectangle 8 cm wide, 10 cm tall. Vertical midline at 4 cm. Left eye center at 3 cm from left edge; right eye center at 5 cm from left edge. Are the eyes symmetric? If not, what is the offset?
Show answer and check
Left eye is 1 cm left of midline; right eye is 1 cm right of midline. They are symmetric. Offset is zero.
Why: Measure each eye distance from the vertical midline. Equal distances on opposite sides mean symmetry.
Check: Measure from midline to each eye center; both should be 1 cm.
Exercise 3
Profile view: head height 9 cm. Eye at 4.5 cm. Beak base at 3 cm. Beak tip 3 cm forward. A student draws the beak tip 5 cm forward. What is the new beak length percentage, and how far from the suggested one-third proportion is it?
Show answer and check
New beak length is 5 cm. 5/9 = 55.6%. The suggested one-third length for a 9 cm head is 3 cm (33.3%), so the drawn beak is 2 cm longer than that suggested length. In percentage terms it is 22.2 percentage points above the suggested proportion, which is outside the stated tolerance of about 5 percentage points (roughly 28% to 38%).
Why: Calculate percentage as length divided by height times 100. Subtract the suggested percentage (33.3%) from the actual percentage to get the percentage-point difference. Also subtract the suggested length (3 cm) from the drawn length (5 cm) to get the centimeter difference. Compare the percentage-point difference to the stated tolerance of about 5 percentage points.
Check: Measure beak length and head height; recompute percentage; compare to 33.3%.
Exercise 4
Front view: rectangle 10 cm wide. Each eye should be one eighth of rectangle width. Calculate eye diameter. If a student draws each eye 1.5 cm wide, how much too large is each eye?
Show answer and check
Suggested eye diameter is 10/8 = 1.25 cm. A 1.5 cm eye is 0.25 cm too large.
Why: Divide rectangle width by 8. Subtract suggested diameter from drawn diameter.
Check: Measure drawn eye width and rectangle width; recompute one eighth; compare.
Common mistakes
- Making the beak too long or too short relative to the head. Measure the base-to-tip distance and compare it to head height; in profile, aim for about one third and treat roughly 28% to 38% as consistent.
- Placing the eye above or below the horizontal midline. Re-mark the midline and place the eye center exactly on it before drawing the eyeball.
- Drawing the pupil facing away from the beak. Check pupil direction; it should point toward the beak tip in both views.
- Making the front-view head too wide at the beak. Measure width at brow, eye level, and beak base; the beak base should be the narrowest.
Self-check rubric
- Head rectangle and midlines are drawn and labeled.
- Eye center lies on the horizontal midline in both views.
- Beak base-to-tip distance is measured and recorded.
- Beak shape uses a base line and two wedges before smoothing.
- Pupil direction points toward the beak.
- Head contour is checked at crown, back, and throat points.
- Front-view symmetry is checked at three heights.
- Construction lines are light and can be erased cleanly.
- Valid alternative proportions are accepted if measurements are consistent and documented.
Questions and answers
Do I need a ruler?
A ruler helps check distances, but you can use a pencil to mark equal lengths. Keep units consistent, such as centimeters or pencil-widths.
Can I draw the head larger than the guide rectangle?
Yes. The proportions are relative. If you enlarge the rectangle, enlarge all guide distances by the same factor.
How do I know the eye is the right size?
In profile, the eye diameter is about one eighth of the head height. In front view, each eye is about one eighth of the rectangle width. Measure and compare.
What if my beak shape looks wrong?
Return to the wedge construction: base line, upper wedge, lower wedge. Check the base-to-tip distance and the angle of the upper beak before smoothing edges.