Free original lessons
Draw a Generic Insect: Segmented Body and Six-Leg Construction
Learn to draw a generic insect with a three-part segmented body and six legs attached to the thorax, using proportion guides and a clear step sequence.
Free lesson
Four exercises
Worked answers
Object Drawing Lessons
This lesson teaches a reliable construction method for drawing a generic insect. You will build the body from three segments, place six legs on the thorax, and label the parts. The method uses simple proportion guides so the result is checkable rather than dependent on a single style. All measurements are hypothetical examples; measure your own paper and tools. The focus is body segmentation and leg attachment, not species identification, wing detail, or habitat scenes.
Practice materials: Printable downloads are not available for this lesson yet. Use the instructions and four exercises below.
Reference illustration
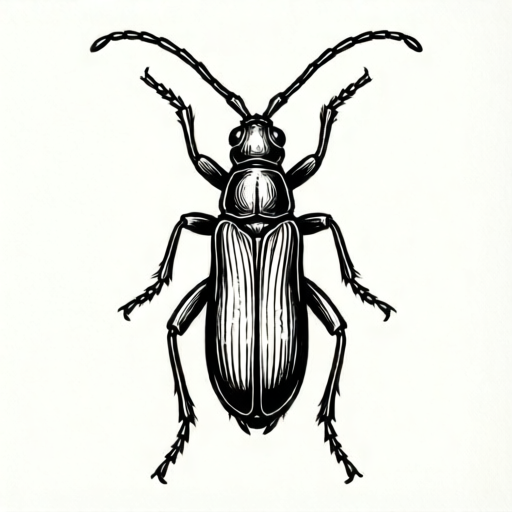
Use the stated measurements and conventions for each exercise.
Body Segmentation and Proportion Guides
An insect body has three main segments: head, thorax, and abdomen. Draw them as three connected ovals or rounded shapes along a central axis. A practical proportion guide is to make the head the smallest, the thorax medium, and the abdomen the longest. For example, on a 20 cm wide sheet, you might plan head length 2 cm, thorax 3 cm, and abdomen 6 cm. These numbers are hypothetical; adjust to your paper size.
Keep the segments visually distinct by leaving a slight narrowing or seam line between them. The thorax is the anchor for all six legs, so give it enough width to host three attachment points on each side. Draw a faint center line first, then place the three segment shapes along it. Check that the total body length fits inside your planned drawing area with room for legs.
- Draw a faint horizontal center line across the middle of your paper.
- Mark three lengths along the line for head, thorax, and abdomen using your chosen proportions.
- Draw a rounded shape for each segment, keeping the thorax wider than the head.
- Add a light seam line between head and thorax and between thorax and abdomen.
- Check that the three segments touch but remain visually separate.
Six-Leg Attachment Layout
All six legs attach to the thorax. A simple layout is three attachment points on the left side and three on the right, spaced evenly along the thorax. Draw small dots for the attachment points before drawing legs. Each leg can be built from two or three straight or slightly bent sections. Use a consistent convention: for this lesson, a leg section is a line segment, and a joint is where two segments meet.
Plan leg length so the insect looks balanced. A hypothetical example is leg length about 1.5 times the thorax length. Keep left and right legs roughly mirrored, but allow small differences because natural insects vary. Check that no leg crosses another leg confusingly and that all six legs clearly start at the thorax, not the head or abdomen.
- Mark three attachment dots on the left side of the thorax and three on the right.
- Draw the front pair of legs first, angling them forward.
- Draw the middle pair, angling them outward.
- Draw the rear pair, angling them backward.
- Add one joint per leg by breaking each leg into two segments.
- Check that every leg begins at a thorax dot and that there are exactly six legs.
Labeling and Checking the Construction
Label the head, thorax, and abdomen with short lines and clear text. Label the six leg attachment points or number the legs one to six. Use a simple convention for labels: place the label outside the body shape and connect it with a straight line that does not cross another label line. This makes the drawing easy to check.
Check the construction against three rules: three body segments, six legs, and all legs attached to the thorax. Measure your drawing with a ruler if needed. For example, if your thorax is 3 cm long, the three attachment dots on each side should fall within that 3 cm span. These values are hypothetical; use your own planned measurements.
- Label head, thorax, and abdomen outside the body outline.
- Number the legs one to six at their attachment points.
- Check that each label line touches only its target part.
- Measure the thorax span and confirm all six attachment dots lie within it.
- Erase guide lines that are no longer needed, keeping the construction clear.
Worked example
On a 20 cm wide sheet, plan a generic insect with head length 2 cm, thorax length 3 cm, and abdomen length 6 cm. Place six legs on the thorax and label the parts. Describe the construction.
Worked answer
Draw a center line. Mark 2 cm for the head, 3 cm for the thorax, and 6 cm for the abdomen. Draw three rounded shapes along the line, with the thorax wider than the head. Mark three attachment dots on each side of the thorax within its 3 cm span. Draw six two-segment legs from those dots, angling front legs forward, middle legs outward, and rear legs backward. Label head, thorax, and abdomen outside the body and number the legs one to six. Check that all six legs start at thorax dots and that the three segments are visually separate.
Four practice exercises
Exercise 1
A student draws an insect with head 2 cm, thorax 3 cm, abdomen 5 cm, and six legs. Four legs attach to the thorax and two attach to the abdomen. State whether the construction meets the lesson rules and explain why.
Show answer and check
No. Two legs attach to the abdomen, so the rule that all six legs attach to the thorax is broken.
Why: The lesson requires exactly six legs and all six attached to the thorax. Four on the thorax plus two on the abdomen fails the attachment rule even though the total is six.
Check: Count legs at each body part. Confirm thorax count equals six and head and abdomen counts equal zero.
Exercise 2
On a 15 cm wide sheet, a student plans head 1.5 cm, thorax 2.5 cm, and abdomen 4 cm. They mark three attachment dots on each side of the thorax. The left dots span 2 cm and the right dots span 3 cm. Is the layout consistent with the planned thorax length? Explain.
Show answer and check
No. The right-side dots span 3 cm, which is longer than the planned 2.5 cm thorax, so at least one dot falls outside the thorax.
Why: Attachment dots must lie within the thorax span. A 3 cm span exceeds the 2.5 cm thorax length, so the layout is inconsistent.
Check: Measure each side's dot span and compare it with the thorax length. Both spans must be less than or equal to the thorax length.
Exercise 3
A drawing shows three labeled segments and six legs, but the legs are drawn as single straight lines with no joints. The lesson convention defines a leg as one or more line segments with joints where segments meet. Does the drawing satisfy the leg construction convention? Explain.
Show answer and check
Yes, if each leg is a single line segment. The convention allows one or more segments, so a single straight line per leg is valid as long as all six legs attach to the thorax.
Why: The convention does not require multiple segments. A single segment is a valid leg construction under the stated rule.
Check: Check that each leg is a line segment starting at a thorax dot and that there are exactly six legs.
Exercise 4
A student draws an insect with head 2 cm, thorax 3 cm, abdomen 6 cm, and six legs on the thorax. They label only the thorax and number the legs one to six. Does the drawing meet the labeling rubric? Explain.
Show answer and check
No. The rubric requires head, thorax, and abdomen to be labeled. Labeling only the thorax leaves two required labels missing.
Why: The rubric lists three body segment labels as a requirement. Missing head and abdomen labels fails that item even if leg numbering is correct.
Check: List the required labels and tick each one present. Confirm head, thorax, and abdomen are all labeled.
Common mistakes
- Attaching legs to the abdomen or head. Move all six attachment dots onto the thorax and redraw the legs from those dots.
- Drawing only four or eight legs. Count the legs aloud and number them one to six at the attachment points.
- Making the three body segments look like one continuous blob. Add a slight narrowing or seam line between head, thorax, and abdomen.
- Letting leg lines cross and hide the attachment points. Draw attachment dots first, then angle legs so they do not overlap confusingly.
Self-check rubric
- Three body segments are drawn and labeled: head, thorax, abdomen.
- Exactly six legs are drawn.
- All six legs attach to the thorax, not the head or abdomen.
- Leg attachment points are visible or numbered.
- Body segments are visually distinct through shape or seam lines.
- Labels are clear and label lines do not cross confusingly.
- Valid alternative styles are accepted if the three structural rules are met.
Questions and answers
Do I need to draw wings?
No. This lesson focuses on segmented body and six-leg construction. Wings are excluded from the task boundary.
Must all six legs look identical?
No. Keep the layout consistent, but small differences in angle or length are acceptable if all six legs attach to the thorax.
What if my paper is a different size?
Choose your own proportions and measure your paper. The numerical examples in this lesson are hypothetical and can be scaled.
How do I know the drawing is correct?
Check three rules: three labeled body segments, exactly six legs, and every leg attached to the thorax.