Free original lessons
Botanical Pen and Ink: Leaf, Stem, and Flower Detail
Learn to draw botanical subjects in pen and ink with clear leaf venation, tapered stems, and observed flower detail using simple, checkable steps.
Free lesson
Four exercises
Worked answers
Object Drawing Lessons
Pen and ink rewards close looking and deliberate marks. This lesson guides you through observing and drawing a botanical subject—leaf, stem, and flower—with a focus on venation, taper, and contour. You will use a simple convention: x-height is measured from baseline to midline, and letter styles may vary. All measurements are checkable with a ruler. No special hardware is assumed; measure your own pen and paper. The practice tasks are self-contained and solvable from the text.
Practice materials: Printable downloads are not available for this lesson yet. Use the instructions and four exercises below.
Reference illustration
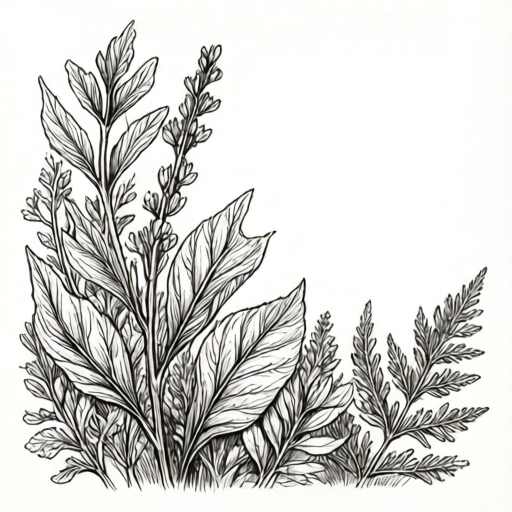
Use the stated measurements and conventions for each exercise.
Leaf Venation: Midrib, Secondary Veins, and Margin
Begin by placing the leaf on paper and marking the midrib as a gentle curve from base to tip. Secondary veins branch from the midrib toward the margin; their spacing and angle vary by species, so observe rather than invent. Draw the margin last, using short strokes that follow the leaf edge.
Use a light pencil guide if needed, then ink over it. Keep vein lines thinner than the midrib. For shading, use parallel hatching that follows the vein direction, not across it.
- Mark the leaf base and tip with two dots; connect with a curved midrib.
- Add 4–6 secondary veins per side, angling toward the margin.
- Draw the margin with short, overlapping strokes.
- Hatch between veins to suggest depth, keeping lines parallel to the vein.
Stem Taper and Node Placement
A stem is rarely a constant width. Observe where it narrows toward the tip and where nodes (leaf attachment points) occur. Mark nodes first, then taper the stem between them. Use a ruler to check that the stem width at the base is greater than at the tip; label any numerical values as hypothetical examples for your own practice.
Ink the stem with a single confident line on each side, then add a few short cross-hatches at nodes to suggest texture.
- Mark two nodes on the stem with small dots.
- Draw the stem outline, narrowing from base to tip.
- Add a leaf or bud at each node.
- Check taper with a ruler: base width should exceed tip width.
Flower Observation: Shape Block-In, Contour, Ink Detail
Observe the flower as a simple shape first—circle, oval, or cup. Block in that shape lightly, then refine the contour with petal edges. Finally, add ink detail such as petal veins or stamen lines. Keep detail sparse; pen and ink relies on contrast.
Use the x-height convention for any lettering on your sheet: measure from baseline to midline. Letter styles vary, so choose a consistent style for labels.
- Block in the flower shape with a light outline.
- Refine the contour with petal edges.
- Add 2–3 ink details per petal, such as a vein or fold.
- Label parts using the x-height convention if desired.
Hatching for Leaf Shading
Hatching is a set of parallel lines. For leaves, angle hatch lines to follow the secondary veins. Vary spacing to suggest light and shadow. A sample strip with three spacing densities (wide, medium, tight) helps you compare.
Check your hatching by holding the page at arm's length: the darkest area should read as a single tone, not as separate lines.
- Draw a 3 cm by 1 cm strip and divide into three equal parts.
- Fill each part with parallel lines at wide, medium, and tight spacing.
- Apply the tight spacing to the leaf's shadow side.
- Compare tones at arm's length and adjust spacing.
Worked example
Draw a simple leaf with a curved midrib, 4 secondary veins per side, and a tapered stem 6 cm long. Use hatching on one side.
Worked answer
Midrib curves from base to tip; 4 veins per side angle toward margin; stem narrows from 4 mm at base to 2 mm at tip (hypothetical example); hatching follows vein direction on the shadow side.
Four practice exercises
Exercise 1
Draw a leaf 8 cm long with a straight midrib and 5 secondary veins per side. Add a stem 5 cm long that tapers from 3 mm to 1.5 mm (hypothetical example).
Show answer and check
Leaf has straight midrib, 5 veins per side, stem taper 3 mm to 1.5 mm.
Why: Follow steps: mark base and tip, connect midrib, add veins, draw margin, then stem with measured taper.
Check: Count veins per side (should be 5); measure stem widths at base and tip with a ruler.
Exercise 2
Create a hatching strip 3 cm by 1 cm divided into three equal parts with wide, medium, and tight spacing. Apply tight spacing to a leaf's shadow side.
Show answer and check
Strip shows three densities; leaf shadow uses tight spacing.
Why: Parallel lines at increasing density create tone; tight spacing reads darker at arm's length.
Check: Hold at arm's length: darkest part should read as one tone; measure strip divisions (1 cm each).
Exercise 3
Block in a flower as an oval, refine the contour with petal edges, and add 2 ink details per petal. Label one part using the x-height convention.
Show answer and check
Oval block-in, refined contour, 2 details per petal, label with baseline-to-midline height.
Why: Shape first, then contour, then sparse detail; label height measured from baseline to midline.
Check: Count details per petal (2); measure label height from baseline to midline.
Exercise 4
Draw a stem with two nodes 4 cm apart. Stem tapers from 5 mm at base to 2 mm at tip (hypothetical example). Add a leaf at each node.
Show answer and check
Two nodes 4 cm apart; taper 5 mm to 2 mm; leaf at each node.
Why: Mark nodes first, taper between them, attach leaves at nodes.
Check: Measure node distance (4 cm) and stem widths (5 mm base, 2 mm tip).
Common mistakes
- Drawing veins as straight lines across the leaf. Curve secondary veins gently toward the margin and vary their angle.
- Making the stem the same width from base to tip. Measure base and tip widths with a ruler; taper between nodes.
- Overloading the flower with ink detail. Limit to 2–3 details per petal and leave white space.
- Hatching across veins instead of along them. Angle hatch lines parallel to the nearest secondary vein.
Self-check rubric
- Midrib is a single curved line from base to tip.
- 4–6 secondary veins per side angle toward the margin.
- Stem tapers from base to tip; base width exceeds tip width.
- Flower contour is refined from a simple shape block-in.
- Hatching lines follow vein direction and vary in spacing.
- Labels, if used, follow the x-height convention consistently.
Questions and answers
Do I need special pens?
No. Use any pen you have; measure its line width on scrap paper to plan detail.
How do I check my leaf venation?
Count secondary veins per side (aim for 4–6) and confirm they angle toward the margin.
What is the x-height convention?
X-height is the distance from baseline to midline; letter styles may vary, so keep one style per sheet.
Can I use a ruler for taper?
Yes. Measure stem width at base and tip; base should be wider. Label any numbers as hypothetical examples.