Free original lessons
Draw Koru Spirals and Interlocking Patterns: A Step-by-Step Guide
Learn to construct koru spirals with taper and stem, then repeat them in interlocking patterns using a grid. Includes practice tasks, rubric, and checks.
Free lesson
Four exercises
Worked answers
Object Drawing Lessons
The koru is a spiral motif inspired by the unfurling fern frond. This guide teaches a clear construction method: start with an inner curl, add a tapered body, attach a stem, then repeat motifs in an interlocking grid. You will use simple tools and checkable steps. All measurements are hypothetical examples; measure your own paper and tools. The focus is on deliberate line control and pattern repetition, not on copying a single fixed shape. Valid variations in tightness, taper, and spacing are expected and assessed with a flexible rubric.
Practice materials: Printable downloads are not available for this lesson yet. Use the instructions and four exercises below.
Reference illustration
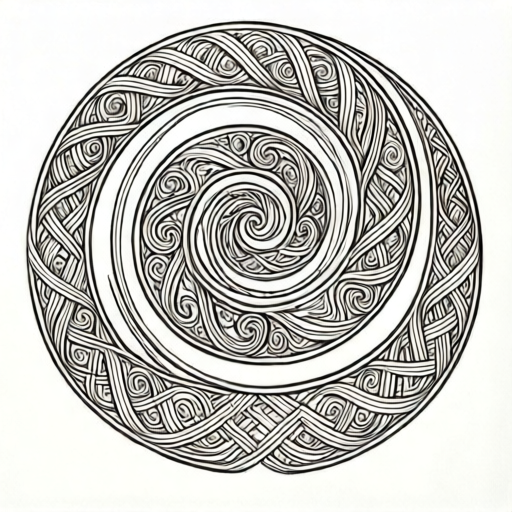
Use the stated measurements and conventions for each exercise.
Constructing a Single Koru Spiral
A koru has three parts: an inner curl, a tapered body that widens as it unwinds, and a stem that connects to the pattern. Work lightly at first, then darken final lines. Use a pencil and a smooth sheet. Define a center point and a starting direction. The spiral can turn clockwise or counterclockwise; choose one and keep it consistent within a motif.
Line weight convention: the outer edge of the spiral is the heavier line; the inner edge is lighter. This is a drawing convention, not a universal rule. You may reverse it if you state your choice and keep it consistent. X-height is not relevant here; instead, treat the spiral's widest point as the body width and the stem as a straight or gently curved tail.
- Mark a center point. Draw a small circle of about 5 mm radius (hypothetical) around it; this is the inner curl guide.
- From the top of the circle, draw a light spiral outward, increasing the radius by about 2 mm per quarter-turn (hypothetical) for one and a half turns total.
- Continue until one and a half turns are complete, keeping the gap between turns widening gradually.
- At the outer end, taper the line: the body should be widest near the last half-turn and narrow toward the stem.
- Attach a stem of about 15 mm (hypothetical) tangent to the outer end. Keep the stem straight or with a slight curve.
- Check: the spiral should not cross itself; the taper should be gradual; the stem should meet the body smoothly.
Building an Interlocking Pattern on a Grid
Interlocking means adjacent koru motifs share space without overlapping lines. A simple approach is a staggered grid: place motifs in rows, offsetting every other row by half a cell. Each motif's stem points toward the gap between two motifs in the next row. This creates a woven look.
Choose a cell size that fits your motif. Grid size may be equal to or slightly larger than the body span; for example, if your koru body spans about 30 mm, a 35 mm grid is one hypothetical choice, while the exercises use 30 mm and 25 mm cells as alternative chosen examples. When a cell is smaller than the body span, scale the motif down so its body span stays within the cell; for the 25 mm cell, keep the body span under 25 mm (for example, about 20 mm, hypothetical). Draw light grid lines, then place centers at grid intersections or cell centers. Keep the spiral direction alternating by row to enhance interlocking. Check that stems do not collide; adjust spacing rather than forcing overlap.
- Draw a light grid of squares, for example 35 mm per side (hypothetical).
- Mark motif centers: row 1 at cell centers; row 2 at cell corners (staggered).
- Draw one koru at each center using the single-spiral steps, keeping line weight consistent.
- Alternate spiral direction by row: clockwise in row 1, counterclockwise in row 2.
- Adjust stems so they point into the gaps between neighboring motifs, not into their bodies.
- Check: no lines cross; spacing is even; the pattern reads as repeating without crowding.
Line Weight and Shading Practice
Line weight variation helps the spiral read clearly. Use a heavier line on the outer edge and a lighter line on the inner edge, or the reverse, but keep the choice consistent. Shading is optional: a light shade on the body's outer side can suggest volume. Keep the stem unshaded in all motifs for consistency.
Practice on a shaded outline: draw a koru, then trace the outer edge with a darker pencil and the inner edge with a lighter one. Check that the transition is gradual, not abrupt. If you use shading, keep it even and avoid smudging.
- Draw a koru lightly.
- Trace the outer edge with a darker line, pressing evenly.
- Trace the inner edge with a lighter line.
- Add optional shading on the outer side of the body only; leave all stems unshaded.
- Check: the heavier line should follow the outer contour smoothly; no double lines.
Worked example
Construct one koru with a 5 mm inner circle, one and a half turns, 2 mm growth per quarter-turn, and a 15 mm stem. State the spiral direction and line-weight convention.
Worked answer
Draw a 5 mm radius circle. From the top, spiral outward clockwise for six quarter-turns (one and a half turns), adding 2 mm to the radius each quarter-turn. The final radius is 5 + 6×2 = 17 mm. Taper the last half-turn so the body narrows toward the stem. Attach a 15 mm stem tangent to the outer end. Use heavy outer edge, light inner edge. Check: no self-crossing; stem meets smoothly; taper is gradual.
Four practice exercises
Exercise 1
Draw a single koru with a 4 mm inner circle, one and a quarter turns, and 3 mm growth per quarter-turn. Use a 12 mm stem. State your direction and line-weight convention.
Show answer and check
A valid drawing shows a 4 mm circle, five quarter-turns total (one and a quarter turns), final radius 4 + 5×3 = 19 mm, a tapered last half-turn, and a 12 mm stem. Direction and line-weight convention are stated.
Why: The arithmetic sets the final radius; the taper and stem follow the construction steps. Any direction is valid if consistent.
Check: Measure the inner circle and stem; count quarter-turns; confirm no self-crossing and a gradual taper.
Exercise 2
On a 30 mm grid, place four koru motifs in a 2×2 staggered arrangement. Alternate spiral direction by row. Describe or draw the result.
Show answer and check
Use a 2×2 grid of 30 mm cells (60 mm × 60 mm total). Row 1: two motifs at cell centers, clockwise. Row 2: two motifs at cell corners, counterclockwise. Assume each body span is under 30 mm and stems are about 12 mm (hypothetical), angled into the gaps. At that size, check that no lines cross.
Why: Staggering offsets rows by half a cell; alternating direction enhances interlocking. The grid size is hypothetical and can be adjusted.
Check: Verify the grid is 2×2 cells of 30 mm, centers are staggered (cell centers in row 1, cell corners in row 2), directions alternate, and stems angled into gaps do not collide at the stated motif size.
Exercise 3
Take one koru and redraw it with heavy outer edge and light inner edge. Then redraw the same koru with the reverse convention. Compare.
Show answer and check
Two drawings of the same spiral with opposite line-weight conventions. Both are valid if consistent and the transition is gradual.
Why: Line weight is a convention, not a fixed rule. The exercise tests consistent application.
Check: Check that each drawing uses one convention throughout and that heavier lines follow the chosen contour.
Exercise 4
Design a row of three interlocking koru motifs with stems pointing into the gaps between the next row's motifs. Use a 25 mm cell (hypothetical) and scale each motif so its body span is under 25 mm (for example, about 20 mm, hypothetical). State spacing and direction.
Show answer and check
Three motifs in a row, evenly spaced at 25 mm, each scaled so its body span is under 25 mm (for example, about 20 mm, hypothetical), with stems angled toward gaps. Direction is consistent or alternating as stated. No overlaps.
Why: The row tests spacing and stem placement. The cell size is a chosen example, not a standard.
Check: Measure spacing; confirm each body span is under 25 mm, stems enter gaps, and lines do not cross.
Common mistakes
- The spiral crosses itself or the turns touch. Increase the gap between turns by about 1–2 mm per quarter-turn (hypothetical) and redraw lightly before darkening.
- The taper is abrupt or the stem is too thick. Taper over the last half-turn; make the stem no wider than the narrowest part of the body.
- Interlocking motifs overlap or stems collide. Use a staggered grid and point stems into gaps; increase cell size if needed.
- Line weight changes randomly. State your convention (heavy outer or heavy inner) and apply it to every motif.
Self-check rubric
- Spiral is continuous and does not cross itself.
- Taper is gradual from body to stem.
- Stem meets the body smoothly and is proportionate.
- Line-weight convention is stated and applied consistently.
- Interlocking pattern uses even spacing and no overlapping lines.
- Valid alternatives (direction, tightness, curved stem) are accepted if consistent and clearly drawn.
Questions and answers
Do I have to draw clockwise?
No. Choose clockwise or counterclockwise and keep it consistent within a motif or pattern row. The rubric accepts either.
How tight should the spiral be?
Any tightness is valid if the turns do not touch and the taper is gradual. A common guide is a 5 mm inner circle and 2 mm growth per quarter-turn (hypothetical).
Can I use a ruler for the grid?
Yes. A ruler helps even spacing. Measure your own paper and tools; the grid size is your choice.
What if my stem is curved?
A gently curved stem is acceptable if it meets the body smoothly and does not cross other lines.