Free original lessons
Latte Art Drawing: Cup Rim, Foam Contrast, and Pour Patterns
Learn to draw latte art with a correct cup rim ellipse, milk-foam contrast, and three pour patterns: rosetta, heart, and tulip.
Free lesson
Four exercises
Worked answers
Object Drawing Lessons
Drawing latte art is a study in controlled shapes and tonal contrast. The cup rim is an ellipse seen in perspective; the foam surface holds light and dark zones that define the pattern. This lesson breaks the task into three checkable parts: the rim ellipse, the contrast map, and the pour-pattern shapes. You will use a simple convention for x-height and letter-style variation so that valid alternatives are accepted. All measurements are hypothetical examples; measure your own cup and paper.
Practice materials: Printable downloads are not available for this lesson yet. Use the instructions and four exercises below.
Reference illustration
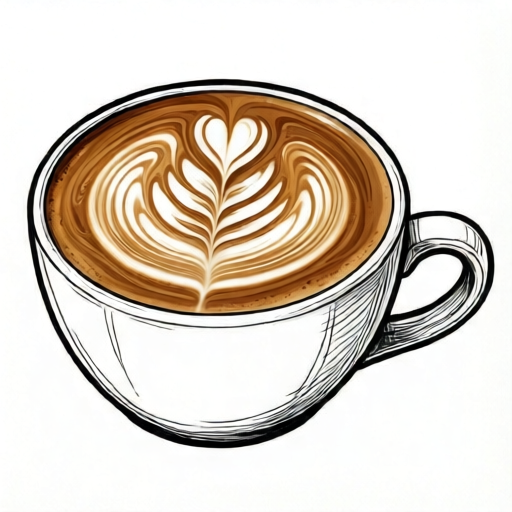
Use the stated measurements and conventions for each exercise.
Cup Rim Ellipse and Surface Setup
Begin by drawing the cup rim as an ellipse. An ellipse has a major axis (widest horizontal span) and a minor axis (vertical height). For a cup seen from a typical pouring angle, the minor axis is shorter than the major axis. A hypothetical example: major axis 10 cm, minor axis 4 cm. These are example values only; measure your actual cup opening.
Place the ellipse so its center sits slightly above the page midline. Draw a light vertical centerline through the ellipse to guide symmetry. The foam surface is the area inside the ellipse; the cup wall is the band below the rim. Keep the rim line clean and single-weight so the pattern remains the focus.
- Measure the cup opening width and depth; record both in the same unit.
- Draw a horizontal major axis and a vertical minor axis crossing at the center.
- Sketch the ellipse through four axis endpoints; check that opposite points are equal distances from the center.
- Add a light centerline and a faint horizontal midline inside the ellipse for pattern placement.
Milk-Foam Contrast Map
Contrast on the foam surface comes from two zones: the bright milk foam and the darker espresso base. Decide which zone is lighter before shading. A simple convention: use unshaded paper for the lightest foam, light pencil hatching for mid foam, and denser cross-hatching for the dark espresso. This convention is explicit so that any consistent tonal scale is valid.
Map the contrast before drawing the pattern. Draw three or four broad tonal patches inside the ellipse: a bright patch where the pour stream lands, a mid-tone ring around it, and darker crescents near the rim. Keep the darkest values away from the pattern center unless the pattern itself requires a dark line.
- Mark the lightest foam patch with a small circle or label L.
- Mark the darkest espresso areas near the rim with label D.
- Add a mid-tone band between L and D; label M.
- Test the contrast by squinting: the L patch should stand out from D without any outline.
Pour-Pattern Shape Breakdowns
Rosetta: a leaf-like fan of stacked curved lobes. Draw a central stem line, then add pairs of curved lobes that widen toward the rim. Each lobe is a shallow arc; keep lobe widths equal on both sides of the stem. Heart: a rounded top with a pointed base. Draw two symmetric arcs meeting at a point, then soften the top curve. Tulip: a stack of rounded bulbs that narrow toward the top. Draw three or four overlapping circles or ovals, with each bulb slightly smaller than the bulb beneath it (the bottom bulb is largest), then connect their sides with gentle curves.
Use the centerline from the rim setup to keep each pattern symmetric. The pattern should sit inside the ellipse and not touch the rim unless the design intends it. Set a consistent x-height for pattern elements: choose one reference height (for example, the height of one rosetta lobe or one tulip bulb) and keep all elements of that pattern at that height or a stated multiple of it. Letter-style variation is allowed: lobes may be rounded or slightly pointed, hearts may be wide or narrow, and tulip bulbs may be circular or oval, provided the overall shape reads clearly and the chosen x-height is applied consistently.
- Choose one pattern and sketch its outer boundary lightly inside the ellipse.
- Add internal lines: stem for rosetta, center crease for heart, bulb separations for tulip.
- Check symmetry by folding a light tracing or by measuring distances from the centerline.
- Refine line weight: heavier on the pattern edges, lighter on the foam texture.
Shading the Foam Surface
Shade the foam surface after the pattern is placed. Use the contrast map from earlier: keep the pattern's light areas unshaded, add light hatching to mid foam, and reserve dense hatching for dark espresso. Do not outline the pattern with a hard black line; let tonal contrast define the edge. General rule: leave the center of the lightest patch unshaded and hatch only its edges. A hypothetical example tied to a 10 cm ellipse: if the light foam patch is 3 cm wide, leave the central 1 cm unshaded and hatch the outer 1 cm on each side.
Check the shading by viewing the drawing from a short distance. The pattern should remain readable and the rim ellipse should still be visible. If the contrast is too weak, darken the espresso zones rather than adding outlines.
- Shade mid-tone foam with light parallel hatching.
- Shade dark espresso zones with cross-hatching, following the ellipse curve.
- Leave the lightest foam unshaded.
- Compare the pattern's readability at arm's length; adjust contrast if needed.
Worked example
Draw a heart pattern inside a cup rim ellipse with a contrast map. Use a hypothetical cup opening 10 cm wide and 4 cm deep. Place the heart centered, with its top curve 1 cm below the rim's top edge and its point 1 cm above the rim's bottom edge. Show three tonal zones.
Worked answer
Draw an ellipse with major axis 10 cm and minor axis 4 cm. Mark the center and a vertical centerline. Sketch a heart: two symmetric arcs meeting at a point at the bottom, top curve rounded. Keep the heart inside the ellipse with 1 cm margins top and bottom. Map contrast: unshaded light foam inside the heart, light hatching in a ring around it, dense cross-hatching near the rim. Check symmetry by measuring from the centerline; check contrast by squinting so the heart reads as a light shape against darker foam.
Four practice exercises
Exercise 1
Draw a cup rim ellipse with a hypothetical major axis of 12 cm and minor axis of 5 cm. Mark the center, both axes, and a vertical centerline. State the distance from the center to each axis endpoint.
Show answer and check
The major axis endpoints are 6 cm from the center; the minor axis endpoints are 2.5 cm from the center. The ellipse is wider than it is tall, consistent with a pouring view.
Why: An ellipse's axes are bisected by the center, so each endpoint lies half the axis length from the center. Using consistent units (cm) makes the check simple.
Check: Measure each endpoint distance with a ruler; confirm 6 cm horizontally and 2.5 cm vertically, and that opposite endpoints are equal.
Exercise 2
Inside a rim ellipse, sketch a rosetta with a central stem and three pairs of lobes. Each lobe should be 1.0 cm wide at its widest. State the total width of the rosetta at the widest pair and check that it fits inside a 10 cm wide ellipse with at least 1 cm margin on each side.
Show answer and check
Three pairs of lobes give six lobes. At 1.0 cm each, the total width is 6 x 1.0 cm = 6 cm. A 10 cm ellipse leaves (10 - 6) / 2 = 2 cm margin on each side, which is more than 1 cm, so it fits.
Why: Width is the sum of lobe widths across the pattern: 6 lobes x 1.0 cm = 6 cm. Subtracting the pattern width from the ellipse width and dividing by two gives the side margin: (10 - 6) / 2 = 2 cm.
Check: Measure the widest lobe pair and the ellipse width; confirm the total pattern width is 6 cm and the margin on each side is 2 cm, which is at least 1 cm.
Exercise 3
Create a contrast map for a tulip pattern inside a 10 cm wide ellipse. Label three zones: light foam, mid foam, dark espresso. State one hypothetical width for the light zone and one for the dark zone, using the same unit, and check that the light zone is narrower than the dark zone and that both zones fit inside the ellipse.
Show answer and check
Example: light zone 2 cm wide, dark zone 4 cm wide inside a 10 cm ellipse. The light zone is narrower than the dark zone (2 < 4), and both zones fit: 2 + 4 = 6 cm, leaving (10 - 6) / 2 = 2 cm margins on each side. The tulip reads as a bright shape against darker foam.
Why: Contrast depends on relative areas and values. Keeping the light zone smaller and unshaded makes the pattern stand out without outlines. Checking the widths against the ellipse width confirms the zones fit and the light zone is narrower.
Check: Measure the labeled zones and the ellipse width; confirm the light zone width is less than the dark zone width, that the two widths sum to less than the ellipse width, and that three distinct labels are present.
Exercise 4
Draw a heart pattern inside an ellipse with a vertical centerline. The heart's top curve is 1 cm below the rim's top edge and its point is 1 cm above the rim's bottom edge. The ellipse minor axis is 4 cm. State the heart's vertical height and check that it equals the minor axis minus the two margins.
Show answer and check
Heart height = 4 cm - 1 cm - 1 cm = 2 cm. The heart spans 2 cm vertically, centered between the margins.
Why: Vertical height is the minor axis length minus the top and bottom margins. Subtracting both margins from the axis gives the available height.
Check: Measure the heart's vertical span and the two margins; confirm they add to the minor axis length (1 + 2 + 1 = 4 cm).
Common mistakes
- Drawing the cup rim as a perfect circle. Use an ellipse with a shorter minor axis; check that the vertical span is less than the horizontal span.
- Outlining the pour pattern with a hard dark line. Define the pattern by tonal contrast between light foam and dark espresso instead of a contour line.
- Making the rosetta lobes uneven on the two sides. Measure each lobe's distance from the centerline and adjust so paired lobes match.
- Shading the entire foam surface evenly. Map at least three tonal zones (light, mid, dark) before shading and keep the lightest zone unshaded.
Self-check rubric
- Cup rim is drawn as an ellipse with a shorter minor axis and clear major and minor axes.
- Pattern is centered and symmetric about the vertical centerline, with measured margins inside the ellipse.
- Contrast map uses at least three distinct tonal zones: light foam, mid foam, dark espresso.
- Pattern shape reads clearly as rosetta, heart, or tulip without relying on a hard outline.
- A consistent x-height is chosen for pattern elements and applied throughout the chosen pattern.
- Valid alternatives are accepted: lobes may be rounded or pointed, hearts wide or narrow, tulip bulbs circular or oval, provided symmetry, readability, and consistent x-height are maintained.
Questions and answers
Do I need a real cup to draw latte art?
No. You can draw a measured ellipse for the rim and use the pattern breakdowns. If you have a cup, measure its opening to set your ellipse axes.
What does x-height mean in this lesson?
X-height is the distance from the baseline to the midline of a letter or shape. In this lesson it is a sizing convention: choose one reference height for a pattern element (such as one rosetta lobe or one tulip bulb) and keep all elements of that pattern at that height or a stated multiple of it. Letter styles vary, so the exact x-height is your choice; what matters is that it is applied consistently and checked in the rubric.
Can I use a different tonal scale?
Yes. The convention is explicit: lightest foam unshaded, mid foam light hatching, dark espresso dense hatching. Any consistent scale that preserves three distinct values is valid.
How do I know my ellipse is correct?
Check that opposite points on the ellipse are equal distances from the center along both axes, and that the minor axis is shorter than the major axis for a typical pouring view.