Free original lessons
Twin-Peak Mountain Drawing: Paired Summits and Valley Shading
Learn to construct twin-summit mountains with paired ridge lines, a saddle valley, and depth shading using a simple, repeatable drawing convention.
Free lesson
Four exercises
Worked answers
Object Drawing Lessons
This lesson teaches a reliable method for drawing a twin-peak mountain: two summits joined by a saddle valley. You will build paired ridge lines from a shared base, shape the saddle, and shade the valley to suggest depth. The convention is explicit so you can check your work, but letter styles and line weights may vary. All measurements are hypothetical examples; measure your own paper and tools. The focus is construction and shading, not scenery.
Practice materials: Printable downloads are not available for this lesson yet. Use the instructions and four exercises below.
Reference illustration
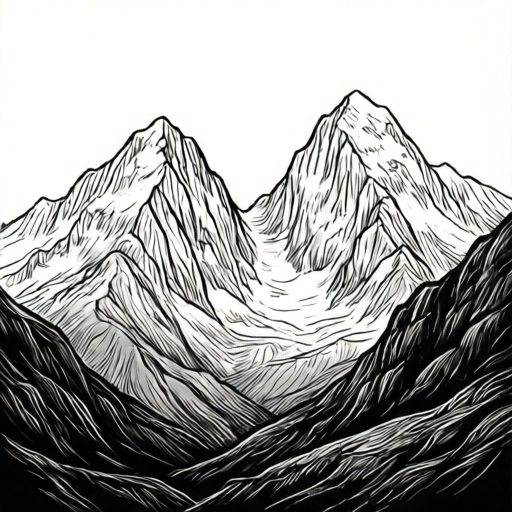
Use the stated measurements and conventions for each exercise.
Building Paired Summit Shapes
Start with a horizontal base line. Mark a center point and two summit points at equal height above the base, spaced apart. These are the paired summits. Draw a left ridge from the left base to the left summit and a right ridge from the right base to the right summit. Then draw inner ridge lines from each summit down toward a saddle point on the center line, lower than both summits. The saddle is the valley between the peaks.
Keep the two summit shapes similar in style but not identical; variation is valid. A summit can be rounded, angular, or slightly flattened. The paired ridge lines should meet the base at distinct points so the mountain reads as one mass with two peaks, not two separate mountains.
- Draw a base line and mark center, left summit, and right summit points.
- Connect left base to left summit and right base to right summit.
- Draw inner ridges from each summit to a saddle point on the center line.
- Check that the saddle is lower than both summits and that the outer base points are distinct.
Shaping the Saddle Valley
The saddle valley is the low area between the summits. Its shape controls whether the twin peaks look connected or separate. A shallow saddle makes a broad, connected mass; a deep saddle makes two distinct peaks. Draw the saddle as a smooth curve or a shallow V, and keep the inner ridges meeting it cleanly.
Use a light construction line for the saddle first, then darken it once the proportions look right. The valley floor should not dip below the base line. If the saddle is too low, the mountain looks like two separate hills; if too high, the peaks merge into one.
- Mark the saddle point on the center line below the summits.
- Draw a light curve or V for the saddle floor.
- Adjust the saddle depth until the twin peaks read as one mass.
- Darken the final saddle line and erase construction marks.
Valley Shading for Depth
Shade the valley to suggest depth. Use a consistent convention: darker shading in the saddle and along the inner ridges, lighter shading on the outer slopes. Hatching lines can run down the slope, following the ridge direction. Keep the shading density graded: darkest at the saddle, fading outward.
Valid alternatives include cross-hatching, stippling, or smooth tonal shading, as long as the darkest area is the valley and the lightest area is the outer slopes. Do not shade the summits uniformly; leave highlights near the peaks to separate them from the valley.
- Choose one shading method and apply it consistently.
- Darken the saddle and inner ridge areas first.
- Grade the shading outward to lighter tones on the outer slopes.
- Leave highlights near both summits and check the contrast.
Comparing Twin-Peak Proportions
Use a comparison box to test proportions. Draw three small twin-peak outlines in a row: one with a shallow saddle, one with a medium saddle, and one with a deep saddle. Compare how the saddle depth changes the read of the mountain. This box is a planning tool, not a final drawing.
Check that each outline has paired summits, distinct outer base points, and a saddle lower than the summits. Label the saddle depth as shallow, medium, or deep. Choose the proportion that best matches your intended mountain and apply it to your main drawing.
- Draw three small twin-peak outlines in a comparison box.
- Vary only the saddle depth between them.
- Label each as shallow, medium, or deep.
- Select one proportion and transfer it to the main drawing.
Worked example
On a 20 cm wide base line, place a center point at 10 cm. Place left summit at 5 cm and right summit at 15 cm, both 8 cm above the base. Place the saddle at 10 cm on the center line, 4 cm above the base. Draw the outer ridges, inner ridges, and saddle, then shade the valley darkest.
Worked answer
The drawing shows one mountain mass with two summits at equal height, a saddle at half the summit height, and graded shading darkest at the saddle. Check: saddle (4 cm) is lower than summits (8 cm); outer base points at 0 cm and 20 cm are distinct; shading is darkest at the center valley.
Four practice exercises
Exercise 1
Draw a twin-peak mountain on a 16 cm base line. Place the center at 8 cm, left summit at 4 cm and right summit at 12 cm, both 6 cm above the base. Place the saddle at 8 cm, 3 cm above the base. Shade the valley darkest.
Show answer and check
A twin-peak outline with summits at 6 cm, saddle at 3 cm, and darkest shading at the center valley.
Why: The saddle is half the summit height, so the peaks read as connected but distinct. The outer base points at 0 cm and 16 cm keep the mass unified.
Check: Measure the saddle height (3 cm) against summit height (6 cm); confirm the saddle is lower and the darkest shading is at the center.
Exercise 2
Draw a twin-peak mountain with a shallow saddle: base 18 cm, center 9 cm, summits at 5 cm and 13 cm, both 7 cm high, saddle at 9 cm and 5 cm high. Use cross-hatching for valley shading.
Show answer and check
A twin-peak outline with a shallow saddle at 5 cm and cross-hatched valley shading darkest at the center.
Why: A saddle at 5 cm is only 2 cm below the summits, creating a broad connected mass. Cross-hatching is a valid shading convention if graded darkest at the saddle.
Check: Confirm saddle (5 cm) is lower than summits (7 cm); check that cross-hatching density is highest at the center valley.
Exercise 3
Draw a twin-peak mountain with unequal summits: base 20 cm, center 10 cm, left summit at 6 cm and 8 cm high, right summit at 14 cm and 6 cm high, saddle at 10 cm and 3 cm high. Use stippling for shading.
Show answer and check
A twin-peak outline with unequal summits and a saddle at 3 cm, stippled darkest at the valley.
Why: Unequal summit heights are valid as long as the saddle is lower than both. Stippling is acceptable if density is greatest at the saddle.
Check: Verify saddle (3 cm) is lower than both summits (8 cm and 6 cm); check stipple density is highest at the center valley.
Exercise 4
In a comparison box, draw three twin-peak outlines with base 12 cm and summits 6 cm high. Use saddle heights of 2 cm, 3 cm, and 4 cm. Label each as deep, medium, or shallow.
Show answer and check
Three outlines labeled deep (2 cm), medium (3 cm), and shallow (4 cm), each with paired summits and a lower saddle.
Why: Varying only saddle depth isolates the proportion variable. Each saddle is lower than the 6 cm summits, so all three are valid twin-peak shapes.
Check: Measure each saddle height and confirm the labels match: 2 cm deep, 3 cm medium, 4 cm shallow; all are below 6 cm.
Common mistakes
- Drawing two separate mountains instead of one twin-peak mass. Use a shared base line and connect the inner ridges to a single saddle point on the center line.
- Making the saddle higher than one or both summits. Lower the saddle point below both summits and check the center line.
- Shading the summits darker than the valley. Apply the darkest shading at the saddle and inner ridges, leaving highlights near the peaks.
- Using inconsistent shading methods across the drawing. Choose one method (hatching, cross-hatching, stippling, or smooth tone) and apply it uniformly.
Self-check rubric
- Paired summits are present and connected by a saddle valley.
- Saddle is lower than both summits.
- Outer base points are distinct and the mountain reads as one mass.
- Valley shading is darkest at the saddle and graded outward.
- Shading method is consistent and highlights remain near the summits.
- Construction lines are cleaned up and proportions are checkable.
Questions and answers
Do the two summits have to be the same height?
No. Paired summits can differ in height as long as the saddle remains lower than both and the outer base points are distinct. Varying summit height is a valid proportion choice.
Can I use a rounded saddle instead of a V?
Yes. A rounded saddle or a shallow V both work. The key check is that the saddle is lower than the summits and the inner ridges meet it cleanly.
How dark should the valley shading be?
Dark enough to read as the lowest, deepest area, but not so dark that it hides the ridge lines. Grade the shading from dark at the saddle to light on the outer slopes.
What if my paper size changes?
Measure your actual paper and scale the base line and summit spacing proportionally. Any numerical values in this lesson are hypothetical examples, not fixed requirements.