Reference diagram
LETTER · Download PDF (2 pages)
Free original lessons
Learn to draw an upside-down jellyfish with a clear bell orientation, radial tentacle guide, and a self-check rubric for original work.
Original reference diagrams, four practice exercises and separate worked answers. All files are free. No signup required.
LETTER · Download PDF (2 pages)
LETTER · Download PDF (2 pages)
LETTER · Download PDF (6 pages)
Choose A4 or US Letter for your printer. The reference and answer illustrations are not physical rulers; follow the scale instruction printed on the practice worksheet.
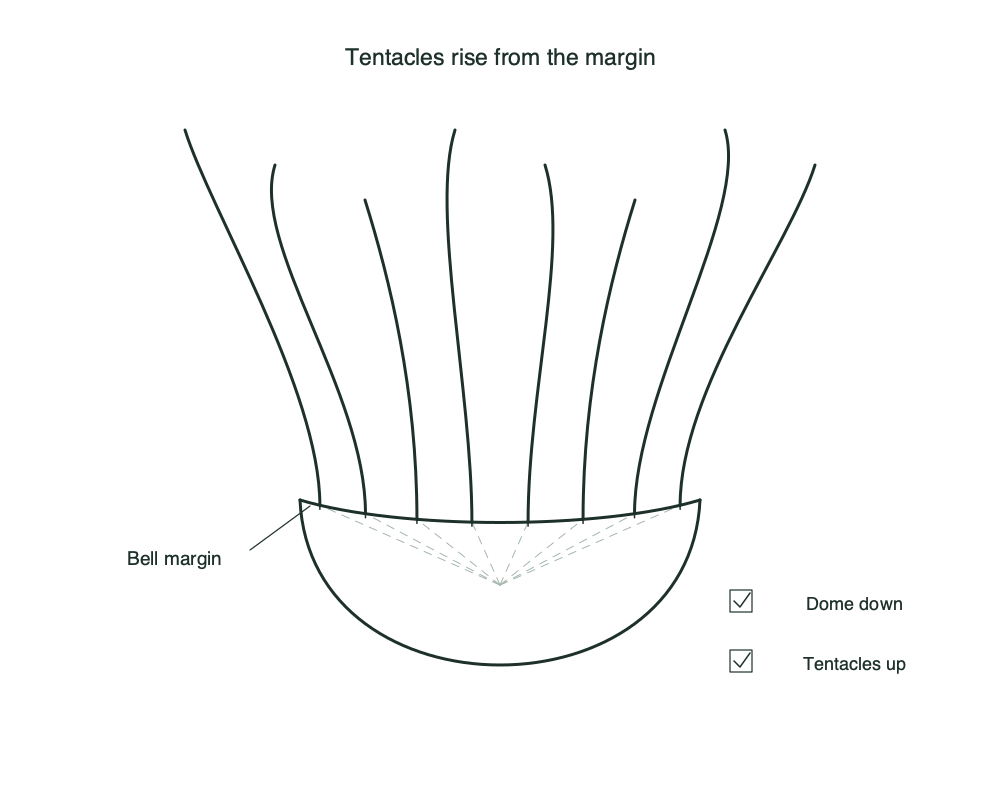
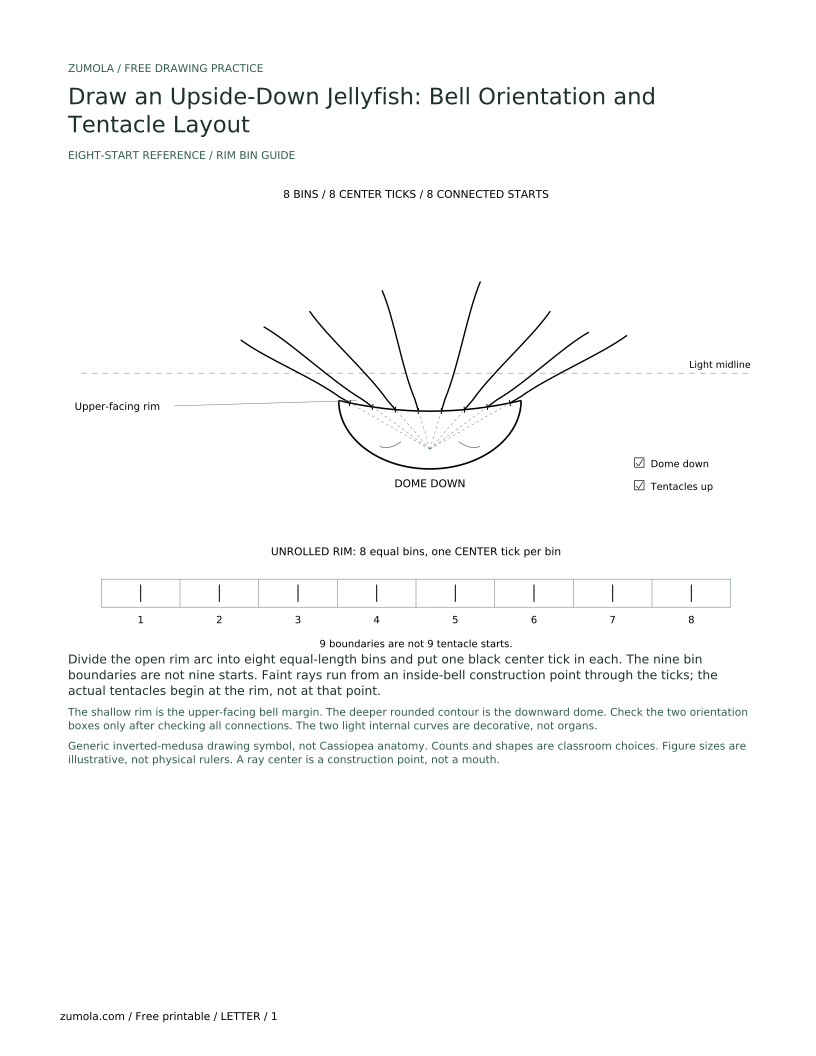
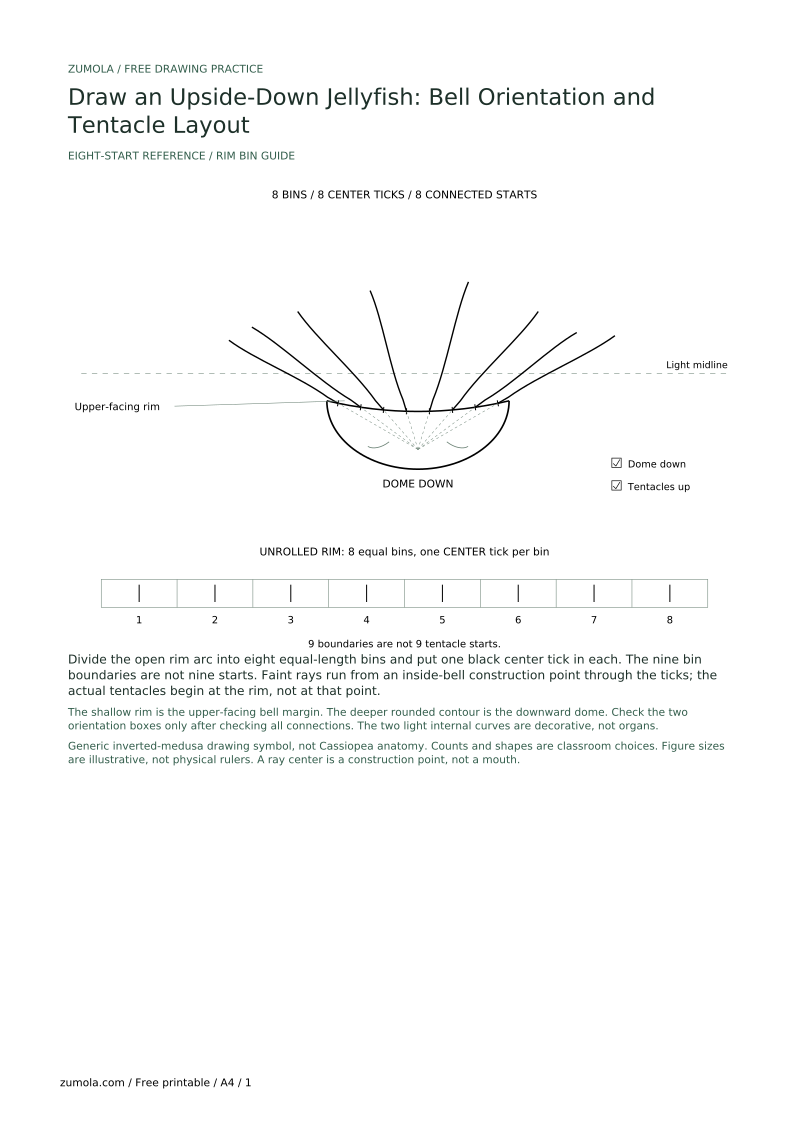
Draw a simplified jellyfish symbol turned upside down: its rounded bell dome points toward the page bottom, and the drawn tentacles rise from the upper-facing bell margin. Here, margin means the shallow rim joining the two ends of that downward dome, not its lowest rounded contour. This is a generic drawing exercise, not a species diagram of Cassiopea. The rubric rewards readable orientation, connected tentacles, and a consistent spacing convention. Measure your own paper when choosing a size; the counts and proportions here are classroom choices.
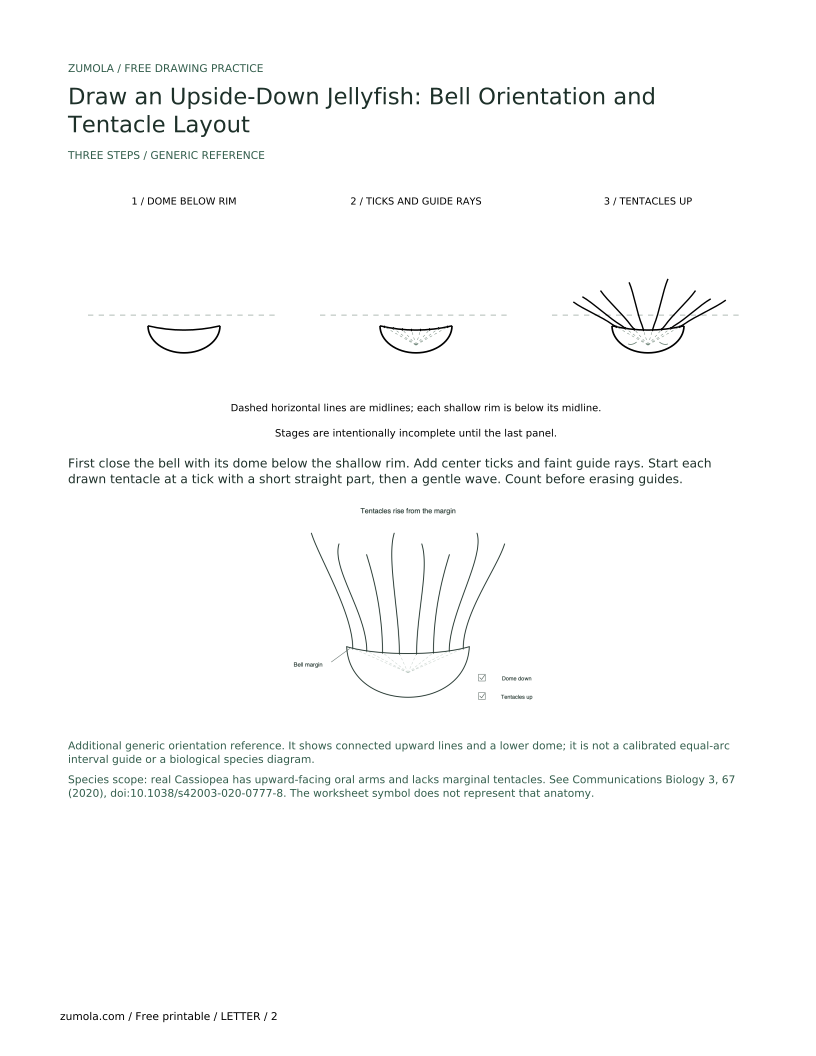
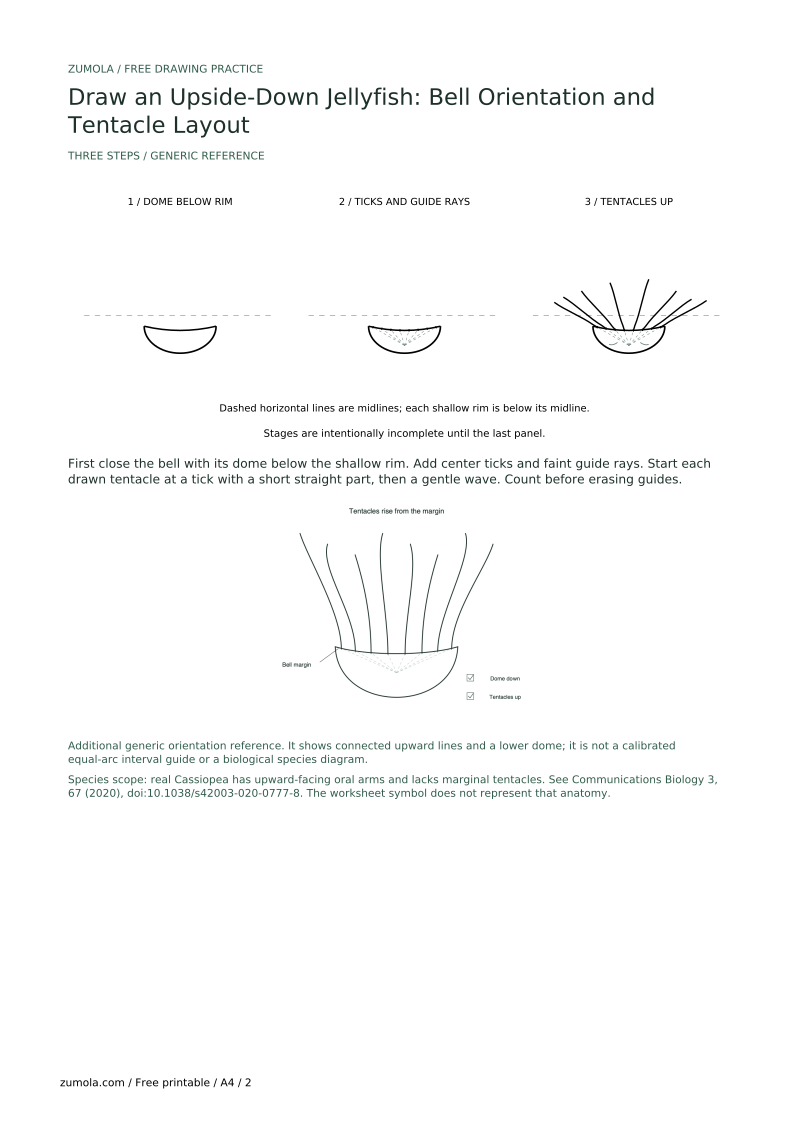
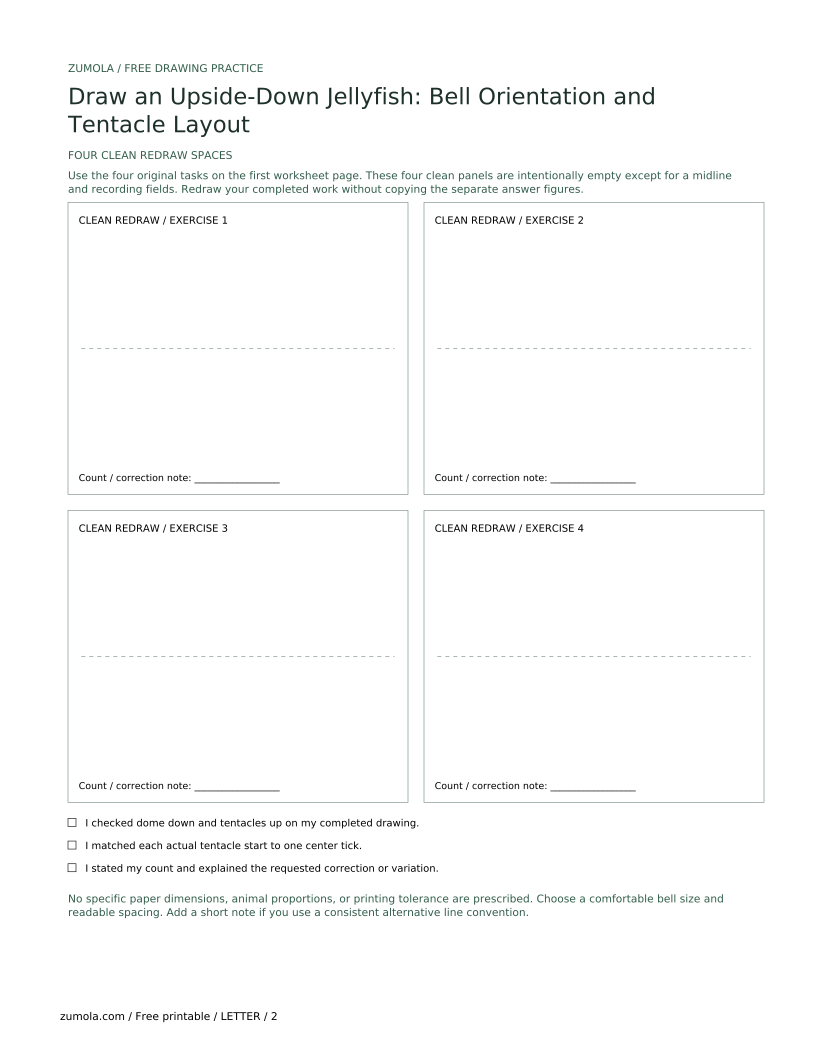
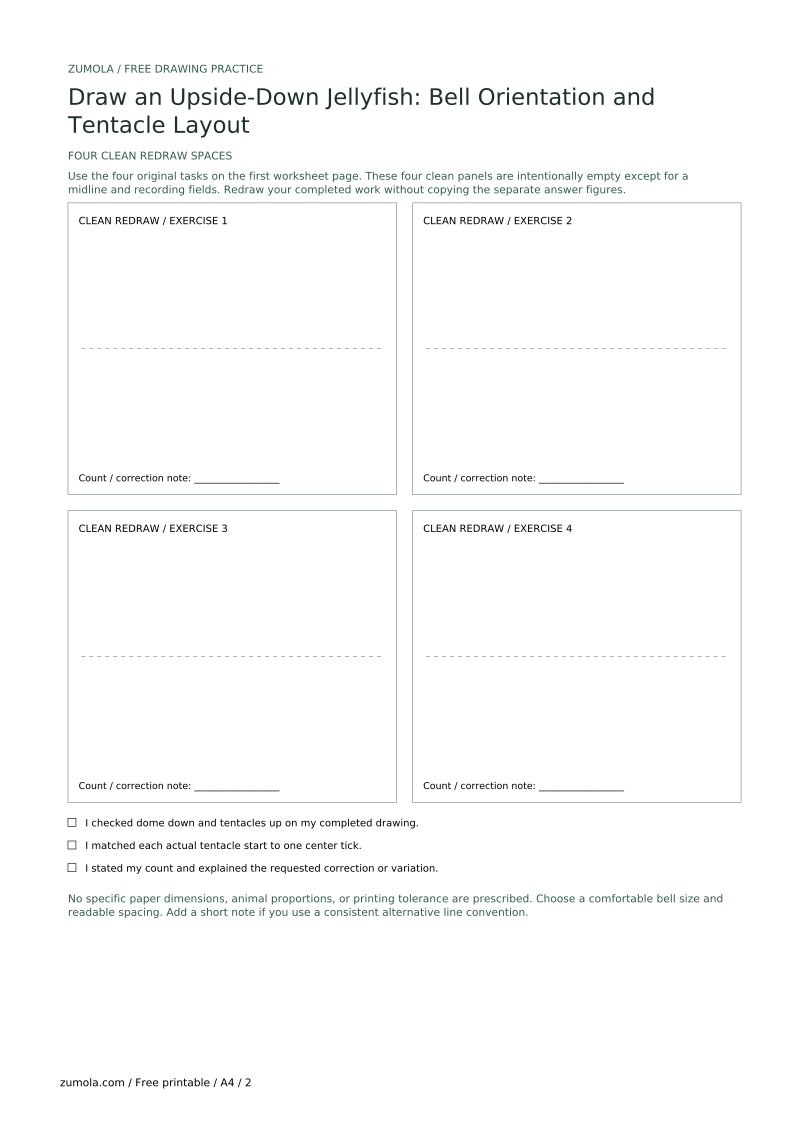
Choose a drawing area and mark a light horizontal midline. Place the shallow bell margin just below this midline, with the rounded dome farther down toward the page bottom. Tentacles will rise from this upper-facing margin and extend above the bell. Keep the complete bell wider than it is tall. Page-up and page-down are drawing directions, not claims about every real jellyfish.
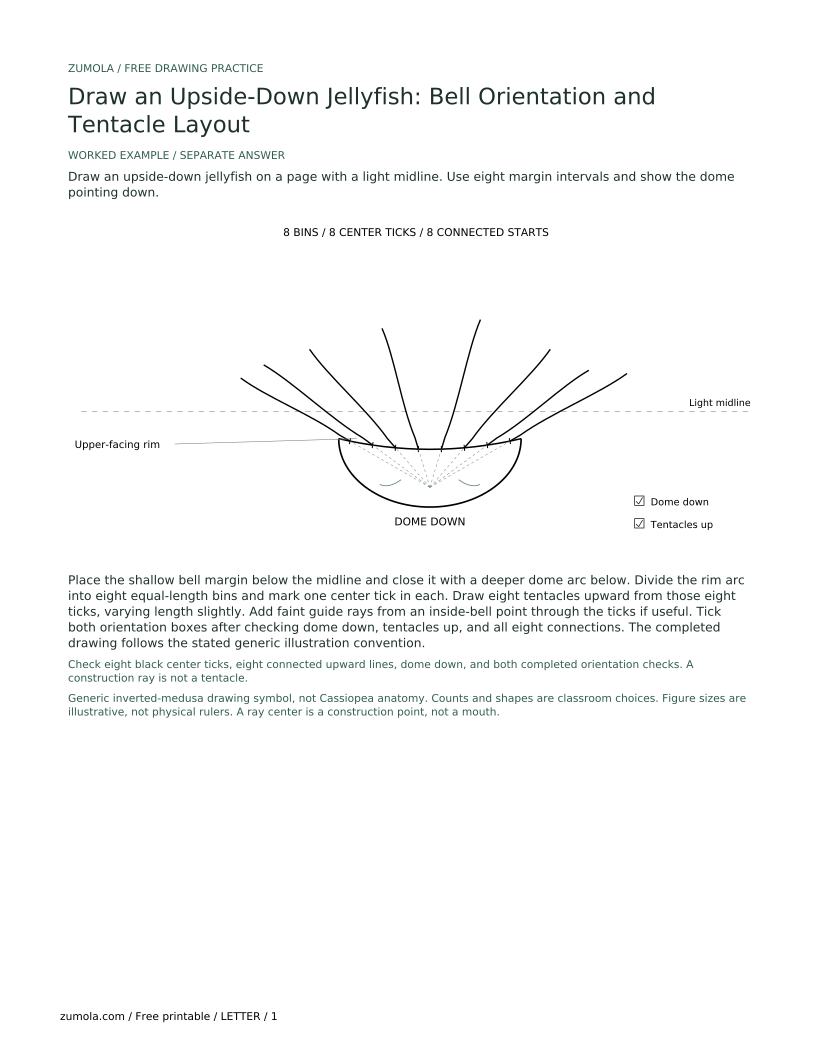
Draw a shallow rim curve between two margin endpoints. Close it with a deeper smooth arc below it so the dome points downward. Add two orientation check boxes beside the drawing: dome down and tentacles up. Tick them only after checking the complete drawing.
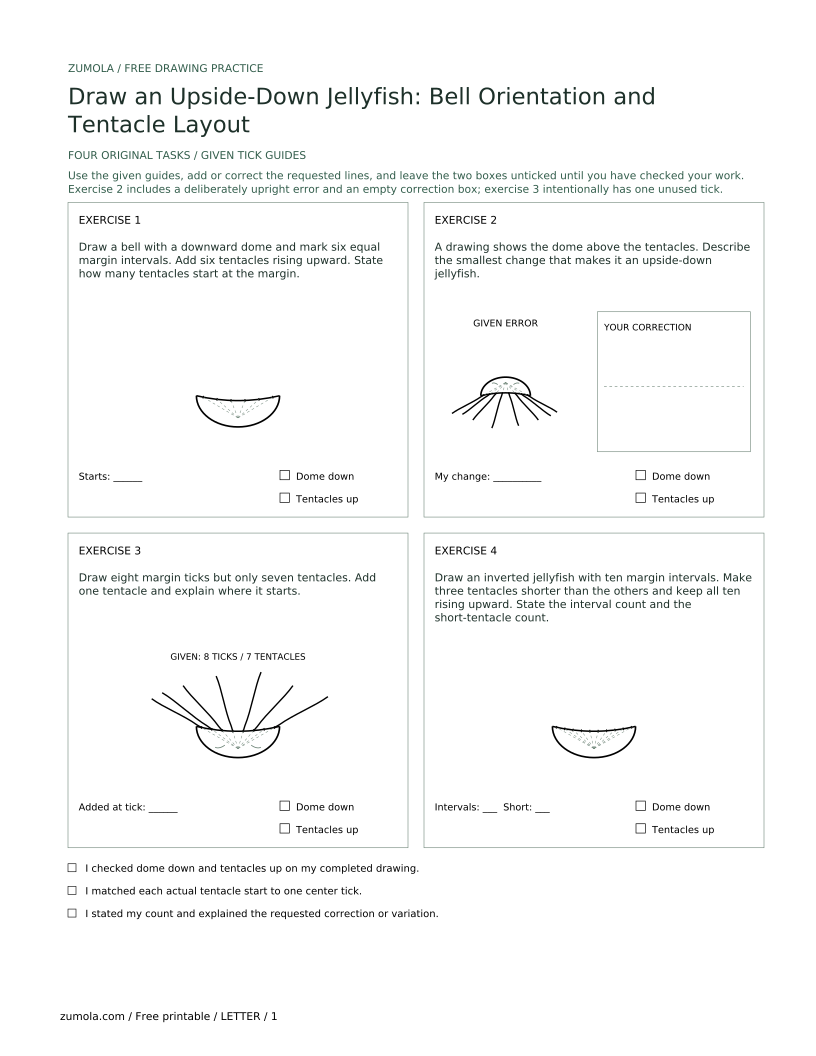
Begin each drawn tentacle at a marked point on the upper-facing bell margin and fan it upward. When a task asks for N equal margin intervals, divide the open rim arc into N equal-length bins and put ONE tick at the center of each bin. Use those N center ticks for N tentacle starts; do not count the N + 1 bin boundaries as starts. Six to ten is a chosen practice range, not a biological rule. Begin with a short straight segment, then a gentle wave; vary lengths when requested.
For a radial guide, choose a point inside the bell below all margin ticks. Draw a faint ray from this guide center through each tick and continue in that upward direction. The ray center is a construction point, not a mouth. Equal spacing refers to distance along the rim arc; rays need not have exactly equal angles. Keep each tentacle connected to its own tick. Avoid overlaps while learning, or explain a clear front-back choice when drawing one.
Keep the rounded dome below its shallow rim. Add two or three short, light curves inside the dome if you want a decorative thickness cue. They are graphic details, not identified organs. Do not label a mouth on the outside of the downward dome or confuse the radial construction point with a mouth.
Use a consistent line weight for the outer bell and a lighter weight for guides. Erase construction lines only after the tentacle arrangement is stable. The goal is a clear inverted silhouette that a viewer can identify without a habitat scene.
Use the two check boxes to confirm the dome points down and the tentacles rise up. Then check tentacle spacing: count the intervals and confirm each tentacle starts at a margin tick. Finally, check that no tentacle begins above the bell or floats without a margin connection.
Because hand-drawing varies, accept any bell shape that is wider than tall and clearly inverted. Accept tentacle curves that differ in length as long as the upward direction and radial spacing remain readable.
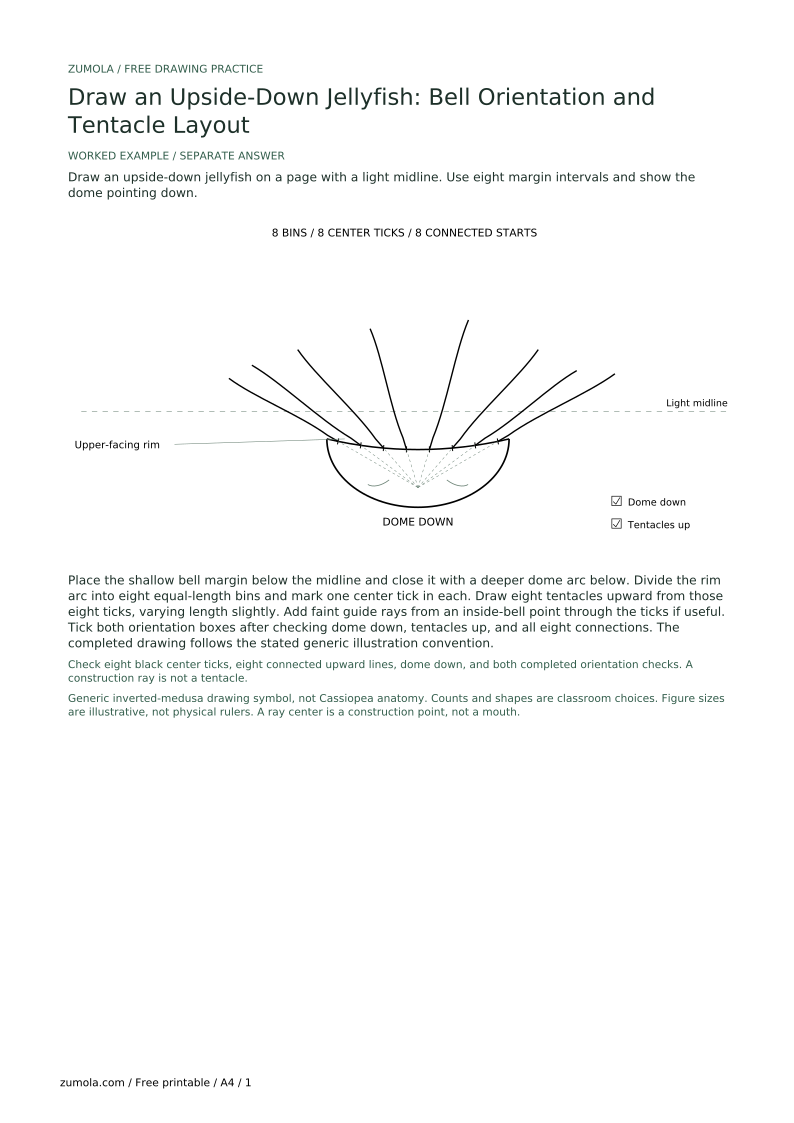
Draw an upside-down jellyfish on a page with a light midline. Use eight margin intervals and show the dome pointing down.
Place the shallow bell margin below the midline and close it with a deeper dome arc below. Divide the rim arc into eight equal-length bins and mark one center tick in each. Draw eight tentacles upward from those eight ticks, varying length slightly. Add faint guide rays from an inside-bell point through the ticks if useful. Tick both orientation boxes after checking dome down, tentacles up, and all eight connections. The completed drawing follows the stated generic illustration convention.
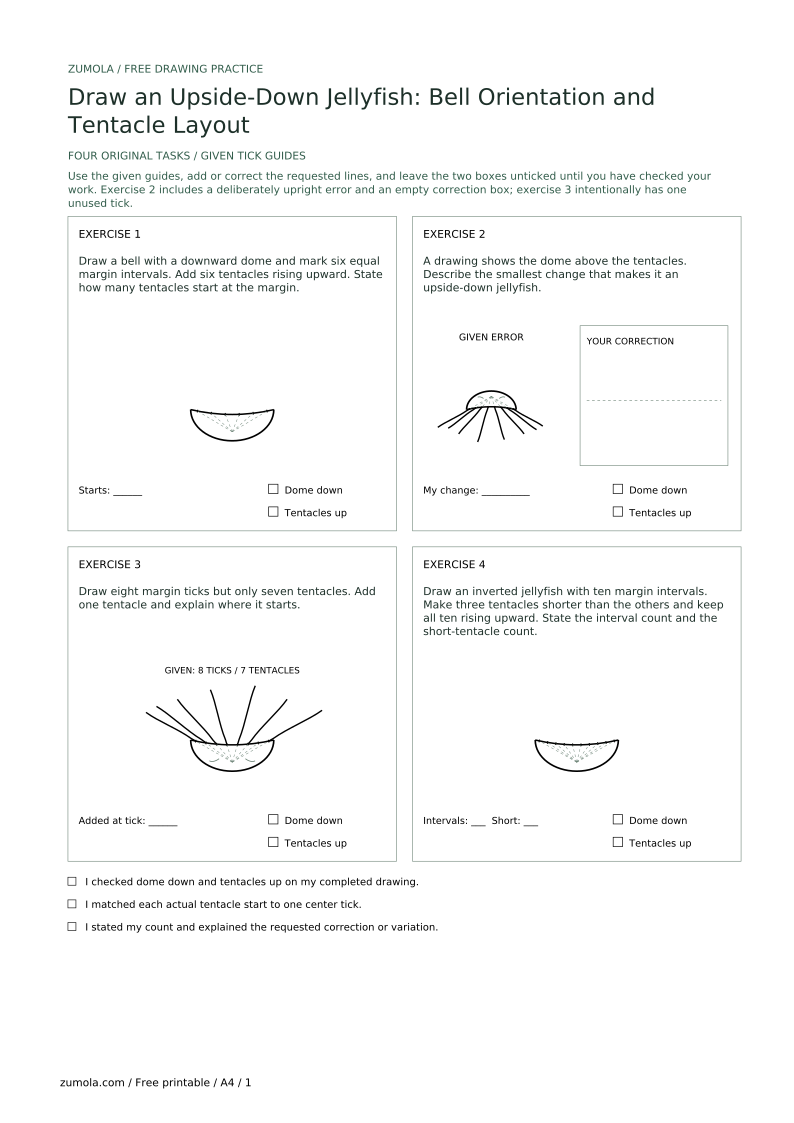
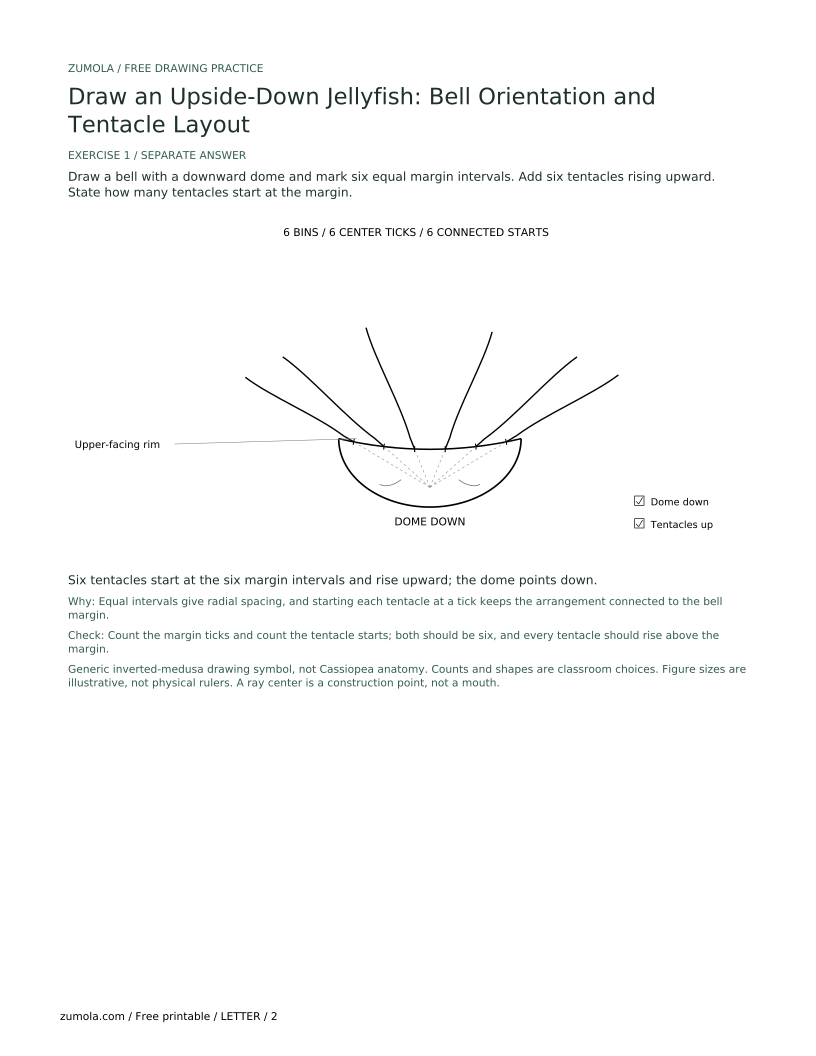
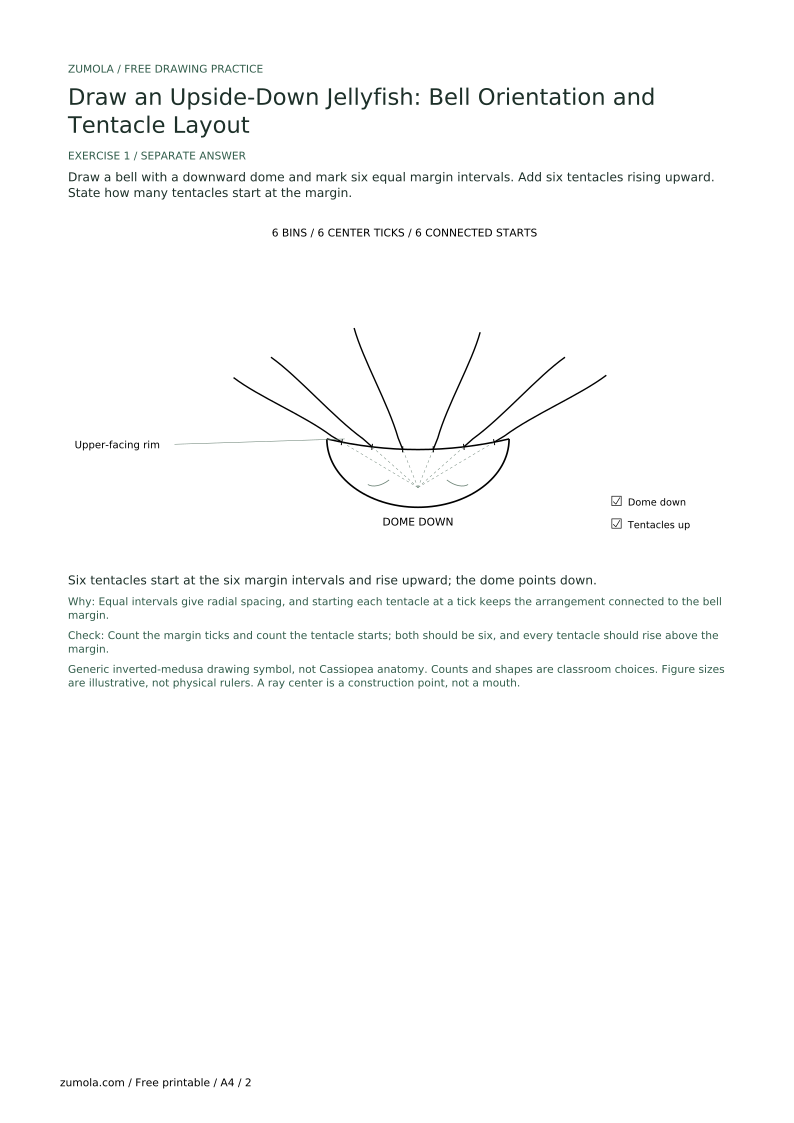
Draw a bell with a downward dome and mark six equal margin intervals. Add six tentacles rising upward. State how many tentacles start at the margin.
Six tentacles start at the six margin intervals and rise upward; the dome points down.
Equal intervals give radial spacing, and starting each tentacle at a tick keeps the arrangement connected to the bell margin.
Check: Count the margin ticks and count the tentacle starts; both should be six, and every tentacle should rise above the margin.
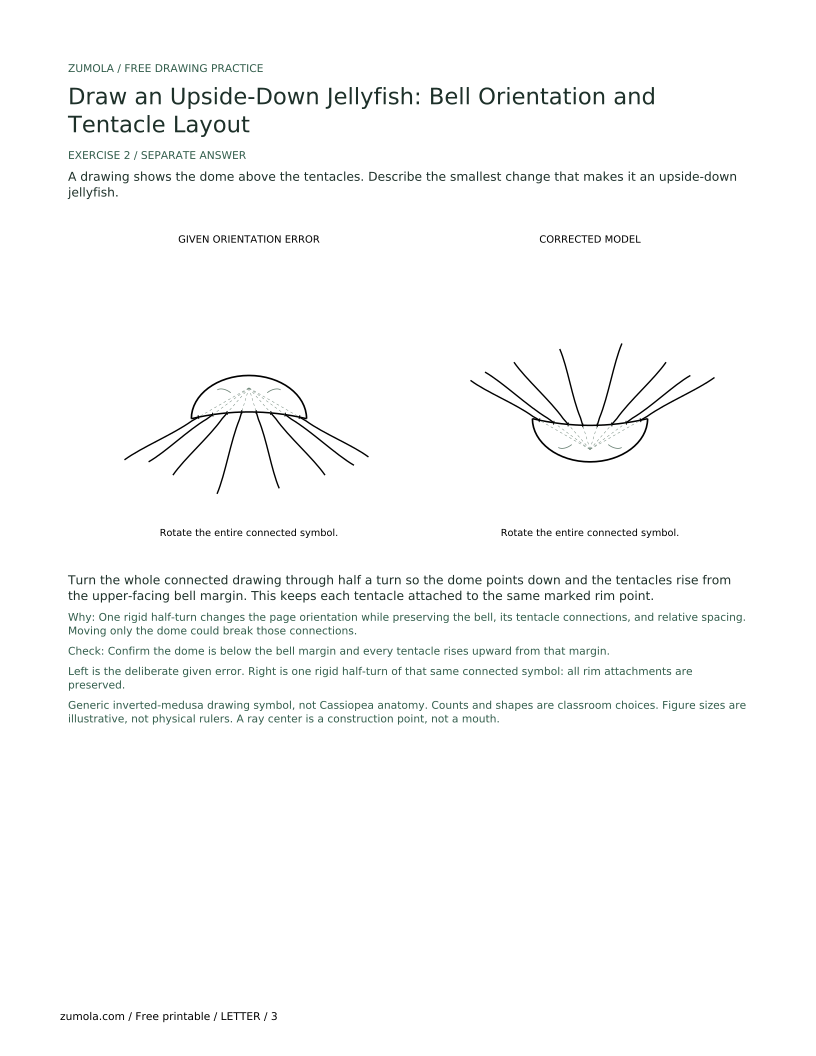
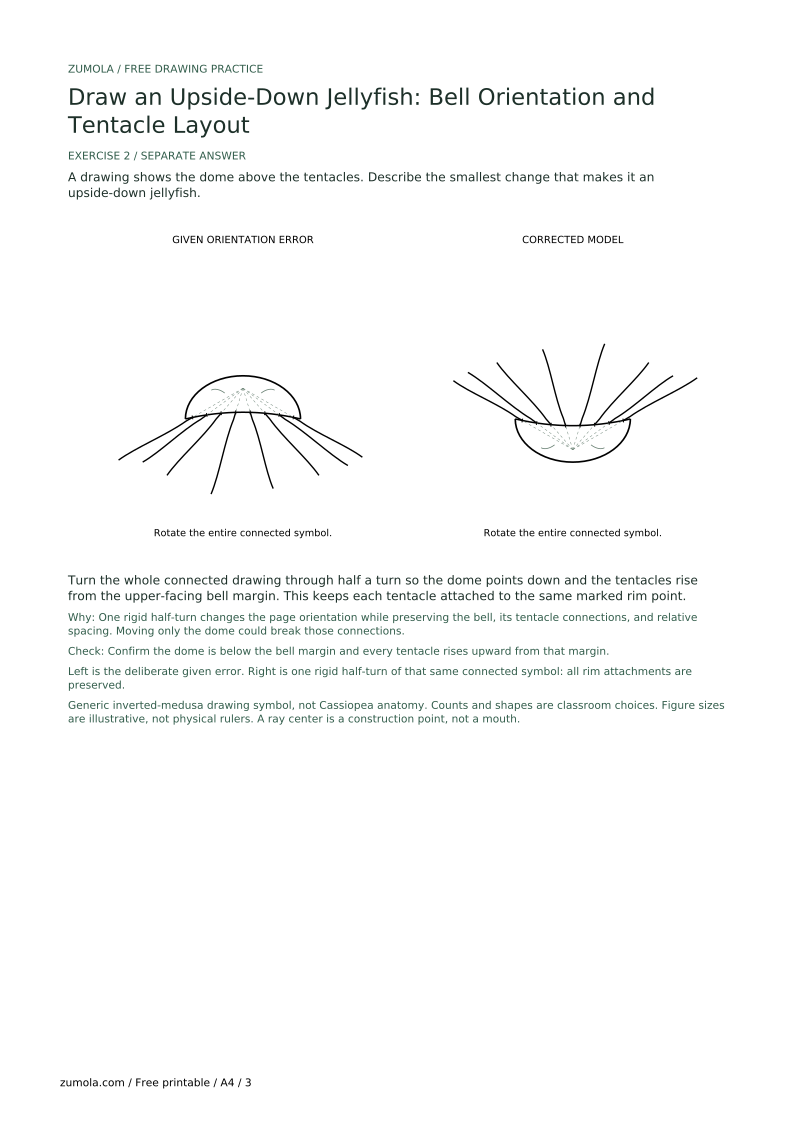
A drawing shows the dome above the tentacles. Describe the smallest change that makes it an upside-down jellyfish.
Turn the whole connected drawing through half a turn so the dome points down and the tentacles rise from the upper-facing bell margin. This keeps each tentacle attached to the same marked rim point.
One rigid half-turn changes the page orientation while preserving the bell, its tentacle connections, and relative spacing. Moving only the dome could break those connections.
Check: Confirm the dome is below the bell margin and every tentacle rises upward from that margin.
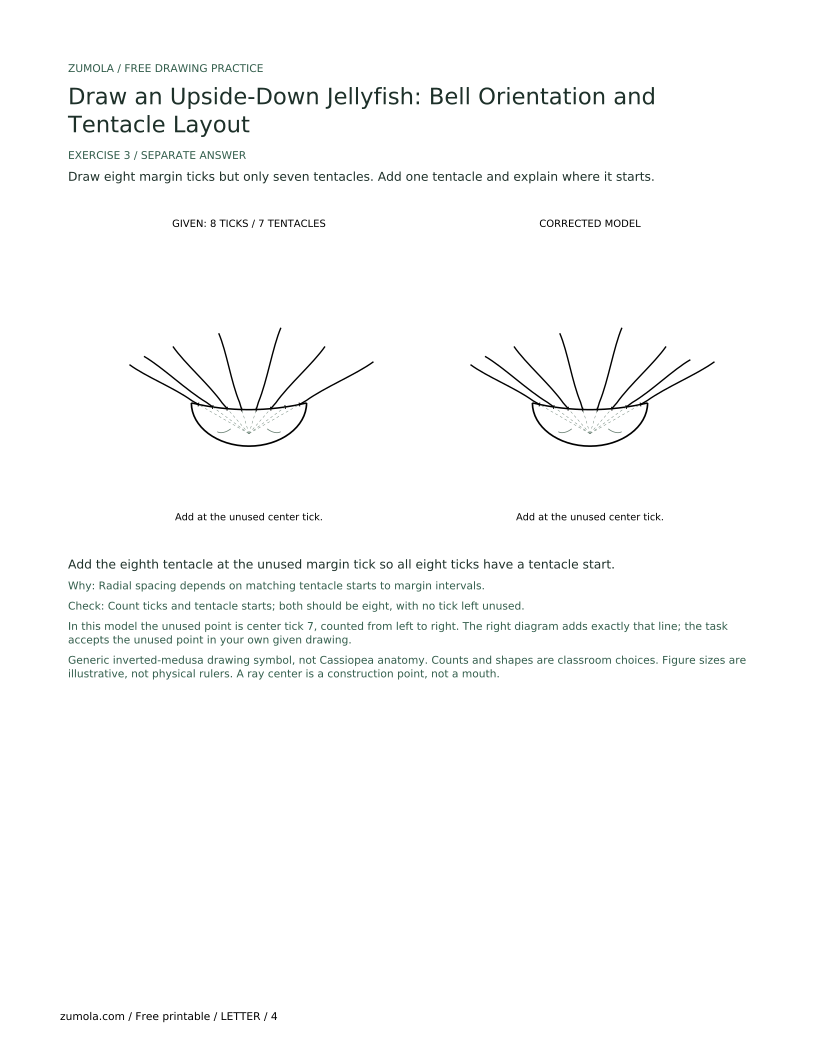
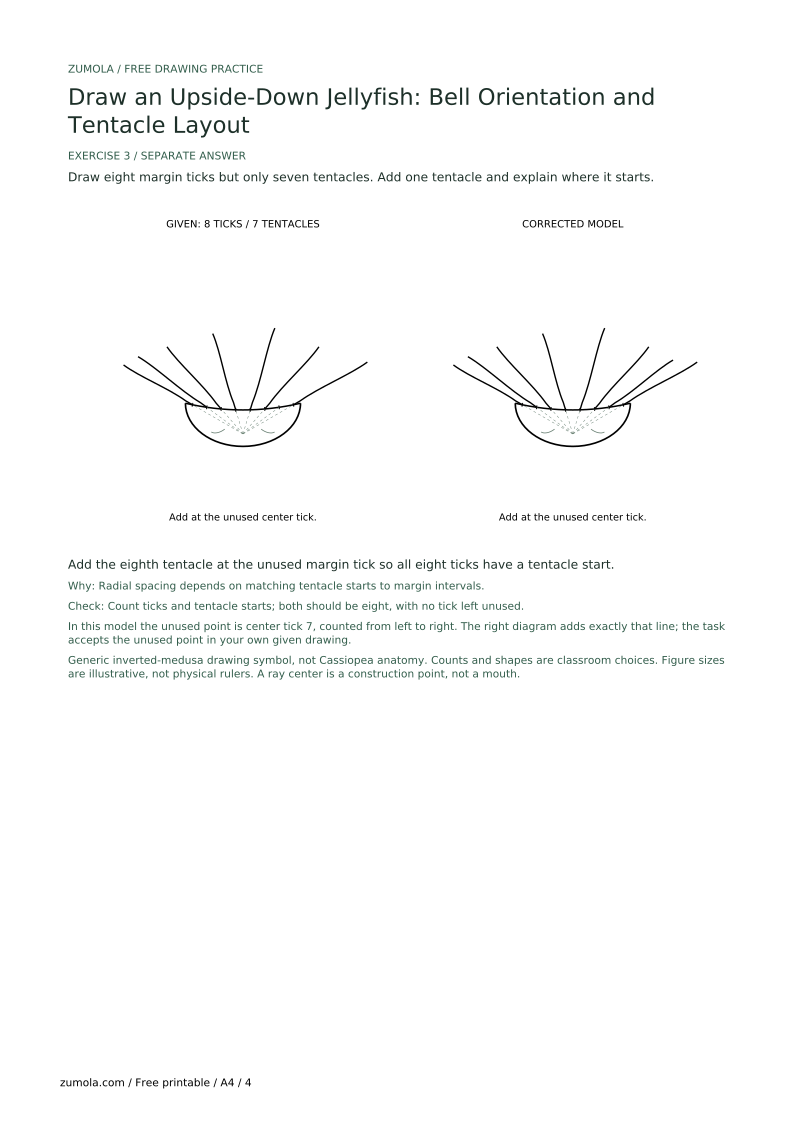
Draw eight margin ticks but only seven tentacles. Add one tentacle and explain where it starts.
Add the eighth tentacle at the unused margin tick so all eight ticks have a tentacle start.
Radial spacing depends on matching tentacle starts to margin intervals.
Check: Count ticks and tentacle starts; both should be eight, with no tick left unused.
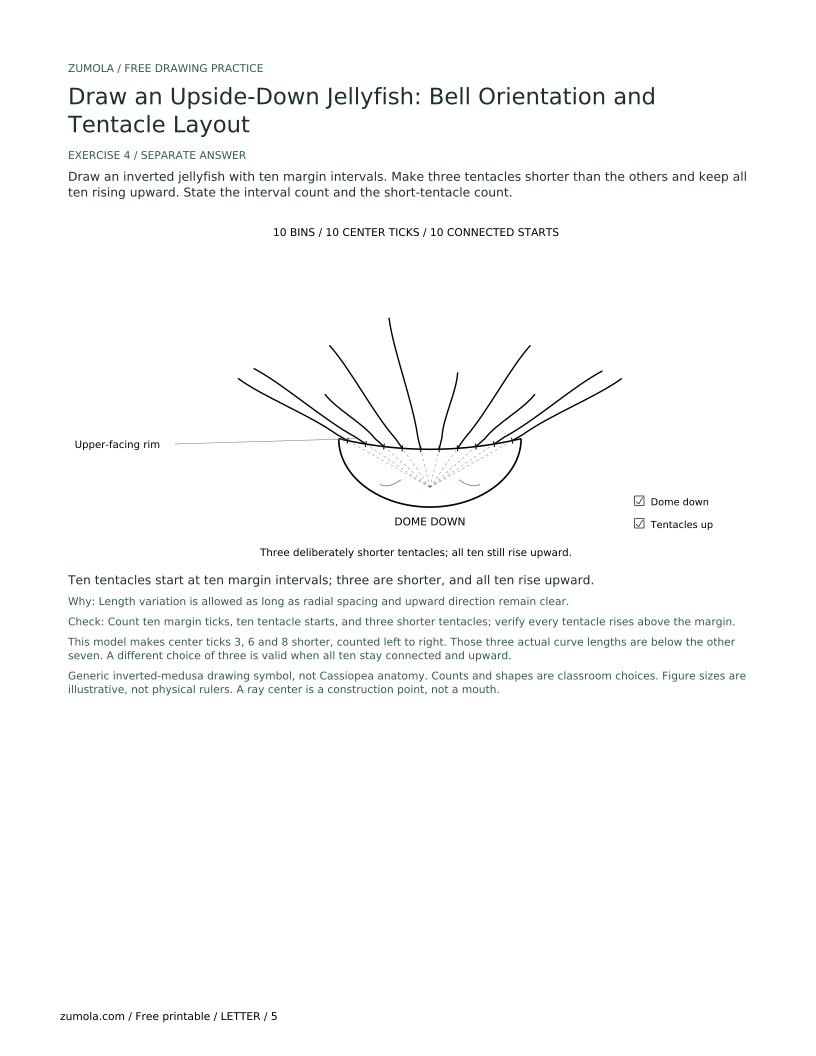
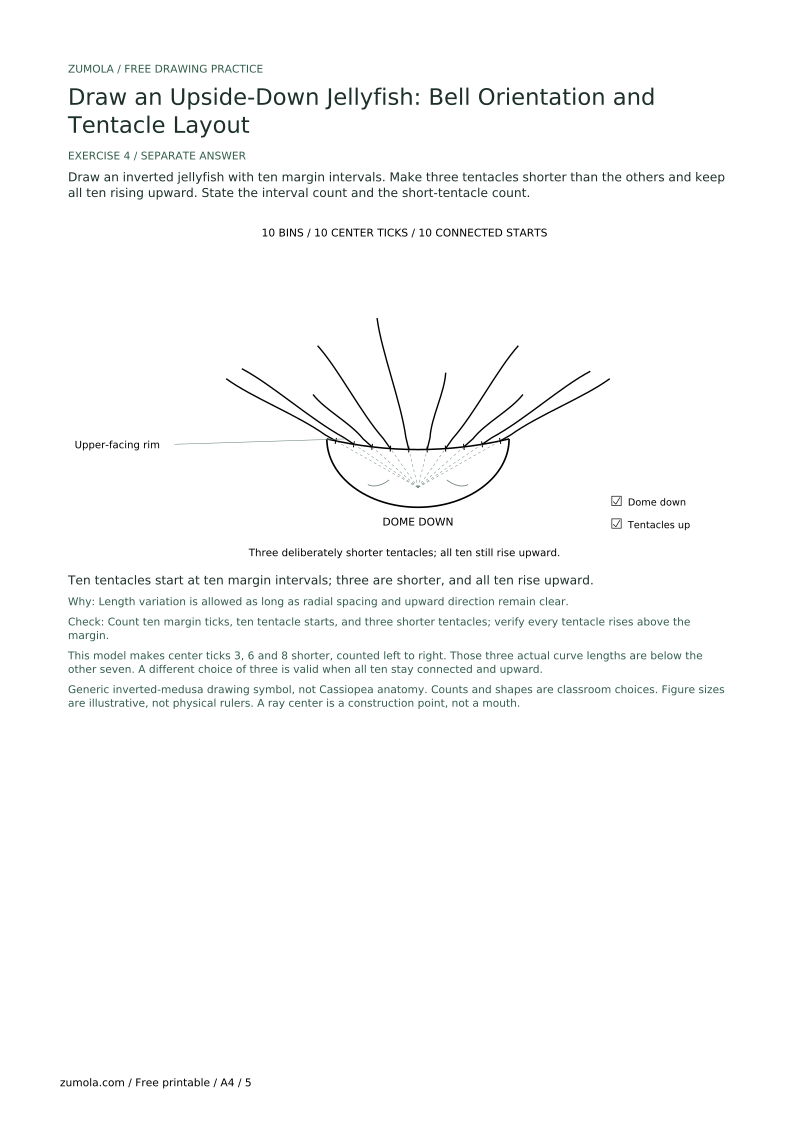
Draw an inverted jellyfish with ten margin intervals. Make three tentacles shorter than the others and keep all ten rising upward. State the interval count and the short-tentacle count.
Ten tentacles start at ten margin intervals; three are shorter, and all ten rise upward.
Length variation is allowed as long as radial spacing and upward direction remain clear.
Check: Count ten margin ticks, ten tentacle starts, and three shorter tentacles; verify every tentacle rises above the margin.
Turn the whole connected drawing through half a turn, or redraw the same connections with dome below and tentacles rising from the upper-facing margin. Moving only a dome outline can leave tentacles attached to the wrong edge.
Mark the rim center ticks first and start each tentacle at its own tick. Faint rays may begin at the guide center, but the actual tentacles do not.
Vary length and wave slightly while keeping radial spacing and upward direction.
Choose which tentacle is in front and keep that overlap consistent.
The dome points toward the bottom of the page and the tentacles rise above the bell margin.
Use the count requested by the task. Otherwise choose a readable count; six to ten is a classroom range, not an anatomical standard. N rim bins give N center ticks and N starts under the stated convention.
Yes. Vary curves and lengths as long as each starts at the margin and rises upward.
No. This task focuses on the inverted jellyfish only, without a marine scene.
No. The marginal-tentacle symbol here is a generic drawing convention. The real Cassiopea has upward-facing oral arms and lacks marginal tentacles, as described in Communications Biology 3, 67 (2020). Do not use this worksheet to identify a species or its organs.