Free original lessons
Drawing Eyes in Perspective: Foreshortened Lids and Iris Ellipses
Learn to draw eyes at front, three-quarter, and profile angles by mapping lid curves and iris ellipses to head rotation, with checkable practice tasks.
Free lesson
Four exercises
Worked answers
Object Drawing Lessons
When a head turns, the eye does not simply shrink; its lid curve and iris shape change in a predictable way. This lesson teaches a construction method for drawing eyes under head-angle perspective. You will learn to place the eye on a head-angle frame, foreshorten the upper and lower lids, and draw the iris as an ellipse whose width narrows as the head turns toward profile. The focus is on structural accuracy, not a single realistic style. Letter styles and eye shapes vary, so the rubric rewards consistent construction and plausible perspective rather than one universal answer.
Practice materials: Printable downloads are not available for this lesson yet. Use the instructions and four exercises below.
Reference illustration
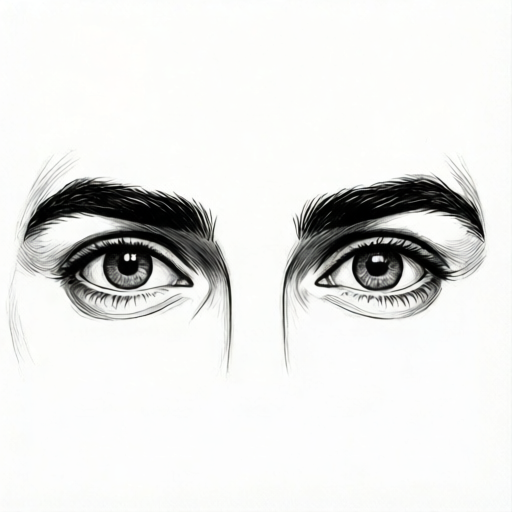
Use the stated measurements and conventions for each exercise.
Set the head-angle frame before drawing the eye
Begin with a simple head-angle frame: a circle for the cranium, a vertical midline that curves with the head turn, and a horizontal eye line that tilts with the head. Mark the eye position on that line. The eye sits inside a socket, so the brow angle and the cheek plane should agree with the head turn. At front view, the eye line is horizontal and the two eyes are symmetric. At three-quarter view, the far eye is compressed and sits closer to the midline. At profile, only one eye is visible and the eye line runs nearly vertical on the page.
Use the midline as your anchor. The near eye is farther from the midline than the far eye in three-quarter view. Keep the distance between the eyes consistent with the head width you have drawn. If the head-angle frame is wrong, the eye will look pasted on, so spend time checking the frame before adding lid details.
- Draw a circle for the cranium and a curved midline showing the head turn.
- Draw the eye line across the face, tilting it according to the head angle.
- Mark the near and far eye positions on the eye line, keeping the far eye closer to the midline.
- Check that the brow angle and cheek plane match the head turn before drawing lids.
Foreshorten the upper and lower lids
The upper lid is a curve that wraps around the eyeball. In front view, it arcs upward with a peak near the middle. As the head turns, the lid curve becomes narrower and its peak shifts toward the near side. In profile, the upper lid appears as a short, steep curve near the front of the eye. The lower lid follows the same logic but with a shallower curve. Do not draw the lids as flat lines; they should suggest the spherical form of the eye.
A useful convention is to treat the lid curve as an arc on the eyeball sphere. Mark the visible portion of the sphere, then draw the lid along that surface. The lid thickness can be shown with a second line, but keep it thin so the eye does not look heavy. Valid alternatives include a sharper or softer lid curve, as long as the curve agrees with the head angle and the eyeball sphere.
- Draw the eyeball as a circle or ellipse on the eye line.
- Mark the visible portion of the eyeball according to the head turn.
- Draw the upper lid as an arc on the eyeball surface, shifting its peak toward the near side as the head turns.
- Draw the lower lid as a shallower arc, then add a thin lid thickness line if desired.
Draw the iris as a foreshortened ellipse
The iris is a circle on the front of the eyeball, so when the eyeball turns away, the iris appears as an ellipse. At front view, the iris is nearly circular. At three-quarter view, the iris ellipse is narrower horizontally. At profile, the iris is a thin vertical ellipse or may be partly hidden by the lid. The width of the iris ellipse should narrow consistently with the head turn. A common mistake is to keep the iris circular at every angle, which makes the eye look flat.
Place the iris so that it sits on the visible front of the eyeball. The pupil is a smaller ellipse inside the iris with the same orientation. Keep the iris ellipse centered on the eyeball's front axis, not on the lid opening. If the iris looks too wide, check the head angle and the eyeball sphere. Label any numerical proportions you choose as hypothetical examples, and measure your own drawing to confirm consistency.
- Locate the front axis of the eyeball according to the head turn.
- Draw the iris as an ellipse whose width narrows as the head turns toward profile.
- Draw the pupil as a smaller ellipse inside the iris with the same orientation.
- Check that the iris ellipse sits on the eyeball front, not on the lid opening.
Annotate brow angle and check the whole eye
The brow angle supports the head turn. In front view, the brows are roughly horizontal. In three-quarter view, the near brow rises or falls depending on the expression, and the far brow is compressed. In profile, the brow follows the forehead curve. Annotate the brow angle on your drawing so you can check it against the eye line. The brow should not contradict the head-angle frame.
Finally, check the whole eye: lid curve, iris ellipse, brow angle, and eye position should all agree with the same head turn. Use a simple check: cover the drawing and redraw the eye line from memory, then compare. If the iris ellipse width and lid curve do not match the head angle, adjust the frame rather than patching the eye.
- Annotate the brow angle and compare it with the eye line.
- Check that the near and far eye positions match the head-angle frame.
- Compare the iris ellipse width with the head turn.
- Redraw the eye line from memory and compare it with your original to catch inconsistencies.
Worked example
A head is turned three-quarter to the viewer's left. The near eye is on the left side of the face. Draw the eye line, place the near eye, foreshorten the upper lid, and draw the iris as an ellipse. Use a hypothetical iris width of 60 percent of its front-view width and label it as a hypothetical example.
Worked answer
Draw a curved midline turning left. Draw the eye line tilting slightly down to the left. Place the near eye left of the midline and the far eye closer to the midline. Draw the eyeball as a circle on the eye line. Draw the upper lid as an arc whose peak shifts left toward the near side. Draw the iris as an ellipse with a hypothetical horizontal width of 60 percent of the front-view width, centered on the eyeball front axis. Draw the pupil as a smaller ellipse with the same orientation. Annotate the brow angle so it agrees with the head turn. Check that the far eye is compressed and that the iris ellipse is narrower than at front view.
Four practice exercises
Exercise 1
Front view: draw a head-angle frame with a horizontal eye line. Place two symmetric eyes. Draw the iris as a nearly circular ellipse and the upper lid as an arc peaking near the middle. Annotate the brow angle.
Show answer and check
A front-view frame with a horizontal eye line, two symmetric eyes, nearly circular irises, upper lids arcing with peaks near the middle, and brows roughly horizontal.
Why: At front view, the eye line is horizontal and the iris is nearly circular because the eyeball front faces the viewer. The lid arc peaks near the middle because the visible eyeball is symmetric.
Check: Measure the distance from each eye to the midline; they should be equal. Check that the iris ellipse is nearly circular and that the brow angle is roughly horizontal.
Exercise 2
Three-quarter view: draw a head turned to the viewer's right. Place the near eye on the right and the far eye closer to the midline. Draw the upper lid with its peak shifted right, and draw the iris as an ellipse narrower than at front view. Use a hypothetical iris width of 70 percent of front-view width and label it as hypothetical.
Show answer and check
A three-quarter frame turning right, near eye on the right, far eye compressed toward the midline, upper lid peak shifted right, and iris ellipse with a hypothetical horizontal width of 70 percent of front-view width.
Why: As the head turns right, the near eye is on the right and the far eye compresses toward the midline. The lid peak shifts toward the near side, and the iris ellipse narrows because the eyeball front turns away.
Check: Check that the far eye is closer to the midline than the near eye. Measure the iris ellipse width and confirm it is narrower than the front-view width you used. Confirm the lid peak is on the near side.
Exercise 3
Profile view: draw a head in profile facing left. Draw only the visible eye near the front of the face. Draw the upper lid as a short, steep curve and the iris as a thin vertical ellipse or partly hidden by the lid. Annotate the brow angle following the forehead curve.
Show answer and check
A profile frame facing left, one visible eye near the front, a short steep upper lid curve, a thin vertical iris ellipse or partly hidden iris, and a brow angle following the forehead curve.
Why: In profile, only one eye is visible and the eyeball front turns nearly perpendicular to the viewer, so the iris becomes a thin vertical ellipse. The lid curve is short and steep because only the front edge of the eyeball is visible.
Check: Check that only one eye is drawn and that it sits near the front of the face. Confirm the iris ellipse is thin and vertical or partly hidden. Check that the brow follows the forehead curve.
Exercise 4
Correction task: a drawing shows a three-quarter head turned left, but the iris is circular and the upper lid is a flat line. Describe two specific changes that would make the eye agree with the head turn, and state how you would check each change.
Show answer and check
Change the iris from a circle to an ellipse narrower horizontally, centered on the eyeball front axis. Change the flat upper lid to an arc on the eyeball sphere with its peak shifted left toward the near side. Check the iris by measuring its horizontal width against the front-view width; check the lid by confirming it curves around the eyeball sphere and peaks on the near side.
Why: A circular iris and a flat lid contradict the three-quarter head turn. Narrowing the iris ellipse and curving the lid on the sphere restore consistency with the head angle.
Check: Measure the iris ellipse width and confirm it is narrower than a front-view circle. Trace the lid curve and confirm it follows the eyeball sphere with its peak on the near side.
Common mistakes
- Keeping the iris circular at every head angle. Narrow the iris ellipse horizontally as the head turns toward profile, and check it against the eyeball front axis.
- Drawing the upper lid as a flat line instead of a curve on the eyeball sphere. Draw the eyeball first, then place the lid as an arc on its visible surface, shifting the peak toward the near side as the head turns.
- Placing the far eye too far from the midline in three-quarter view. Compress the far eye toward the midline and check the distance between the eyes against the head width.
- Letting the brow angle contradict the head turn. Annotate the brow angle and compare it with the eye line and midline before finalizing the eye.
Self-check rubric
- Head-angle frame is drawn before the eye and shows a consistent midline and eye line.
- Near and far eye positions agree with the head turn, with the far eye compressed toward the midline.
- Upper and lower lids are drawn as curves on the eyeball sphere, not as flat lines.
- Iris is drawn as an ellipse whose width narrows as the head turns toward profile.
- Pupil is a smaller ellipse inside the iris with the same orientation.
- Brow angle agrees with the eye line and head turn.
- Valid alternatives in lid shape and eye style are accepted if the construction remains consistent.
Questions and answers
Do I need to draw a realistic eye to use this method?
No. The method is about construction under head-angle perspective. You can use a simple or stylized eye shape as long as the lid curve and iris ellipse agree with the head turn.
How narrow should the iris ellipse be at three-quarter view?
There is no single universal value. Choose a width that looks consistent with your head turn, label any numerical proportion as a hypothetical example, and check it by measuring your own drawing.
What if my eye looks flat?
Check the eyeball sphere and the iris ellipse. A flat eye usually means the iris stayed circular or the lid was drawn as a flat line instead of an arc on the sphere.
Can I use different lid shapes?
Yes. Lid shapes vary. The rubric rewards a lid curve that agrees with the head angle and the eyeball sphere, not one specific shape.