Free original lessons
Pumpkin Contour Drawing: Blind, Continuous, and Cross-Contour Exercises
Learn pumpkin contour drawing through blind-contour, continuous-line, and cross-contour exercises. Build observation and line control with clear steps and checks.
Free lesson
Four exercises
Worked answers
Object Drawing Lessons
Contour drawing trains your eye to follow edges and your hand to record them without guessing. A pumpkin is an ideal subject because its ribs, stem dimple, and lobed silhouette give clear edges to trace. This lesson separates three skills: blind contour (looking only at the pumpkin), continuous line (one unbroken line), and cross-contour (lines that wrap across the surface to show volume). You will use a simple convention: x-height means the distance from baseline to midline of a letter, and letter styles vary, so measure your own writing rather than assuming a standard. All numerical values below are hypothetical examples for practice, not equipment specifications. Work on plain paper with a pencil or pen; measure your actual paper and tool if you set sizes.
Practice materials: Printable downloads are not available for this lesson yet. Use the instructions and four exercises below.
Reference illustration
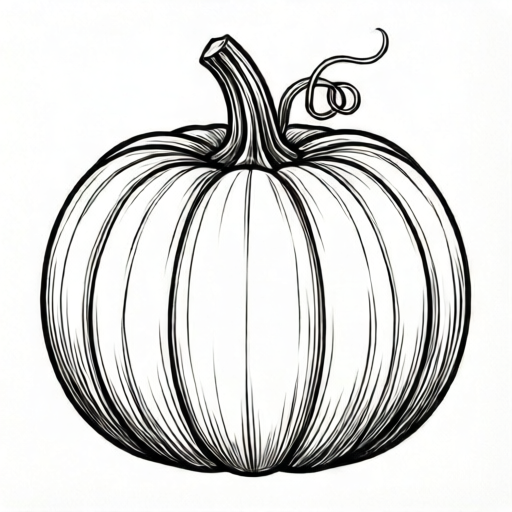
Use the stated measurements and conventions for each exercise.
Set Up and Define Your Convention
Place the pumpkin where you can see it without moving your head. Decide a drawing area on your paper. As a hypothetical example, mark a rectangle 15 cm wide and 20 cm tall; adjust to your actual paper. Define your line convention: a contour line is a single visible edge line; a cross-contour line crosses the form to describe surface curvature. For handwriting labels, use x-height as baseline to midline; because letter styles vary, measure your own x-height with a ruler and label it, for example 4 mm, as a hypothetical value.
Keep the pumpkin still. Light from one side so ribs cast soft edges. You will make three small drawings, not one large rendering. Label each section with a short title in your normal handwriting; the label is not judged for style.
- Measure your paper and draw three boxes; write the box dimensions you actually measured.
- Measure your handwriting x-height on a scrap line and note it.
- Place the pumpkin at eye level and choose one side as the light side.
- Write the three section titles: Blind, Continuous, Cross-Contour.
Blind Contour: Eye on the Pumpkin, Pencil on the Paper
Blind contour means you do not look at your paper while drawing. Put your pencil at a starting edge, then move your eye slowly along the pumpkin’s silhouette and stem dimple while your hand follows at the same pace. If your eye stops, your hand stops. Do not lift the pencil. The goal is observation, not a polished outline. Expect proportions to drift; that is normal and useful evidence of what you noticed.
Choose one continuous path: start at the stem base, travel down one rib edge, around the bottom lobe, up the next rib, and back to the stem. Keep the line unbroken. When finished, look at the paper and compare the number of lobes and the stem dimple position with the pumpkin.
- Fix your eye on the starting point and place the pencil there without looking down.
- Move your eye along the edge at a slow, even speed; let the hand follow.
- Do not lift the pencil or look at the paper until the path returns to the start.
- After finishing, look down and mark one place where the line drifted from the edge.
Continuous Line and Cross-Contour Surface Lines
Continuous line allows you to look at the paper but not lift the pencil. Draw the pumpkin’s outer contour, then travel inward along a rib edge, loop around the stem dimple, and return outward without lifting. Overlap lines are acceptable; they show your path. Keep the line thin and steady.
Cross-contour lines describe volume. Draw short curved lines that cross the ribs, following the surface as if a rubber band wrapped around the pumpkin. On a rib, the cross-contour curves with the rib’s bulge; near the stem dimple, lines curve inward toward the dip. Space them evenly by eye, for example about 1 cm apart as a hypothetical spacing, and measure your actual spacing if you want a check. Do not shade; use only lines.
- Draw the outer contour in one continuous line without lifting the pencil.
- Add one interior rib edge as a continuous path to the stem dimple and back.
- Draw five cross-contour lines across the ribs, curving each to follow the surface.
- Check that cross-contour lines change direction near the stem dimple.
Compare and Improve Without Shading
Place the three drawings side by side. Count the visible lobes on the pumpkin and on each drawing. Check the stem dimple: is it centered, offset, deep, or shallow? In the blind contour, note one drift; in the continuous line, note one overlap that helped you keep the path; in the cross-contour, note one line that follows a rib’s curve. Redraw only the weakest section once, keeping the same convention.
Do not add shading or Halloween scenery. The boundary of this task is contour only: edges, continuous paths, and surface cross-lines. If you label sections, use your measured x-height convention and accept that letter styles vary; the label is for organization, not a handwriting grade.
- Count lobes on the pumpkin and on each drawing; record the numbers.
- Locate the stem dimple on the pumpkin and on each drawing.
- Circle one cross-contour line that curves with a rib.
- Redraw the weakest section once using the same rules.
Worked example
A pumpkin has six visible lobes and an offset stem dimple. Draw a blind contour path starting at the stem base, down one rib, around the bottom, up the next rib, and back to the stem. Then draw three cross-contour lines across two ribs. Describe the path and one check.
Worked answer
Blind path: start at stem base, follow rib edge down to bottom lobe, curve around the bottom, climb the adjacent rib edge, return to stem base without lifting or looking. Cross-contour: draw three short curves across the two ribs, each curving with the rib bulge and bending slightly toward the offset dimple. Check: count six lobes on the pumpkin and compare with the drawing; verify that cross-contour lines change direction near the dimple.
Four practice exercises
Exercise 1
A pumpkin shows four lobes and a centered stem dimple. Draw a blind contour starting at the dimple, around the top, down one rib, around the bottom, and back to the dimple. Do not look at the paper until you finish. Then count lobes on your drawing.
Show answer and check
A single unbroken line path from dimple around top, down one rib, around bottom, back to dimple; lobe count on the drawing may differ from four and is recorded as observed.
Why: Blind contour prioritizes eye-hand tracking over accuracy; the path follows the specified edges and the dimple start/end.
Check: Confirm the pencil did not lift and you did not look down until the end; compare recorded lobe count with the pumpkin’s four lobes.
Exercise 2
Draw a continuous line of a pumpkin with five lobes: outer contour, then one rib edge to the stem dimple, then back out, without lifting the pencil. Add two cross-contour lines across the rib. State one overlap you used.
Show answer and check
One unbroken line includes outer contour, one rib path to dimple and back, plus two curved cross-contour lines; one overlap is named, such as retracing the rib edge.
Why: Continuous line permits looking but not lifting; overlaps are valid path evidence. Cross-contour lines must curve with the rib.
Check: Trace the line from start to end without finding a gap; verify two cross-contour lines curve with the rib and bend near the dimple.
Exercise 3
A pumpkin has an offset stem dimple and six ribs. Draw three cross-contour lines across three ribs, spacing them by eye. Measure your actual spacing with a ruler and record it. Do not shade.
Show answer and check
Three curved lines crossing three ribs, each following the rib bulge and bending toward the offset dimple; recorded spacing is the measured value, for example 1.2 cm, labeled as measured.
Why: Cross-contour describes surface curvature; offset dimple changes line direction. Measurement is of the actual drawing, not a standard.
Check: Check that no shading is present, three lines cross three ribs, and each line changes direction near the dimple; confirm recorded spacing matches the ruler measurement.
Exercise 4
Compare a blind contour and a continuous-line drawing of the same pumpkin. Record lobe counts for the pumpkin and both drawings, and locate the stem dimple in each. Name one improvement for the weaker drawing.
Show answer and check
Recorded counts may differ; dimple locations are described as centered or offset in each drawing; one improvement names a specific edge or cross-contour adjustment, such as slowing eye movement or curving a line with a rib.
Why: Comparison builds observation; blind contour drift is expected, while continuous line should preserve path continuity.
Check: Verify three lobe counts are recorded, dimple location is noted for each drawing, and the improvement refers to a visible line feature rather than shading.
Common mistakes
- Looking at the paper during blind contour. Cover the paper with a blank sheet or turn your head; keep your eye on the pumpkin until the path returns to the start.
- Lifting the pencil during continuous line. Plan the path before starting: outer contour, one rib, stem dimple, return. Overlap rather than lift.
- Drawing cross-contour lines as straight horizontal stripes. Curve each line with the rib’s bulge and bend it inward near the stem dimple; check against the actual surface.
- Adding shading to suggest volume. Use only line: add or adjust cross-contour lines instead of shading; the task excludes shaded rendering.
Self-check rubric
- Blind contour: pencil not lifted and eyes not checked on paper until the path returns; one drift noted.
- Continuous line: outer contour and one interior rib path drawn without lifting; overlaps accepted.
- Cross-contour: at least three lines curve with ribs and respond to the stem dimple; no shading.
- Comparison: lobe count and dimple position recorded for pumpkin and drawings.
- Convention: any labels use measured x-height; letter style is not graded.
Questions and answers
Do I need a perfect pumpkin outline?
No. Blind contour is an observation exercise; drift is expected. Judge whether your eye followed edges and the stem dimple, not whether the outline is accurate.
How many cross-contour lines should I draw?
Choose a small number you can check, such as five, as a hypothetical example. Space them by eye and measure your actual spacing if you want a numerical check.
Can I use a pen instead of a pencil?
Yes. A pen makes lifting visible, which helps continuous-line discipline. Measure your actual tool and paper if you set sizes.
What does x-height mean here?
X-height is baseline to midline of a letter. Letter styles vary, so measure your own handwriting x-height and label it; do not assume a universal value.