Free original lessons
Draw a Law Balance Scale: Beam, Pans, and Pillar
Learn to draw a law balance scale with a central pillar, horizontal beam, and suspended pans using symmetry guides, construction steps, and a practice box.
Free lesson
Four exercises
Worked answers
Object Drawing Lessons
A law balance scale is a classic symbol of justice: a central pillar supports a horizontal beam, and two pans hang from the beam ends. This guide breaks the drawing into measurable construction steps. You will use a simple convention: the beam is level, the pillar is vertical, and the pans hang symmetrically. Because hand-drawn lettering and line styles vary, the rubric accepts any clean, consistent style that follows the stated proportions. All measurements below are hypothetical examples; measure your own paper and tools before drawing.
Practice materials: Printable downloads are not available for this lesson yet. Use the instructions and four exercises below.
Reference illustration
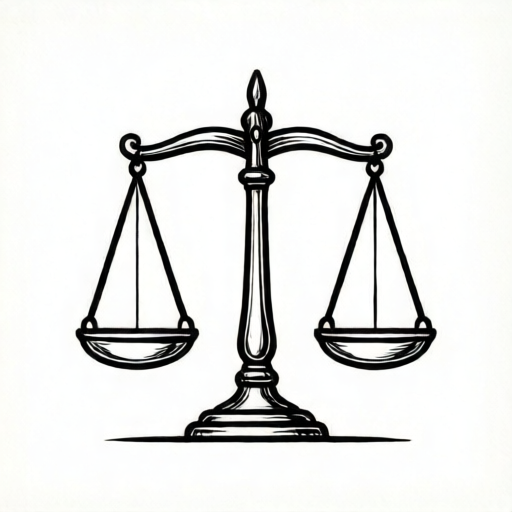
Use the stated measurements and conventions for each exercise.
Set up the drawing area and symmetry guides
Choose a sheet size and mark a light vertical center line. This line is the pillar axis. Mark a horizontal baseline near the bottom for the pillar base and a beam line above it. The distance from baseline to beam line is your pillar height; for this example, use 10 cm on a 15 cm wide practice area. Mark the beam line 10 cm above the baseline.
Add two light horizontal guides: one at the beam line and one at the pan-hang line, which is 3 cm below the beam ends. These guides keep the beam level and the pans at equal heights. Keep all guides light so they can be erased or hidden later.
- Draw a light vertical center line from top to bottom of the practice area.
- Mark a baseline 2 cm above the bottom edge.
- Mark the beam line 10 cm above the baseline.
- Mark the pan-hang line 3 cm below the beam line.
- Check that the center line crosses both horizontal guides at right angles.
Draw the central pillar and base
The pillar is a vertical shape centered on the center line. For a simple style, draw two parallel vertical lines 1.5 cm apart, centered on the axis, from the baseline to the beam line. Add a base: a horizontal oval or rectangle 4 cm wide and 1 cm tall centered at the baseline. Add a small cap at the top of the pillar, 2 cm wide and 0.5 cm tall, centered on the beam line.
Keep the pillar edges parallel to the center line. If you prefer a tapered pillar, make both sides taper equally so the shape remains symmetric. The cap should sit level and centered; its width may vary, but it must be symmetric about the center line.
- Draw two vertical lines 1.5 cm apart, centered on the center line, from baseline to beam line.
- Draw a base 4 cm wide and 1 cm tall centered at the baseline.
- Draw a cap 2 cm wide and 0.5 cm tall centered at the beam line.
- Check symmetry by measuring from the center line to each side of the base and cap.
Draw the beam and suspended pans
The beam is a horizontal bar centered on the cap. For this example, make the beam 12 cm long and 0.8 cm thick, centered on the center line at the beam line. Mark the beam ends 6 cm from the center on each side. From each beam end, draw a short vertical suspension line down to the pan-hang line. The suspension lines should be equal in length; here they are 3 cm.
Each pan is a shallow curve or trapezoid centered under its suspension line. For a simple pan, draw a horizontal top edge 3 cm wide centered at the pan-hang line, then curve down 1 cm to a rounded bottom. Keep both pans the same size and at the same height. The beam, suspension lines, and pans should mirror each other about the center line.
- Draw a horizontal beam 12 cm long and 0.8 cm thick centered on the cap.
- Mark beam ends 6 cm from the center line on each side.
- Draw vertical suspension lines 3 cm long from each beam end to the pan-hang line.
- Draw each pan 3 cm wide at the top and 1 cm deep, centered under its suspension line.
- Check that both pans sit at the same height and are equal in width.
Refine line style and add a practice box
Once the construction is correct, darken the final lines and erase the light guides. Use one consistent line style: either uniform thickness or a deliberate variation such as thicker outlines and thinner details. The convention for this task is that the beam is level and the pans hang symmetrically; lettering or decorative flourishes are optional and must not break symmetry.
Draw a blank practice box 6 cm by 6 cm beside your scale. In the box, redraw the scale smaller using the same proportions: pillar height 5 cm, beam length 6 cm, suspension lines 1.5 cm, pan width 1.5 cm. This box is for a second attempt, not for tracing.
- Darken final lines and erase construction guides.
- Apply one consistent line style to pillar, beam, and pans.
- Draw a 6 cm by 6 cm practice box beside the scale.
- Redraw a smaller scale in the box using half the example dimensions.
- Compare the practice drawing to the first for symmetry and level beam.
Worked example
Using the example dimensions, calculate the total width of the drawing from the left pan edge to the right pan edge. The beam is 12 cm long, each pan is 3 cm wide and centered under a beam end, and the beam ends are 6 cm from the center line.
Worked answer
The left pan extends 1.5 cm beyond the left beam end, and the right pan extends 1.5 cm beyond the right beam end. Total width = 12 cm + 1.5 cm + 1.5 cm = 15 cm.
Why: Each pan is centered under a beam end, so half the pan width (1.5 cm) extends outward beyond the beam end. Adding both overhangs to the beam length gives the total width.
Check: Measure the drawn width from left pan edge to right pan edge and compare to 15 cm; also confirm each pan overhang is 1.5 cm.
Four practice exercises
Exercise 1
A drawing has a beam 10 cm long centered on a pillar. Each pan is 2 cm wide and centered under a beam end. Calculate the total width from left pan edge to right pan edge.
Show answer and check
Total width = 10 cm + 1 cm + 1 cm = 12 cm.
Why: Each pan extends half its width (1 cm) beyond its beam end. Adding both overhangs to the beam length gives 12 cm.
Check: Measure the drawn width and confirm each pan overhang is 1 cm.
Exercise 2
A pillar is 8 cm tall from baseline to beam line. The suspension lines are 2 cm long. What is the distance from the baseline to the pan-hang line?
Show answer and check
Distance = 8 cm + 2 cm = 10 cm.
Why: The pan-hang line is below the beam line by the suspension length, so add pillar height and suspension length.
Check: Measure from baseline to pan-hang line and compare to 10 cm.
Exercise 3
A beam is 14 cm long. You want each pan to be 4 cm wide and centered under a beam end. How far does each pan extend beyond its beam end, and what is the total width?
Show answer and check
Each pan extends 2 cm beyond its beam end; total width = 14 cm + 2 cm + 2 cm = 18 cm.
Why: Half of 4 cm is 2 cm, so each pan overhangs by 2 cm. Add both overhangs to the beam length.
Check: Measure each overhang as 2 cm and total width as 18 cm.
Exercise 4
In a practice box, you redraw the scale at half the example dimensions: pillar height 5 cm, beam length 6 cm, suspension lines 1.5 cm, pan width 1.5 cm. Calculate the total width from left pan edge to right pan edge.
Show answer and check
Each pan overhang = 0.75 cm; total width = 6 cm + 0.75 cm + 0.75 cm = 7.5 cm.
Why: Half of the pan width is 0.75 cm. Adding both overhangs to the beam length gives 7.5 cm.
Check: Measure the practice drawing width and confirm each overhang is 0.75 cm.
Common mistakes
- The beam is tilted instead of level. Re-measure the beam ends against the horizontal beam guide; both ends must be the same distance above the baseline.
- The pillar is not centered on the beam. Measure from the center line to each beam end; both distances must be equal.
- The pans are different sizes or heights. Use the pan-hang line and measure each pan width from its suspension line; make both pans equal.
- Suspension lines are different lengths. Measure each suspension line from beam end to pan-hang line; both should be 3 cm in the example.
Self-check rubric
- Beam is level within the drawn guide; both beam ends are equidistant from the baseline.
- Pillar is centered on the beam and vertical; base and cap are symmetric about the center line.
- Suspension lines are equal in length and vertical.
- Pans are equal in width and depth and hang at the same height.
- Line style is consistent; construction guides are removed or hidden.
- Practice box contains a smaller redrawn scale using the same proportions.
Questions and answers
Must the beam be perfectly horizontal?
Yes for this convention. A level beam is the checkable feature that makes symmetry easy to verify. A tilted beam changes the task and is not part of this guide.
Can I use a tapered pillar instead of straight sides?
Yes, provided both sides taper equally about the center line. The rubric checks symmetry, not a single pillar shape.
How wide should the pans be?
The example uses 3 cm at the top and 1 cm deep. Any equal width works if both pans match and remain centered under their suspension lines.
Do I need to include lettering or decoration?
No. Lettering and decoration are optional. If included, they must not break the symmetry or level-beam convention.