Free original lessons
Pear Contour Drawing: Blind and Slow Line Practice
Learn blind and slow contour line drawing with a pear. Build observation, hand-eye coordination, and line control through guided steps and self-checks.
Free lesson
Four exercises
Worked answers
Object Drawing Lessons
Contour drawing trains your eye to follow an edge and your hand to record it without guessing. This lesson uses a pear because its silhouette combines a narrow stem, a swelling body, and a soft base—three zones that reward careful looking. You will practice two variants: blind contour, where you draw without looking at the paper, and slow contour, where you look mostly at the pear and draw at a deliberate pace. The goal is not a polished fruit illustration but a record of sustained attention. Work on plain paper with a pencil or pen. Keep the pear still and light it evenly so its outline is clear. Before drawing, decide your convention: in this lesson, x-height means the distance from the baseline to the midline of a letter, and letter styles vary, so use your own handwriting as the reference for any written labels. All measurements below are hypothetical examples; measure your own paper and pear if you need exact values.
Practice materials: Printable downloads are not available for this lesson yet. Use the instructions and four exercises below.
Reference illustration
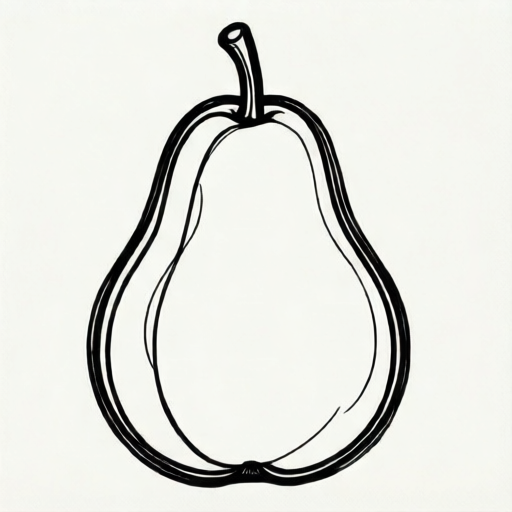
Use the stated measurements and conventions for each exercise.
Set up and define your drawing convention
Place the pear on a plain surface at eye level. Tape your paper to the table if it slides. Draw a light frame on the paper—for example, a 12 cm by 16 cm rectangle—and label it only if labels help you. Because handwriting varies, define your label convention explicitly: write in your normal style, and treat the baseline-to-midline distance of your lowercase letters as the x-height for any notes. This keeps written annotations consistent without forcing a single lettering style.
Choose one drawing tool and keep it fixed for all attempts. A pencil with a medium point or a fine pen both work; the important thing is that the line is visible and does not smudge. Decide where the pear's stem, body, and base sit in your frame before you begin. You are not shading, measuring proportions with a ruler, or composing a still life—only recording the outer edge and any clear internal edges you choose to include.
- Place the pear upright and light it from one side so the outline is readable.
- Draw a frame on your paper and note its size in your own handwriting.
- Define your x-height convention in one short note if you use labels.
- Choose one tool and keep it for every attempt in this session.
Blind contour: draw without looking at the paper
Blind contour means your eyes stay on the pear while your hand moves on the paper. You may glance at the paper only to place your tool at the start, then return your gaze to the pear. Move slowly enough that your hand can follow the edge you are seeing. If your line drifts, keep going; do not correct by looking. The point is to build a direct link between observation and hand movement.
Start at the top of the stem and travel down one side, around the base, and up the other side. When you reach a point where the edge changes direction sharply, slow down further. You may lift your tool if you need to reposition, but try to keep one continuous line for the main silhouette. A blind contour often looks distorted; that is expected and useful. Compare the recorded line to the pear afterward to see where your attention jumped or stalled.
- Look at the pear and place your tool at the top of the stem without looking at the paper.
- Keep your eyes on the pear and draw down one side at a slow, even pace.
- Follow the base curve and continue up the opposite side.
- Finish at the stem, then look at the paper and note where the line changed speed or direction.
Slow contour: look mostly at the pear, draw deliberately
Slow contour allows brief glances at the paper to keep the line in the frame, but most of your attention stays on the pear. Draw at roughly half your normal speed. Before each short segment, look at the edge, then move your tool while imagining the edge under your hand. Pause at changes in curvature—where the stem meets the body, where the body widens, and where the base flattens.
Use the same frame and tool as the blind attempt. You may include one or two clear internal edges, such as the line where the stem meets the fruit, but avoid tonal shading and cross-contour lines. Keep the line single and unbroken where possible. After finishing, place the drawing beside the pear and check two silhouette relationships that hold for this pear: the stem is narrower than the body, and the base is flatter than the top curve. If you want a third check, note where the widest point of your pear actually sits and compare it to your drawing—do not assume it is below the middle; measure or eyeball your own pear and label any chosen position as a hypothetical example.
- Look at the pear and identify the stem, the widest body point, and the base.
- Draw the stem first, then the body, glancing at the paper only to stay in frame.
- Slow down at each change of curvature and keep the line continuous.
- Compare the finished line to the pear using the two required checkable relationships (stem narrower than body; base flatter than top), and optionally the widest-point check.
Self-check and compare both variants
Place the blind and slow drawings side by side. Check whether each drawing records the stem, the body swell, and the base. In the blind drawing, look for places where the line loops or stops abruptly; these often mark where your gaze moved too fast. In the slow drawing, check whether the line stays inside the frame and whether the stem is narrower than the body and the base flatter than the top.
Use a simple rubric: one point for a visible stem, one for a body wider than the stem, one for a base flatter than the top, and one for a continuous main line. A score of four is not required; the score helps you see which feature you missed. Because letter styles and handwriting vary, any written labels are judged only for legibility under your own convention, not for a universal style.
- Place both drawings beside the pear.
- Check stem, body width, and base flatness in each drawing.
- Mark where the blind line changed speed or direction.
- Score each drawing with the four-point rubric and note one feature to watch next time.
Worked example
A student draws a pear in blind contour on a 12 cm by 16 cm frame. The line starts at the stem, loops once near the body, and ends at the base. The stem is visible, the body is wider than the stem, and the base is flatter than the top. The main line is continuous. Score the drawing with the four-point rubric and state one improvement.
Worked answer
Score: 4 out of 4. Stem visible (1), body wider than stem (1), base flatter than top (1), continuous main line (1) because the line loops but does not break. Improvement: slow down at the stem-body junction so the line follows the edge without circling back.
Four practice exercises
Exercise 1
Blind contour a pear for 4 minutes without looking at the paper. Start at the stem, travel down one side, around the base, and up the other side. Afterward, check whether the stem, body, and base are each recorded.
Show answer and check
A single continuous line that records a narrow stem, a wider body, and a flatter base, with visible drifts where the gaze moved quickly.
Why: Blind contour prioritizes observation over accuracy; the recorded line shows where attention followed the edge and where it jumped.
Check: Place the drawing beside the pear and mark each of the three features with a check. Count how many are present.
Exercise 2
Slow contour a pear in a 10 cm by 14 cm frame. Glance at the paper only to stay in frame. Include the stem and one internal edge where the stem meets the body. Do not shade.
Show answer and check
A line drawing that stays inside the 10 cm by 14 cm frame, with a visible stem, a body wider than the stem, a flatter base, and one internal edge at the stem-body junction.
Why: Slow contour allows brief glances to keep the line in frame while most attention stays on the pear; the internal edge tests whether you can record a clear junction without shading.
Check: Visually confirm the line stays inside the drawn frame; check the stem is narrower than the body, the base is flatter than the top, and the single internal edge is present.
Exercise 3
Draw a pear in blind contour, then draw the same pear in slow contour. Compare the two lines and list one place where the blind line changed speed or direction.
Show answer and check
Two drawings side by side; the blind line shows at least one loop, stop, or sharp turn that the slow line does not, and the student names that location.
Why: Comparison makes the effect of looking versus glancing visible; naming a location turns a vague impression into a checkable observation.
Check: Point to the named location on the blind drawing and confirm it differs from the slow drawing at the same feature.
Exercise 4
Score a peer's slow contour pear with the four-point rubric: stem visible, body wider than stem, base flatter than top, continuous main line. Write one improvement using your own handwriting convention for labels.
Show answer and check
A score from 0 to 4 with one specific improvement, such as slowing at the base or keeping the line continuous through the stem-body junction.
Why: Scoring with fixed features separates observation from taste; the improvement should name a feature and an action.
Check: Verify each rubric point against the drawing and confirm the improvement names a feature and a concrete action.
Common mistakes
- Looking at the paper during blind contour. Return your gaze to the pear immediately and continue from where your hand is; do not restart the line.
- Drawing too fast and skipping changes in curvature. Slow to half speed and pause at the stem-body junction and the base.
- Correcting the line by lifting the tool repeatedly. Keep one continuous line for the main silhouette and accept small drifts.
- Adding shading or cross-contour lines. Limit the drawing to the outer edge and at most one clear internal edge.
Self-check rubric
- Stem is visible and narrower than the body.
- Body is wider than the stem.
- Base is flatter than the top curve.
- Main silhouette line is continuous or nearly continuous.
- Written labels, if any, are legible under the student's own x-height convention.
Questions and answers
Do I need a real pear?
A real pear is best because its edge changes with light, but a clear photograph or a simple line drawing of a pear placed at eye level also works.
How long should each attempt take?
A blind contour may take 3 to 5 minutes; a slow contour may take 8 to 12 minutes. These are hypothetical examples—adjust to your pace.
Can I use an eraser?
For blind contour, no; the record of attention is the point. For slow contour, you may erase only to reposition a line that leaves the frame.
What does x-height mean here?
It is the distance from the baseline to the midline of your lowercase letters. Use your own handwriting as the reference; letter styles vary.