Free original lessons
Draw an Upside-Down Light Bulb: Orientation Practice
Learn to copy an inverted light bulb by tracking bulb and base cues, using a simple convention and a checkable orientation rubric.
Free lesson
Four exercises
Worked answers
Object Drawing Lessons
Drawing an object upside down trains you to notice shapes and positions rather than relying on memory. In this lesson you will copy a light bulb that is rotated 180 degrees: the glass bulb points downward and the screw base points upward. You will use a defined convention for the bulb outline and base bands, then check orientation with simple measurements. The goal is accurate copying of the inverted arrangement, not shading or realistic lighting.
Practice materials: Printable downloads are not available for this lesson yet. Use the instructions and four exercises below.
Reference illustration
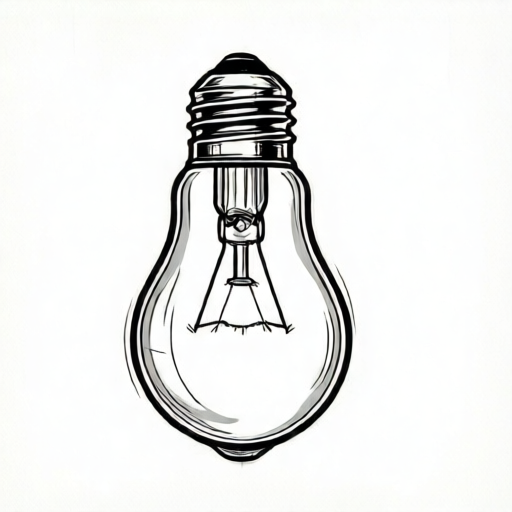
Use the stated measurements and conventions for each exercise.
Set the orientation convention
Use a plain outline convention: the bulb is a closed rounded shape, and the base is a stack of parallel bands attached to the bulb neck. In the upside-down view, the rounded bulb sits below the neck, and the base bands sit above the neck. Draw all bands as straight lines across the base width, spaced evenly.
Choose a drawing frame about 12 cm wide and 16 cm tall. Place the neck about 7 cm above the bottom edge and make the base about 4 cm tall above the neck, so the base top lands about 5 cm below the top edge (16 - (7 + 4) = 5). These numbers are hypothetical examples; measure your own paper and adjust so the whole object fits with a 2 cm margin.
- Draw a light vertical center line in the frame.
- Mark the neck point about 7 cm above the bottom edge on the center line.
- Below the neck, draw the rounded bulb outline, widest about 3 cm below the neck.
- Above the neck, draw the base as a rectangle about 3 cm wide and 4 cm tall.
- Add four evenly spaced horizontal bands inside the base rectangle.
Copy the inverted bulb and base cues
The bulb cue is the rounded end pointing down. The base cue is the banded rectangle pointing up. Keep the neck as the transition line between them. If you accidentally draw the bulb above the neck, the orientation is wrong even if the shapes look neat.
Use light guide lines first, then darken the final outline. Keep band spacing equal: if the base is 4 cm tall and you draw four bands, place them at 1 cm intervals as a hypothetical example. Measure your own base height and divide by the number of bands to get equal spacing.
- Lightly sketch the bulb outline below the neck, checking that the widest part is lower than the neck.
- Sketch the base rectangle above the neck, centered on the same vertical line.
- Draw the horizontal bands across the base at equal intervals.
- Erase guide lines that extend beyond the outline.
- Compare your drawing to the reference by checking top and bottom cues.
Run an orientation check
An orientation check uses simple positions. Measure from the top edge of your frame to the highest base band and from the bottom edge to the lowest bulb point. In the upside-down view, the base should be nearer the top and the bulb nearer the bottom. Record both distances in centimeters.
Also check left-right symmetry: the bulb widest point and the base center should lie on the same vertical line within about 0.5 cm as a hypothetical tolerance. Adjust your drawing if the center line is off.
- Measure top-to-base distance and bottom-to-bulb distance.
- Confirm the base distance is smaller than the bulb distance.
- Check that the base bands are horizontal and evenly spaced.
- Check that the bulb rounded end points downward.
- Mark any mismatch and redraw only the affected part.
Worked example
A frame is 12 cm wide and 16 cm tall. The neck is marked 7 cm above the bottom edge. The base is 4 cm tall and sits above the neck. Where is the top of the base measured from the bottom edge?
Worked answer
The top of the base is 7 cm + 4 cm = 11 cm above the bottom edge. The bulb extends below the neck, so the rounded end is lower than 7 cm.
Four practice exercises
Exercise 1
In a 12 cm by 16 cm frame, the neck is 6 cm above the bottom edge. The base is 3 cm tall above the neck. What is the distance from the bottom edge to the top of the base?
Show answer and check
9 cm.
Why: Add the neck height and base height: 6 cm + 3 cm = 9 cm.
Check: Measure the same two distances on your drawing and add them; the sum should match 9 cm.
Exercise 2
A base is 4 cm tall and you draw four evenly spaced bands. What is the spacing between band lines as a hypothetical example?
Show answer and check
1 cm.
Why: Divide the base height by the number of bands: 4 cm divided by 4 equals 1 cm.
Check: Measure each gap between adjacent bands; each should be about 1 cm.
Exercise 3
Your drawing has the base top 3 cm from the top edge and the bulb bottom 5 cm from the bottom edge. Is the orientation correct for an upside-down light bulb? Explain.
Show answer and check
Yes, because the base is nearer the top and the bulb is nearer the bottom.
Why: In the inverted view, the banded base points up and the rounded bulb points down. The smaller top distance for the base confirms this.
Check: Compare the two measured distances; the base distance should be smaller than the bulb distance.
Exercise 4
A bulb widest point is 0.8 cm left of the center line and the base center is on the center line. Does this meet a 0.5 cm centering tolerance? What should you adjust?
Show answer and check
No. Move the bulb widest point about 0.8 cm right so it aligns with the center line.
Why: The offset 0.8 cm is greater than the hypothetical 0.5 cm tolerance, so centering fails.
Check: Measure the horizontal distance from the bulb widest point to the center line; it should be 0.5 cm or less.
Common mistakes
- Drawing the bulb above the neck and the base below it. Re-mark the neck and place the rounded bulb below it; the banded base goes above.
- Making the base bands uneven or slanted. Measure the base height, divide by the number of bands, and draw horizontal lines at equal intervals.
- Letting the bulb and base centers drift apart. Use one vertical center line for both the bulb widest point and the base center.
- Copying from memory instead of the reference cues. Compare top and bottom distances with a ruler before darkening the outline.
Self-check rubric
- Orientation: bulb rounded end points down and base bands point up.
- Neck placement: bulb and base meet at one clear neck line.
- Base bands: at least three horizontal bands, evenly spaced within the measured base height.
- Centering: bulb widest point and base center align on one vertical line within about 0.5 cm as a hypothetical tolerance.
- Completeness: closed bulb outline and closed base rectangle with no missing bands.
- Valid alternatives: different bulb roundness or band count are acceptable if orientation and even spacing are correct.
Questions and answers
Does the bulb have to be perfectly round?
No. The convention allows a rounded closed shape. Check that the rounded end points down and the widest part is below the neck.
How many base bands should I draw?
Use four bands as a simple convention. Keep them evenly spaced across your measured base height.
Can I use different sizes?
Yes, as long as the whole object fits in your frame with a margin and the orientation cues remain correct.
What if my drawing is slightly off center?
A small offset is acceptable under the rubric if the orientation cues are correct and the base bands are even.