Free original lessons
Timed Figure Gesture Warm-Up Drills for Life Drawing
Short timed gesture and line drills to loosen up before figure drawing. Includes printable warm-up sheet plan, rubric, and four practice tasks.
Free lesson
Four exercises
Worked answers
Object Drawing Lessons
Timed gesture warm-ups train quick observation and decisive mark-making before longer figure work. This guide gives a repeatable drill sequence, a simple convention for judging gesture sketches, and four self-contained practice tasks. All timings and sheet layouts are hypothetical examples; measure your own paper and timer. The planned printable sheet is described but not yet built.
Practice materials: Printable downloads are not available for this lesson yet. Use the instructions and four exercises below.
Reference illustration
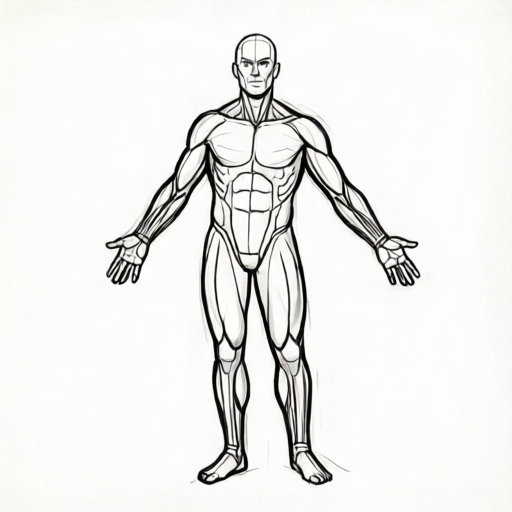
Use the stated measurements and conventions for each exercise.
Drill sequence and timing
Start with 30-second gestures: capture the whole figure with three to five sweeping lines. Move to 60-second gestures adding one or two structural cues such as shoulder-to-hip tilt. Finish with 2-minute gestures that clarify weight and limb direction without shading. Keep the timer visible and stop at the bell even if the sketch is incomplete.
Use a consistent convention: x-height is measured from baseline to midline of lowercase letters in your own handwriting, not a universal standard. Letter styles vary, so record your own x-height on the sheet margin and use it only as a personal reference for spacing labels and notes.
- Set a timer for 30 seconds and draw one full-figure gesture per pose.
- Repeat for four poses, then switch to 60 seconds for three poses.
- Finish with two 2-minute poses, adding only weight and direction cues.
- Note your x-height on the margin before starting so labels stay consistent.
Line-control drills
Before gesture poses, spend two minutes on line-control: draw five long straight lines across a blank box without lifting the pencil, then five gentle curves that change direction once. Keep lines evenly spaced by eye. These drills warm the arm and train steady pressure.
For figure work, use the same line quality: continuous, confident strokes rather than short scratchy marks. If a line goes wrong, leave it and correct with the next stroke; do not erase during timed drills.
- Draw five straight lines across a box, each about one x-height apart.
- Draw five curves that bend once, keeping pressure even.
- Circle the straightest line and the smoothest curve as your reference.
- Proceed to the first 30-second gesture pose.
Printable warm-up sheet plan
The planned sheet has a header for date and x-height, a line-control box, and eight gesture boxes: four at 30 seconds, two at 60 seconds, and two at 2 minutes. Each box includes a short pose prompt such as standing twist or seated lean. Blank boxes are sized to fit a quick full-figure sketch.
Because the sheet is not yet built, use any paper divided into eight boxes and write the prompts yourself. Measure your paper and timer to confirm box size and timing; the numbers here are hypothetical examples.
- Divide a sheet into eight boxes and label timings.
- Write one pose prompt per box.
- Record your x-height in the header.
- Complete the line-control box first, then the gesture boxes in order.
Judging gesture sketches with a convention
Use a three-part check: whole-figure coverage, line economy, and weight cue. Coverage means the sketch fills the box with head, torso, and legs indicated. Line economy means few strokes convey the pose. Weight cue means one mark shows which side bears load. These are judged against your own convention, not a single correct drawing.
Valid alternatives include different line directions, simplified limbs, or a different starting point. The rubric rewards clear gesture over anatomical detail.
- Check that head, torso, and legs are present.
- Count strokes; fewer than eight is economical for 30 seconds.
- Identify one weight cue mark.
- Score each part 0 to 2 using the rubric.
Worked example
A 30-second gesture of a standing figure leaning on one leg. Describe the sketch in words: three sweeping lines from head to foot, one line for the leaning torso, and one short mark at the supporting hip.
Worked answer
Coverage: head, torso, and legs indicated. Line economy: five strokes. Weight cue: short mark at the supporting hip. Score 2,2,2 under the rubric.
Four practice exercises
Exercise 1
Line-control drill: on a blank box, draw five straight lines spaced about one x-height apart. Your x-height is 4 mm (hypothetical example). How far apart are the lines?
Show answer and check
4 mm apart.
Why: One x-height equals 4 mm, so each gap is 4 mm.
Check: Measure the gap between the first two lines with a ruler; it should read about 4 mm.
Exercise 2
A 60-second gesture uses seven strokes and shows head, torso, legs, and a clear weight mark at the left hip. Score coverage, line economy, and weight cue using the rubric.
Show answer and check
Coverage 2, line economy 2, weight cue 2.
Why: All body areas are clear, fewer than eight strokes, and one weight mark is present.
Check: Recount strokes and confirm each body area and the weight mark are visible.
Exercise 3
You have four 30-second poses and three 60-second poses. What is the total drill time in seconds?
Show answer and check
300 seconds.
Why: Four times 30 equals 120; three times 60 equals 180; 120 plus 180 equals 300.
Check: Add the two products again or use a timer to confirm the sequence length.
Exercise 4
A sketch has head and torso but no legs, uses ten strokes, and has no weight mark. Score all three parts.
Show answer and check
Coverage 0, line economy 1, weight cue 0.
Why: Legs are missing so coverage is 0; ten strokes falls in the 1 band; no weight mark gives 0.
Check: Check for legs, count strokes, and look for a weight mark.
Common mistakes
- Erasing during timed drills. Leave wrong lines and correct with the next stroke; erasing wastes time and breaks flow.
- Drawing details like fingers before the whole figure. Block the full figure first with three to five lines, then add one cue if time allows.
- Using short scratchy marks. Practice continuous lines in the line-control box before gesture poses.
- Ignoring the timer and overworking one pose. Stop at the bell and move to the next box; incomplete sketches are part of the drill.
Self-check rubric
- Coverage 0: missing a major body area; 1: all areas present but unclear; 2: head, torso, and legs clearly indicated.
- Line economy 0: more than twelve strokes for 30 seconds; 1: eight to twelve strokes; 2: fewer than eight strokes.
- Weight cue 0: none; 1: ambiguous mark; 2: one clear mark showing load side.
- Valid alternatives: different line direction, simplified limbs, or different start point are accepted if the three checks pass.
Questions and answers
How long should each warm-up last?
A typical sequence is four 30-second poses, three 60-second poses, and two 2-minute poses, plus two minutes of line control. Adjust timings to your session; these are hypothetical examples.
What is x-height and why note it?
X-height is baseline to midline of lowercase letters in your handwriting. Letter styles vary, so record your own value as a personal spacing reference; it is not a universal standard.
Can I use a different pose order?
Yes. Keep the short-to-long progression so you warm up before longer poses, but swap prompts as needed.
How do I know if a gesture sketch is good?
Use the three-part convention: whole-figure coverage, line economy, and one weight cue. Valid alternatives are accepted under the rubric.