Free original lessons
Flour Sack Contour Drawing: Blind and Slow Practice
Learn blind and slow contour drawing with a flour sack. Build observation, hand-eye coordination, and line control through structured practice.
Free lesson
Four exercises
Worked answers
Object Drawing Lessons
Contour drawing trains your eye to follow edges and your hand to record them without guessing. This lesson uses a flour sack because its soft folds, rounded corners, and simple silhouette make contour decisions clear. You will practice two modes: blind contour, where you draw without looking at the paper, and slow contour, where you draw at a deliberate pace while checking your line against the subject. The goal is not a polished illustration but accurate seeing and controlled mark-making. Work on any paper with a pencil or pen. Keep sessions short and focused. Measure your own tools and workspace when setting up; any numbers here are hypothetical examples, not standards.
Practice materials: Printable downloads are not available for this lesson yet. Use the instructions and four exercises below.
Reference illustration
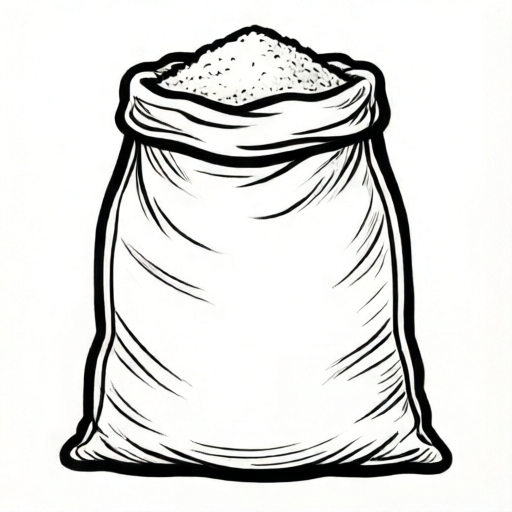
Use the stated measurements and conventions for each exercise.
Set up the flour sack reference and drawing space
Place a physical flour sack or use this text-only reference: a soft upright sack 12 cm tall, 8 cm wide at the base, narrower at its gathered top, with gently bowed sides and rounded lower corners. Tape your paper so it cannot slide. Use a pencil or pen with a visible tip. Define the outline as one continuous contour and each major fold as a separate contour. Do not shade or erase during blind contour; for slow contour, leave corrections visible beside the first line.
Define a simple convention for this exercise: treat the sack outline as one continuous contour, and treat each major fold as a separate contour line that begins and ends at the silhouette or at another fold. Do not shade. Do not erase during blind contour. For slow contour, you may lift the tool between contours but not redraw a line to hide a mistake; instead, leave the first line visible and place a corrected line beside it.
- Place the reference at eye level and tape the paper flat.
- Mark a start point on the sack silhouette, such as the top-left corner.
- Decide the drawing scale: for example, a hypothetical 12 cm tall sack drawn at 12 cm on paper.
- Keep the tool lightly touching the paper before each contour begins.
Blind contour: draw without looking at the paper
Blind contour means your eyes stay on the subject while your hand draws. Move your eye slowly along the edge you are drawing, and let your hand follow at the same pace. If your eye stops, your hand stops. Do not check the paper until the contour is complete. Expect proportions to be off; that is normal and useful because it reveals where your hand rushed ahead of your eye.
Choose one contour per attempt: the outer silhouette, then one major fold, then a second fold. Keep each attempt to about one to three minutes. After each attempt, look at the paper and compare the start and end points of the contour. Note whether the line closed, overshot, or stopped short. These observations guide the next attempt.
- Fix your eyes on the start point of the contour.
- Begin the line and move your eye along the edge at a slow, even pace.
- Keep your hand moving only while your eye moves.
- Complete the contour without looking at the paper.
- After finishing, compare the drawn contour to the reference and note one difference.
Slow contour: draw at a deliberate pace with checking
Slow contour allows you to glance at the paper, but the pace stays slow and the line stays deliberate. Draw a short segment, then check its direction and length against the reference. Continue segment by segment. The aim is to keep the line connected to observed edges rather than to memory or habit.
Use a simple check: after every few centimeters of line, pause and ask whether the line is turning in the same direction as the edge you are observing. If not, stop the line and begin a new contour from the correct point rather than erasing. Leave both lines visible so you can see the correction. This builds honest observation.
- Select one contour and identify its start and end.
- Draw a short segment while watching the reference.
- Glance at the paper to check direction and length.
- Continue segment by segment, pausing at each change of direction.
- At the end, compare the drawn contour with the reference and mark one correction line if needed.
Compare blind and slow contour results
Blind contour often produces distorted shapes but strong continuity of attention. Slow contour often produces more accurate proportions but can become hesitant. Compare the two by counting how many times your line changed direction unexpectedly or stopped before the intended end point. Use a simple tally on the page margin.
Choose one contour from each mode and place them side by side. Check three things: whether the start and end points match the reference, whether the line follows the observed edge without inventing curves, and whether the line weight stays consistent. These checks are qualitative; no single correct drawing exists. Valid alternatives include different line weights, different starting points, and different fold interpretations, as long as the contour follows an observed edge.
- Tally unexpected direction changes on each drawing.
- Compare start and end points to the reference.
- Check line weight consistency.
- Write one sentence describing what your eye missed most often.
Worked example
Use the text-only sack reference: 12 cm tall, 8 cm wide at the base, narrower at its gathered top, gently bowed sides, rounded lower corners. Draw the outer silhouette in slow contour at the same scale. Start at the top-left, move down the left edge, across the base, up the right edge, and close the top. Check the start and end points and tally only interior direction changes.
Worked answer
The drawn silhouette begins and ends near the top-left corner within about 1 cm. It follows the gently bowed left side, the roughly horizontal 8 cm base, and the bowed right side, then closes across the gathered top. Count only interior direction changes, excluding start and end: the two lower corners and the top-right turn give three major changes, with any small observed curve changes tallied separately.
Four practice exercises
Exercise 1
Blind-contour a text-only flour-sack reference that is 10 cm tall, 7 cm wide at the base, about 5 cm wide at its gathered top, and has gently bowed sides with rounded lower corners. Draw at the same scale, start at the top-right, and move counterclockwise. Keep your eyes on the reference until you return to the start.
Show answer and check
A continuous contour that begins and ends near the top-right. The outline narrows at the gathered top, bows gently at the sides, and reaches a 7 cm base. The line may be distorted; the task checks observation and continuity.
Why: Blind contour trains hand-eye coordination by forcing the hand to follow the eye. Distortion is expected and does not indicate failure. The check is whether attention stayed on the reference for the whole contour.
Check: After finishing, measure and note the gap between the start and end points without applying a threshold. Note where your eye sped up. Count how many times your hand moved while your eye was still.
Exercise 2
Slow contour of one major fold. Imagine a flour sack 10 cm tall and 7 cm wide at the base. A fold starts at the left silhouette 4 cm above the base, curves upward and rightward to a high point near the center about 7 cm above the base, then descends to the right silhouette 6 cm above the base. Draw this fold as a single contour, pausing at each direction change. Check the paper after every short segment.
Show answer and check
A line that starts at the left silhouette 4 cm above the base, rises to a high point near the center about 7 cm above the base, and descends to the right silhouette 6 cm above the base. Counting convention for this exercise: count only changes in direction along the interior of the contour, excluding the start and end points. Under that convention there is one interior direction change, at the high point where the ascent turns to descent. Corrections may be drawn beside the first line but not erased.
Why: Slow contour builds deliberate observation. Pausing at direction changes prevents rushing. Describing the fold's path in words makes the task solvable without an image, and the defined start, high point, and end give clear checkpoints.
Check: Verify the start point is about 4 cm above the base on the left silhouette and the end point about 6 cm above the base on the right silhouette. Confirm the high point is near the center and roughly 7 cm above the base. Using the stated convention (interior changes only, excluding start and end), confirm there is one direction change at the high point and that it was checked against the described path. Check that corrections are visible and not erased.
Exercise 3
Blind-contour a second fold on the same 10 cm by 7 cm sack, whose gathered top is about 5 cm wide. The fold begins at the top edge about 3 cm from the left corner, runs diagonally down-left to the left side about 5 cm above the base, and has one slight bend near the middle. Keep your eyes on the reference and the tool on the paper.
Show answer and check
A continuous line from the top silhouette about 3 cm from the left corner to the left silhouette about 5 cm above the base, passing through one slight bend near the middle. The line may overshoot or stop short. The important result is that the tool stayed on the paper and the eyes stayed on the reference until the end point was reached.
Why: This exercise isolates a diagonal fold, which is harder to follow than the outer silhouette. Describing the route and the single bend makes the contour checkable from the text alone. Keeping the tool down maintains continuity and reveals where the hand tends to rush.
Check: Check that the line is continuous with no lifted-tool gaps. Compare the start point to about 3 cm from the left corner on the top silhouette and the end point to about 5 cm above the base on the left silhouette. Confirm the line passes through one slight bend near the middle. Note whether the line overshot or stopped short and by how much, using a simple measurement on the page.
Exercise 4
Slow-contour a text-only sack silhouette 9 cm tall and 6 cm wide at the base, with a 4 cm gathered top, gently bowed sides, and rounded lower corners. Start at the top-left, trace down the left side, across the base, up the right side, and close across the top. Tally only interior direction changes, excluding the start and end.
Show answer and check
A closed silhouette about 9 cm tall and 6 cm wide at the base. Under the stated counting rule, there are three major interior changes: bottom-left, bottom-right, and top-right. Any smaller changes along a curved side can be listed separately if actually observed.
Why: The specified route and counting rule make the outline task solvable without an absent picture. Slow contour checks each segment against the described reference and leaves corrections visible.
Check: Measure the 9 cm height, 6 cm base, and 4 cm top. Confirm the contour closes at the starting point and count only the three major interior turns, excluding the endpoints.
Common mistakes
- Looking at the paper during blind contour. Place a light cover over the paper or turn your chair so the paper is out of view. Keep your eyes on the reference until the contour ends.
- Drawing from memory instead of observing the edge. Slow your eye movement and name the direction of the edge silently, such as left, down, right, before moving the hand.
- Erasing lines to hide mistakes in slow contour. Leave the first line visible and draw a corrected line beside it. The visible correction shows what your eye learned.
- Rushing the line to finish quickly. Set a timer for a short attempt and stop when it ends, even if the contour is incomplete. Pace matters more than completion.
Self-check rubric
- Blind contour attempt keeps eyes on the reference for the full contour.
- Slow contour attempt pauses at direction changes and checks against the reference.
- Lines follow observed edges rather than invented shapes.
- Corrections are left visible rather than erased.
- Comparison notes identify at least one specific difference between blind and slow results.
- Valid alternatives are accepted: different line weights, starting points, and fold interpretations are allowed if edges are observed.
Questions and answers
How long should each blind contour attempt take?
Aim for one to three minutes per contour. Short attempts keep attention high. If you lose focus, stop and begin a new contour rather than continuing on autopilot.
Can I use a pen instead of a pencil?
Yes. A pen prevents erasing and makes corrections visible. Choose a tool that flows without pressure so your hand can move slowly and steadily.
What if my blind contour does not look like a flour sack?
That is expected. Blind contour trains observation, not resemblance. Check whether your eye and hand moved together. Improvement shows in fewer rushed segments and more consistent attention.
How do I know if my slow contour is accurate enough?
Compare start and end points, direction changes, and line weight against the reference. Accuracy is relative to your observed edges, not to a single ideal drawing. Valid alternatives are allowed if the line follows an observed edge.