HomeGuitar Fretboard Grid Paper: Scale and Fret Layout Guide Free original lessons
Guitar Fretboard Grid Paper: Scale and Fret Layout Guide
Learn to use guitar fretboard grid paper for scale mapping and fret layout. Covers grid conventions, scale plotting, common mistakes, and practice tasks.
Free lesson
Four exercises
Worked answers
Object Drawing Lessons
Guitar fretboard grid paper is a specialized template that represents the instrument neck with horizontal string lines and vertical fret lines. Some fretboard grids preserve the proportional spacing of physical frets; others use equal-width cells as a schematic for note positions. A proportional grid is useful for fret-layout planning, while a schematic grid is useful for mapping scales. This guide explains how to read either grid, plot a scale accurately, avoid common errors, and check your work with simple arithmetic. All described resources are planned and free; none are currently built or downloadable.
Practice materials: Printable downloads are not available for this lesson yet. Use the instructions and four exercises below.
Reference illustration
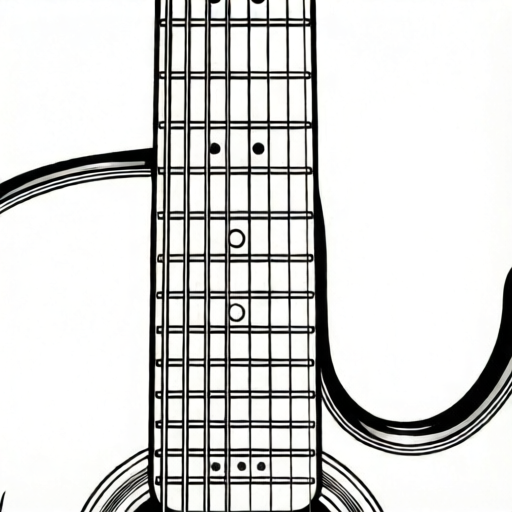
Use the stated measurements and conventions for each exercise.
Reading the Fretboard Grid
A fretboard grid has horizontal lines representing the six strings and vertical lines representing frets. The space between two vertical lines is one fret cell. Fret numbers are usually printed above or below the grid, starting with the open string (fret 0) at the left and increasing toward the body. String names are labeled at the left edge, typically from low E (thickest) at the bottom to high E (thinnest) at the top, though some templates reverse this order. Always confirm the orientation before plotting.
Fret spacing is not uniform. On a real guitar, the distance between frets decreases as you move toward the body. A well-made fretboard grid reflects this proportional spacing, so the first fret cell is wider than the twelfth. If your grid uses equal spacing, treat it as a schematic for note positions only, not for measuring physical fret distances. The grid also includes a nut line at fret 0 and may mark the twelfth fret with a double line or dot.
- Identify the nut line (fret 0) and the direction of increasing fret numbers.
- Confirm which horizontal line corresponds to which string; check the labels at the left edge.
- Locate the twelfth fret marker; it should be roughly halfway along the vibrating string length.
- Note whether fret spacing is proportional or equal; this affects how you use the grid for layout versus note mapping.
Plotting a Scale on the Grid
To map a scale, you place a mark in the cell where each scale tone occurs. A cell is defined by the intersection of a string line and a fret column. For example, the pitch A appears at fret 5 on the low E string and at fret 2 on the G string; fret 12 on the A string is A one octave above open A. Plotting these positions reveals the scale's shape across the neck.
Use a consistent convention: mark scale tones with a filled circle, root notes with a double circle or a distinct symbol, and optional tones with an open circle. This convention is arbitrary but must be stated and applied consistently. When plotting a major scale, the interval pattern in semitones is 2-2-1-2-2-2-1. On the grid, each fret column represents one semitone, so you can count columns to find the next scale tone. For instance, starting on the root at fret 3 of the low E string (G), the next tone is two frets higher at fret 5 (A), then fret 7 (B), fret 8 (C), fret 10 (D), fret 12 (E), fret 14 (F#), and fret 15 (G).
- Choose a root note and locate it on the grid; mark it with your root symbol.
- Apply the interval pattern by counting fret columns from the root.
- Mark each subsequent scale tone in the correct cell, checking string and fret.
- Repeat the pattern across multiple strings to see the scale shape.
- Verify that the twelfth fret repeats the root one octave higher on the same string.
Using the Grid for Fret Layout
Fret layout on the grid helps you plan where to place marks or labels for a physical fretboard. Because fret spacing is proportional, you can measure the distance from the nut to each fret line and compare ratios. A common rule is that the twelfth fret is at half the scale length. If your grid is proportional, the distance from nut to fret 12 should be half the total vibrating string length. You can check this with a ruler: measure the nut-to-fret-12 distance and the nut-to-bridge distance; the first should be approximately half the second.
For layout tasks, label fret numbers clearly and use the grid to record hypothetical measurements. For example, if a hypothetical scale length is 648 mm, the twelfth fret would be at 324 mm from the nut. The first fret distance can be estimated using the rule of 17.817, but this is a luthier's approximation, not a manufacturing standard. Always measure your actual equipment and label any numerical values as hypothetical examples. The grid is a planning aid, not a substitute for physical measurement.
- Measure the actual nut-to-bridge distance on your instrument or project.
- Mark the halfway point as the twelfth fret position on the grid.
- Use the grid's proportional spacing to estimate other fret positions, labeling them as hypothetical.
- Record measurements in consistent units (millimeters or inches) and note them on the grid.
- Check that fret positions decrease in spacing toward the body.
Checking Your Work
Accuracy checks prevent common plotting errors. First, verify that each marked cell corresponds to the correct string and fret. Second, check octave relationships: the same pitch should appear at fret 12 on the same string, and at fret 5 on the string five semitones lower (except between the G and B strings, where the interval is four semitones). Third, confirm that scale interval patterns are consistent across strings. A simple arithmetic check: count the number of fret columns between consecutive scale tones and compare to the interval pattern.
For layout checks, measure the distance from the nut to each fret line on the grid and compare ratios. If the grid is proportional, the ratio of fret 12 distance to total length should be about 0.5. For fret 5, the nut-to-fret-5 distance is about 0.251 of the total scale length under the equal-tempered fret model (1 - 2^(-5/12) ≈ 0.251), while the fret-5-to-bridge distance is about 0.749. These values depend on the grid's accuracy. Use a ruler and record actual measurements rather than assuming. Any numerical values you choose for practice are hypothetical and should be labeled as such.
- Re-read each marked cell against the string and fret labels.
- Check octave repeats at fret 12 and at the appropriate lower string.
- Count semitone intervals between scale tones and compare to the pattern.
- Measure grid distances with a ruler and record ratios in consistent units.
- Label all hypothetical numerical values clearly.
Worked example
Plot the first five tones of a C major scale starting on the low E string at fret 8 (C). Use the interval pattern 2-2-1-2. Mark each tone on the grid and state the string and fret for each.
Worked answer
Root C at low E string, fret 8. Next tone D: two frets higher, fret 10 on low E. Next E: two frets higher, fret 12 on low E. Next F: one fret higher, fret 13 on low E. Next G: two frets higher, fret 15 on low E. All five tones are on the low E string in this example. Check: fret 12 is one octave above fret 0, and C at fret 8 is correct because open low E is E, and eight semitones up is C.
Four practice exercises
Exercise 1
On a fretboard grid with columns labeled fret 0 through at least fret 17, low E at the bottom and fret numbers increasing to the right, mark the first six ascending tones of an A minor pentatonic scale starting at fret 5 on low E. Use the interval pattern 3-2-2-3-2 semitones; mark the starting A with a double circle, the other tones with filled circles, and include the octave A. List each string and fret.
Show answer and check
A at low E fret 5; C at fret 8; D at fret 10; E at fret 12; G at fret 15; and the octave A at fret 17. All six positions are on the low E string. The intervals are 3, 2, 2, 3, and 2 semitones.
Why: Start at A on fret 5 and add each interval in fret columns: 5+3=8, 8+2=10, 10+2=12, 12+3=15, and 15+2=17. Including the sixth tone completes the stated five-step pattern at the octave.
Check: Count the five fret gaps: 5→8 is 3, 8→10 is 2, 10→12 is 2, 12→15 is 3, and 15→17 is 2. Confirm the final A is 12 semitones above the starting A.
Exercise 2
A hypothetical scale length is 600 mm. On a proportional fretboard grid, the twelfth fret should be at half the scale length. Calculate the distance from the nut to fret 12 in millimeters. Then state the distance from fret 12 to the bridge. Label these as hypothetical.
Show answer and check
Half of 600 mm is 300 mm. So the nut-to-fret-12 distance is 300 mm (hypothetical). The fret-12-to-bridge distance is also 300 mm (hypothetical). Check: 300 + 300 = 600 mm.
Why: The twelfth fret is at half the vibrating string length. Divide the total scale length by two. The remaining distance is the same because the total is split in half.
Check: Add the two distances and confirm they equal the total scale length. Use consistent units (millimeters).
Exercise 3
On a grid with high E at the top and low E at the bottom, plot the note G at three different positions. Use the fact that open G string is G, and the interval from low E to G is three semitones. List the string and fret for each G.
Show answer and check
G at open G string, fret 0. G at low E string, fret 3 (three semitones up from E). G at high E string, fret 3 (three semitones up from E). Check: open G is G; low E fret 3 is G because E to F is one, F to F# is two, F# to G is three; high E fret 3 is also G by the same interval.
Why: Use the open string pitches and count semitones. The same pitch appears on different strings at different frets. Confirm string order before plotting.
Check: Verify each position by counting semitones from the open string. Check that the note name matches G and that the string label is correct.
Exercise 4
A grid shows fret spacing that decreases toward the body. The distance from nut to fret 1 is 36 mm (hypothetical). The distance from nut to fret 2 is 70 mm (hypothetical). Calculate the distance between fret 1 and fret 2. Then state whether the spacing is decreasing and explain why.
Show answer and check
Distance between fret 1 and fret 2 is 70 - 36 = 34 mm (hypothetical). The spacing is decreasing because 34 mm is less than 36 mm. Check: 36 + 34 = 70 mm.
Why: Subtract the cumulative distance to fret 1 from the cumulative distance to fret 2. Compare the result to the first fret distance. A smaller second interval indicates decreasing spacing.
Check: Add the fret 1 distance and the fret 1-to-2 distance to confirm the total to fret 2. Use consistent units and label values as hypothetical.
Common mistakes
- Assuming fret spacing is uniform across the grid. Check whether the grid is proportional or schematic. Use proportional grids for layout measurements and schematic grids only for note positions.
- Mixing up string order (low E at top versus bottom). Always confirm string labels at the left edge before plotting. State your convention explicitly if you create your own grid.
- Counting frets instead of fret columns when applying intervals. Remember that each fret column represents one semitone. Count columns between marks, not the lines themselves.
- Treating the twelfth fret as exactly halfway without measuring. Measure the actual nut-to-bridge distance and verify the halfway point. Label any assumed values as hypothetical.
- Using inconsistent symbols for scale tones and roots. Define a symbol convention at the start (e.g., filled circle for scale tone, double circle for root) and apply it uniformly.
Self-check rubric
- Grid orientation and string labels are correctly identified before plotting.
- Scale tones are marked in the correct cells with a consistent symbol convention.
- Interval pattern is applied by counting fret columns, not lines.
- Octave relationships are checked at fret 12 and across strings.
- Any numerical measurements are labeled as hypothetical and use consistent units.
- Work is checked with simple arithmetic and a ruler where applicable.
Questions and answers
What is the difference between guitar fretboard grid paper and standard graph paper?
Standard graph paper has uniform squares. Fretboard grid paper has horizontal lines for strings and vertical lines for frets, often with proportional fret spacing and labeled fret numbers and string names. It is designed specifically for mapping scales and planning fret layouts.
Can I use the grid to measure actual fret distances?
Only if the grid is proportional and you have measured your actual equipment. The grid is a planning aid; always verify with a ruler and label any numerical values as hypothetical examples.
How do I know which string is which on the grid?
Check the labels at the left edge. Common conventions place low E at the bottom or top, so confirm before plotting. If labels are missing, state your own convention clearly.
Why does the same note appear in multiple places?
The guitar has repeated pitches across strings. For example, A appears at fret 0 on the A string, fret 5 on the low E string, and fret 2 on the G string. Fret 12 on the A string is the octave repeat of open A. Plotting these repeats helps you see scale shapes.
Are the printable grids available now?
No. The resource plan describes proposed diagrams and worksheets that are planned but not yet built. All resources are intended to be free when produced.