Free original lessons
Negative Space Hair Drawing: See Gaps, Draw Silhouette
Learn to draw hair by observing enclosed gaps and silhouette shapes. Includes worked example, four practice tasks, rubric, and a planned printable resource.
Free lesson
Four exercises
Worked answers
Object Drawing Lessons
Hair is often drawn as a mass of lines, but negative-space observation treats hair as a set of enclosed gaps and outer silhouette shapes. This lesson teaches you to identify those gaps, measure them, and draw them accurately without constructing hairstyles or placing facial features. You will use a simple convention: x-height is measured from baseline to midline of a letter, and letter styles vary, so valid alternatives exist. All numerical values are hypothetical examples; measure your own reference and equipment. The printable resource is planned, not yet built.
Practice materials: Printable downloads are not available for this lesson yet. Use the instructions and four exercises below.
Reference illustration
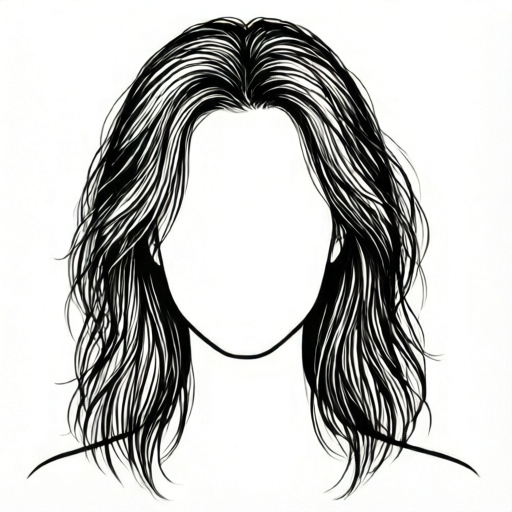
Use the stated measurements and conventions for each exercise.
Defining Negative Space in Hair
Negative space in hair refers to the enclosed gaps between strands, the openings inside curls, and the silhouette gaps where hair meets background. Instead of drawing individual hairs, you draw the shapes of empty space. This shifts attention from line to shape and improves proportion.
Use a simple convention: treat each gap as a closed polygon or curved region. Measure its width and height in millimeters on your reference. For example, a hypothetical gap might be 12 mm wide and 8 mm tall. Record these values before drawing.
- Place your reference photo on a flat surface and identify three enclosed gaps.
- Measure each gap's widest horizontal and vertical extents in millimeters.
- Label each gap with a letter and note its measurements.
- Draw only the gap outlines on blank paper, ignoring hair strands.
Silhouette Gaps and Outer Shapes
Silhouette gaps are the spaces between the hair outline and the background, such as the opening under a chin-length cut or between separated locks. These gaps define the hair's outer contour without drawing the hair itself.
Measure silhouette gaps from the hair edge to a reference line, such as the top of the page. A hypothetical example: a gap 20 mm wide at the crown and 15 mm wide at the nape. Keep units consistent.
- Trace the outer boundary of the hair mass lightly.
- Mark where the boundary dips inward to create a gap.
- Measure the depth of each dip from a straight line connecting two outer points.
- Draw the negative shape of each dip as a separate closed region.
Comparing Positive and Negative Shapes
Positive shapes are the hair strands themselves; negative shapes are the gaps. Comparing them helps you avoid overdrawing. Use a comparison box: on one side sketch a positive strand, on the other sketch the gap it creates.
Check consistency by measuring the same gap on both sketches. If the gap width differs by more than 2 mm (hypothetical tolerance), adjust. This arithmetic check is simple and repeatable.
- Draw a 50 mm by 50 mm box on your paper.
- In the left half, sketch a small hair cluster as positive shapes.
- In the right half, sketch only the gaps between those strands.
- Measure three corresponding gaps and compare widths; note differences.
Using the Planned Printable Resource
The planned printable will include a hair reference outline, shaded gap regions to identify, a blank negative-space-only frame, and a comparison box. It is not yet built, so use your own photo and paper for now.
When available, the worksheet will guide identification and measurement. Answers will be separate to allow self-checking. Until then, follow the steps in this lesson.
- Choose a clear hair reference with distinct gaps.
- Create your own blank frame by drawing a rectangle 100 mm by 150 mm.
- Shade three gap regions lightly and label them.
- Use a separate sheet for answers and measurements.
Worked example
A reference shows a hair mass with one enclosed gap 10 mm wide and 6 mm tall, and a silhouette dip 14 mm deep. Draw only the negative shapes and state your measurements.
Worked answer
Draw a closed oval 10 mm by 6 mm for the enclosed gap. Draw a curved wedge 14 mm deep for the silhouette dip. Label both with measurements in millimeters. Check that the oval's width matches 10 mm and the wedge depth matches 14 mm.
Four practice exercises
Exercise 1
On a blank 80 mm by 80 mm square, draw two enclosed gaps: one 8 mm wide and 5 mm tall, another 6 mm wide and 9 mm tall. Label each with measurements.
Show answer and check
Two closed shapes: an oval 8 mm by 5 mm and a vertical oval 6 mm by 9 mm, both labeled in millimeters.
Why: The task asks for negative shapes only; each gap is a closed region with stated dimensions.
Check: Measure each shape's widest horizontal and vertical extents; they should match the given values within 1 mm.
Exercise 2
A silhouette has a dip 12 mm deep from a straight line connecting two outer points. Draw the negative shape of the dip and mark its depth.
Show answer and check
A curved wedge shape with a marked depth of 12 mm from the connecting line to the deepest point.
Why: Silhouette gaps are measured from a reference line; the negative shape is the empty region inside the dip.
Check: Place a ruler along the connecting line and measure to the deepest point; it should read 12 mm.
Exercise 3
In a 40 mm by 40 mm comparison box, sketch a positive hair cluster on the left and its gaps on the right. Measure one gap width on each side and state the difference.
Show answer and check
Left side shows strands; right side shows at least one closed gap. The measured gap widths are stated, and the difference is calculated (for example, 7 mm and 6 mm, difference 1 mm).
Why: Comparing positive and negative shapes reveals whether the gap was drawn consistently.
Check: Re-measure both gap widths with the same ruler; the difference should match your stated value.
Exercise 4
Using the convention that x-height is baseline to midline, draw a letter 'a' with x-height 5 mm and a letter 'o' with x-height 5 mm. Then draw one hair gap 5 mm tall beside them.
Show answer and check
Two letters with x-height 5 mm (any style) and one closed gap 5 mm tall. All three share the same vertical measurement.
Why: The convention fixes x-height measurement while allowing letter style variation; the gap uses the same unit.
Check: Measure from baseline to midline on each letter and the gap height; all should read 5 mm within 1 mm.
Common mistakes
- Drawing individual hairs instead of gap shapes. Cover the hair strands with your hand and look only at the empty spaces; draw those outlines first.
- Measuring gaps inconsistently in different units. Use millimeters for all measurements and record them next to each gap label.
- Treating silhouette gaps as straight lines. Measure the deepest point of each dip and draw a curved closed shape instead.
- Assuming one correct letter style for x-height. State your convention: x-height is baseline to midline; accept any letter style that follows it.
Self-check rubric
- Identifies at least three enclosed gaps and two silhouette gaps.
- Records measurements in consistent units with labels.
- Draws gap outlines as closed shapes without individual hair lines.
- Compares positive and negative shapes in a box and notes differences.
- Uses the stated x-height convention (baseline to midline) where letters appear; accepts varied letter styles.
Questions and answers
Do I need a reference photo?
Yes, a clear photo with visible gaps helps. You can also use a simple line drawing you create.
How do I know my gap measurements are correct?
Measure twice with the same ruler and compare; differences over 2 mm (hypothetical) suggest re-measuring.
Can I use inches instead of millimeters?
Yes, but keep one unit throughout and label it clearly.
Is there a single correct answer for the drawing?
No. The rubric allows valid alternatives if gap shapes and measurements are consistent.