Free original lessons
Botanical Contour Drawing: Blind and Continuous-Line Practice
Learn contour line drawing of leaves, stems, and blooms using blind and continuous-line methods. Practice observation, line continuity, and comparison without shading or color.
Free lesson
Four exercises
Worked answers
Object Drawing Lessons
Contour drawing captures the outline and internal edges of a subject using line alone. This lesson teaches two foundational methods for botanical subjects: blind contour, where you draw without looking at your paper, and continuous line, where your pencil never lifts. You will practice on a leaf, a stem, and a simple bloom, then compare the same leaf drawn both ways. The goal is not a polished illustration but sharper observation and more confident, continuous line control. All drawing uses a single dark pencil line on plain paper; no shading, color, or erasing is required. A simple convention is defined for judging line quality so that valid stylistic differences are respected.
Practice materials: Printable downloads are not available for this lesson yet. Use the instructions and four exercises below.
Reference illustration
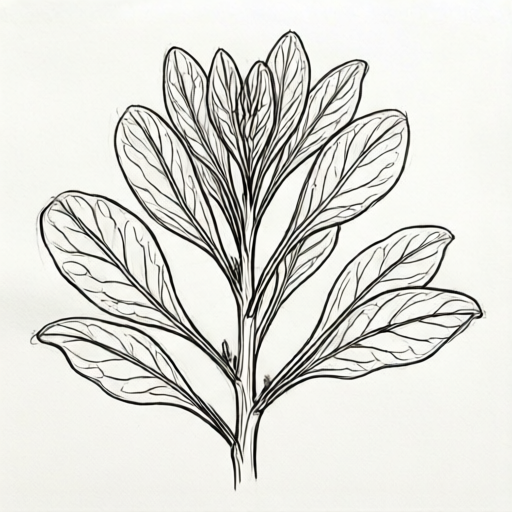
Use the stated measurements and conventions for each exercise.
Blind Contour: Seeing Without Looking
Blind contour drawing trains your eye to follow edges slowly while your hand records them without visual feedback from the paper. You look only at the subject, not at your drawing, for the entire line. This forces careful observation of every change in direction, notch, and curve.
Choose a single leaf with a clear outline and one or two internal veins. Place your pencil at a starting point on the leaf edge. Move your eye slowly along the edge and let your pencil move at the same pace, recording each turn. When you reach the stem, stop. Do not lift the pencil or check the paper until the line is complete.
A blind contour line will look distorted and may not close neatly. That is expected and useful: it shows where your hand lagged or rushed. Keep the line continuous and slow. One pass per subject is enough; repeated passes build patience and edge awareness.
- Place the leaf in front of you and choose a starting point on its outline.
- Rest your pencil on the paper and fix your eyes on the leaf edge.
- Move your eye slowly along the edge; move the pencil at the same pace without looking down.
- Follow one internal vein if it meets the edge, then return to the outline.
- Stop at the stem, lift the pencil, and only then look at your drawing.
Continuous Line: One Unbroken Path
Continuous line drawing keeps the pencil on the paper for the whole subject. You may look at your paper, but you cannot lift the pencil. The line travels from outline to internal detail and back, creating a single connected path.
Start at the leaf tip, trace the outline to the stem, then move inward along the midrib and out along a side vein without lifting. If you need to move to a new area, retrace a short segment of an existing line rather than lifting. Overlapping lines are acceptable and show your path.
Keep the line light and steady. The aim is continuity and clear edge description, not speed. A continuous line can look tangled, but it should still show the leaf's overall shape and at least one internal vein.
- Place the leaf and rest your pencil at the tip.
- Trace the full outline to the stem without lifting.
- Move inward along the midrib, then out along one side vein.
- Retrace a short segment to reach a new area instead of lifting the pencil.
- Finish at the stem and check that the line is unbroken.
Comparing the Same Leaf Two Ways
Draw the same leaf once blind and once continuous, side by side. In the blind version, note where the outline broke or drifted. In the continuous version, note where the line became tangled or where you retraced. Compare which version better captures the leaf tip, the stem join, and one vein.
Use a simple convention for line continuity: a line is continuous if the pencil never lifted and the path is unbroken from start to finish. A line is blind if the drawer did not look at the paper during the line. These are process labels, not quality grades. Valid alternatives include different starting points, different vein choices, and different amounts of retracing.
Write one short note under each drawing: one thing the line shows clearly and one thing it missed. This comparison builds observation vocabulary and helps you plan the next attempt.
- Draw the leaf blind on the left and continuous on the right.
- Label each drawing with the method used.
- Note one clear feature and one missed feature under each.
- Check continuity by confirming the pencil never lifted in the continuous version.
- Choose one adjustment for a second attempt, such as slower eye movement or fewer retraces.
Stem and Bloom: Extending the Practice
A stem introduces long, gentle curves and small changes at leaf joints. Draw a single stem with one attached leaf using continuous line: start at the top, follow the stem down, move out to the leaf, and return to the stem without lifting. Keep the line light so joints remain visible.
A simple bloom, such as a daisy-like flower with a round center and several petals, tests radial edges. Use blind contour for the bloom: start at the center, move out along one petal edge, return to the center, and continue to the next petal without looking at the paper. Stop after three petals to keep the task manageable.
These subjects are not full botanical illustrations. They are contour exercises: outline and key internal edges only. No shading, color, or detailed texture is required.
- Draw a stem with one leaf using continuous line, starting at the top.
- Keep the line unbroken and retrace short segments to change direction.
- Draw a simple bloom using blind contour for three petals.
- Return to the center between petals without lifting the pencil.
- Stop and compare the stem and bloom lines for continuity and edge clarity.
Worked example
A student draws a simple leaf blind contour starting at the tip, follows the outline to the stem, then follows one side vein back to the midrib. The line is unbroken and the student never looks at the paper. The drawing is distorted and the tip is rounded instead of pointed. Using the convention, label the line and note one clear feature and one missed feature.
Worked answer
Label: blind contour, continuous line. Clear feature: the stem join is visible and the line is unbroken. Missed feature: the pointed tip became rounded. Adjustment for next attempt: slow eye movement near the tip and pause at the point before moving to the first side vein.
Four practice exercises
Exercise 1
Draw a simple leaf blind contour. Start at the tip, follow the outline to the stem, then follow one side vein back to the midrib. Do not look at the paper until the line is complete. Then label the line as blind or not blind and continuous or not continuous.
Show answer and check
A single unbroken line from tip to stem and along one side vein, drawn without looking at the paper. Label: blind contour, continuous line.
Why: The method requires no looking at the paper and no lifting. The line records the outline and one internal vein. Distortion is expected and does not change the label.
Check: Confirm the pencil never lifted and the drawer did not look at the paper. Check that the line reaches the stem and includes one side vein. The label must say blind and continuous.
Exercise 2
Draw a stem with one attached leaf using continuous line. Start at the top of the stem, follow it down, move out to the leaf, and return to the stem without lifting. Describe one place where you retraced a short segment.
Show answer and check
An unbroken line from the stem top down to the leaf and back to the stem, with at least one short retraced segment. The description names the retraced location, such as the leaf joint.
Why: Continuous line forbids lifting. Retracing is the allowed way to change direction or reach a new area. The stem and leaf joint are natural retrace points.
Check: Trace the line from start to finish and confirm no gap. Locate the retraced segment and check that it overlaps an existing line. The description must match the drawing.
Exercise 3
Draw a simple bloom with a round center and several petals using blind contour for three petals. Start at the center, move out along one petal edge, return to the center, and continue to the next petal without looking at the paper. Stop after three petals. Label the line and note whether the center remained visible.
Show answer and check
A single unbroken line that visits three petals and returns to the center between them, drawn without looking at the paper. Label: blind contour, continuous line. The center may be distorted but should be traceable.
Why: Blind contour requires no looking; continuous line requires no lifting. Returning to the center between petals keeps the path connected. Three petals limit the task while testing radial edges.
Check: Confirm the line is unbroken and visits exactly three petals. Check that the drawer did not look at the paper. Locate the center and confirm it is part of the path.
Exercise 4
Draw the same leaf twice: once blind contour and once continuous line. Place them side by side. Under each, write one clear feature and one missed feature. Then state one adjustment for a second attempt.
Show answer and check
Two labeled drawings of the same leaf, one blind and one continuous. Each has one clear feature and one missed feature. One adjustment is stated, such as slower eye movement or fewer retraces.
Why: The comparison row tests both methods on the same subject. Clear and missed features build observation vocabulary. The adjustment connects the comparison to the next attempt.
Check: Check that both drawings show the same leaf and are labeled by method. Confirm each note names a feature visible in the drawing. The adjustment must be specific and checkable, such as pausing at the tip.
Common mistakes
- Looking at the paper during a blind contour line. Fix your eyes on the subject and move the pencil at the same slow pace. If you glance down, restart the line from the last point you remember.
- Lifting the pencil during a continuous line drawing. Retrace a short segment of an existing line to reach a new area. Overlapping lines are acceptable and show your path.
- Drawing too fast and skipping small edge changes. Slow your eye movement and match the pencil pace to it. Pause at notches and direction changes before moving on.
- Treating a distorted blind contour as a failure. Judge the process, not the likeness. A blind line is successful if you did not look at the paper and kept the line continuous.
Self-check rubric
- Blind contour line: the drawer did not look at the paper during the line; the line is unbroken from start to finish.
- Continuous line: the pencil never lifted; any change of area uses retracing rather than lifting.
- Edge description: the outline and at least one internal vein are recorded.
- Comparison note: one clear feature and one missed feature are stated for each method.
- Valid alternatives: different starting points, vein choices, and retracing amounts are accepted; no single appearance is required.
Questions and answers
Do I need to erase mistakes?
No. Contour practice keeps all lines visible. Overlaps and drifts are part of the record. Use one dark pencil and plain paper.
How long should each drawing take?
A single leaf blind contour typically takes one to three minutes at a slow pace. Continuous line drawings may take two to four minutes. Use a timer only if it helps you slow down; there is no required duration.
Can I use a pen instead of a pencil?
Yes. A pen makes lifting obvious and supports continuous line practice. A pencil is easier to keep light. Either is acceptable if the line remains visible.
What counts as a valid alternative in the comparison row?
Different starting points, different vein choices, and different amounts of retracing are valid. The comparison should note line continuity and one clear feature, not a single correct appearance.